Installing UAC Software
UAC Setup Guide
This document contains instructions on how to install and setup RIWA2-RT provided all of the OS and hardware requirements are met according to the specifications provided.
Operating System Requirements
- OS: Ubuntu 22.04.5 LTS (64-bit).
- Kernel: Must be running Linux kernel version between
6.5.0-15-genericand6.8.0-52-generic. - Architecture: x86_64 (Intel/AMD systems only).
If your current kernel version is outside the supported range, refer to the Kernel Rollback Guide for detailed instructions.
Installing the RIWA UAC
- v1.14.0 and Newer
- v1.0.0 to v1.14.0
- v0.257.0 and Earlier (Deprecated)
Locating Your RIWA UAC Download
Before starting with the installation, you should have received an executable named
riwa-installer_obara_v{version_number}_linux_amd64
{version_number} is a placeholder and thus the file you received will not actually appear as riwa-installer_obara_v{version_number}_linux_amd64 but something similar to riwa-installer_obara_v1.0.0_linux_amd64
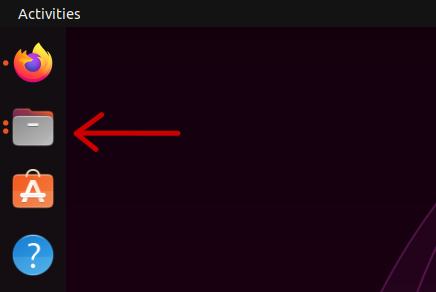
After confirming this file has been downloaded, on your Ubuntu desktop to access your Downloads folder, you will need to start by pressing the file button on your task bar.
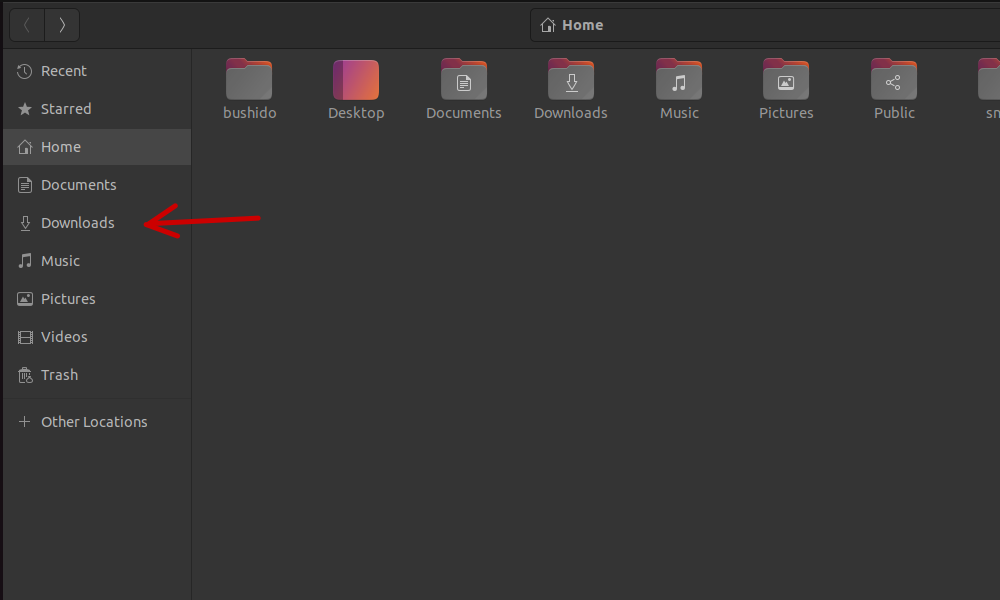
Once inside your Home directory folder, you can click on the Downloads button on the vertical tab bar to direct yourself to the Downloads folder.
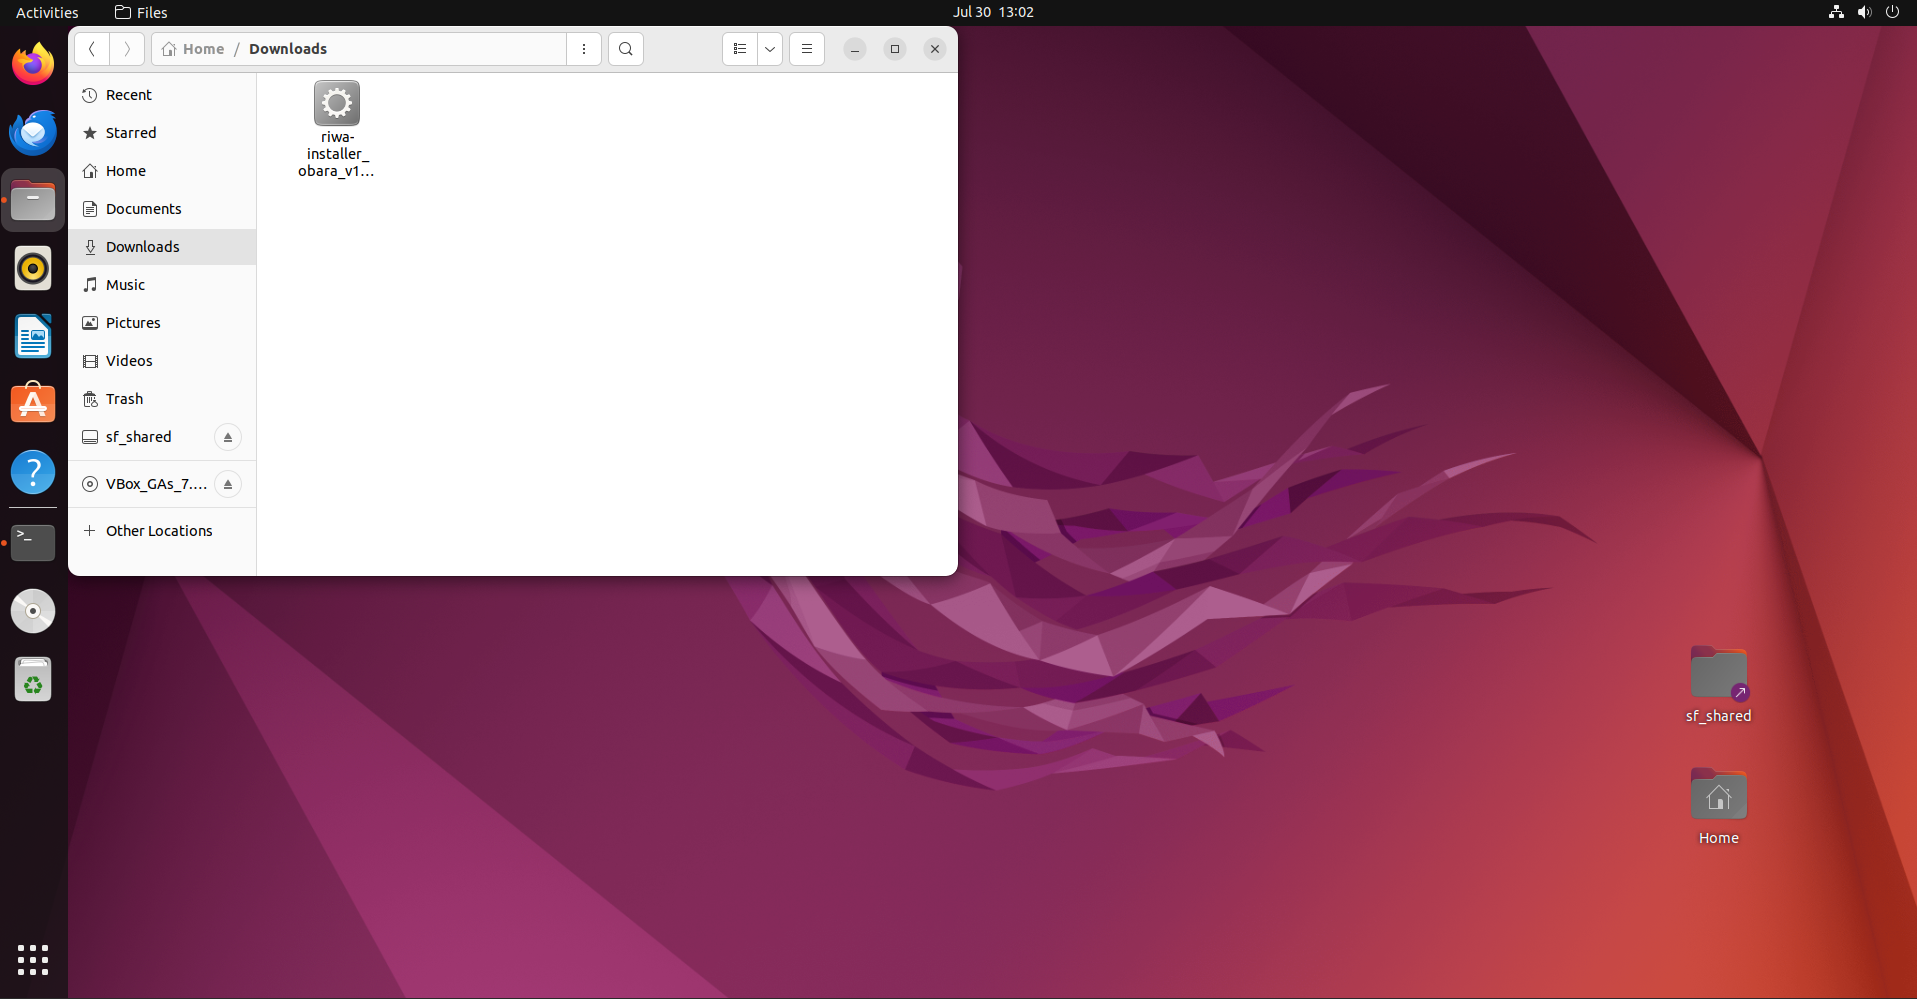
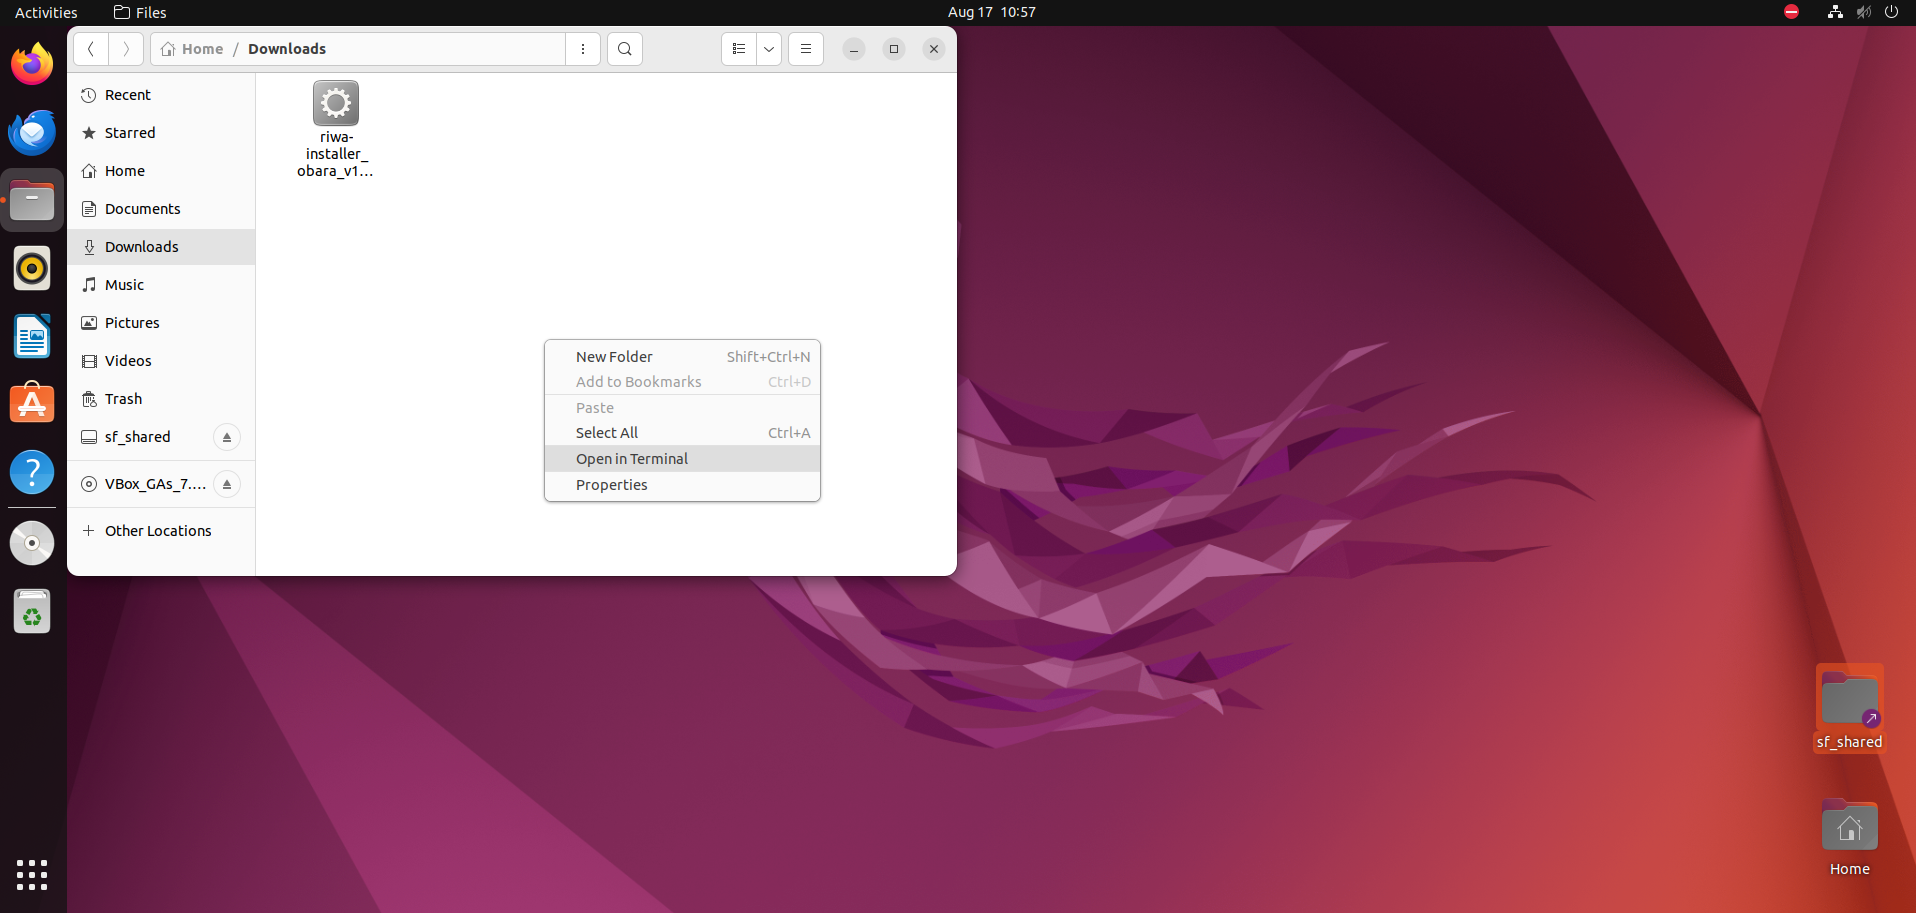
Now inside of your Downloads directory, you should see your downloaded copy of the RIWA UAC Software
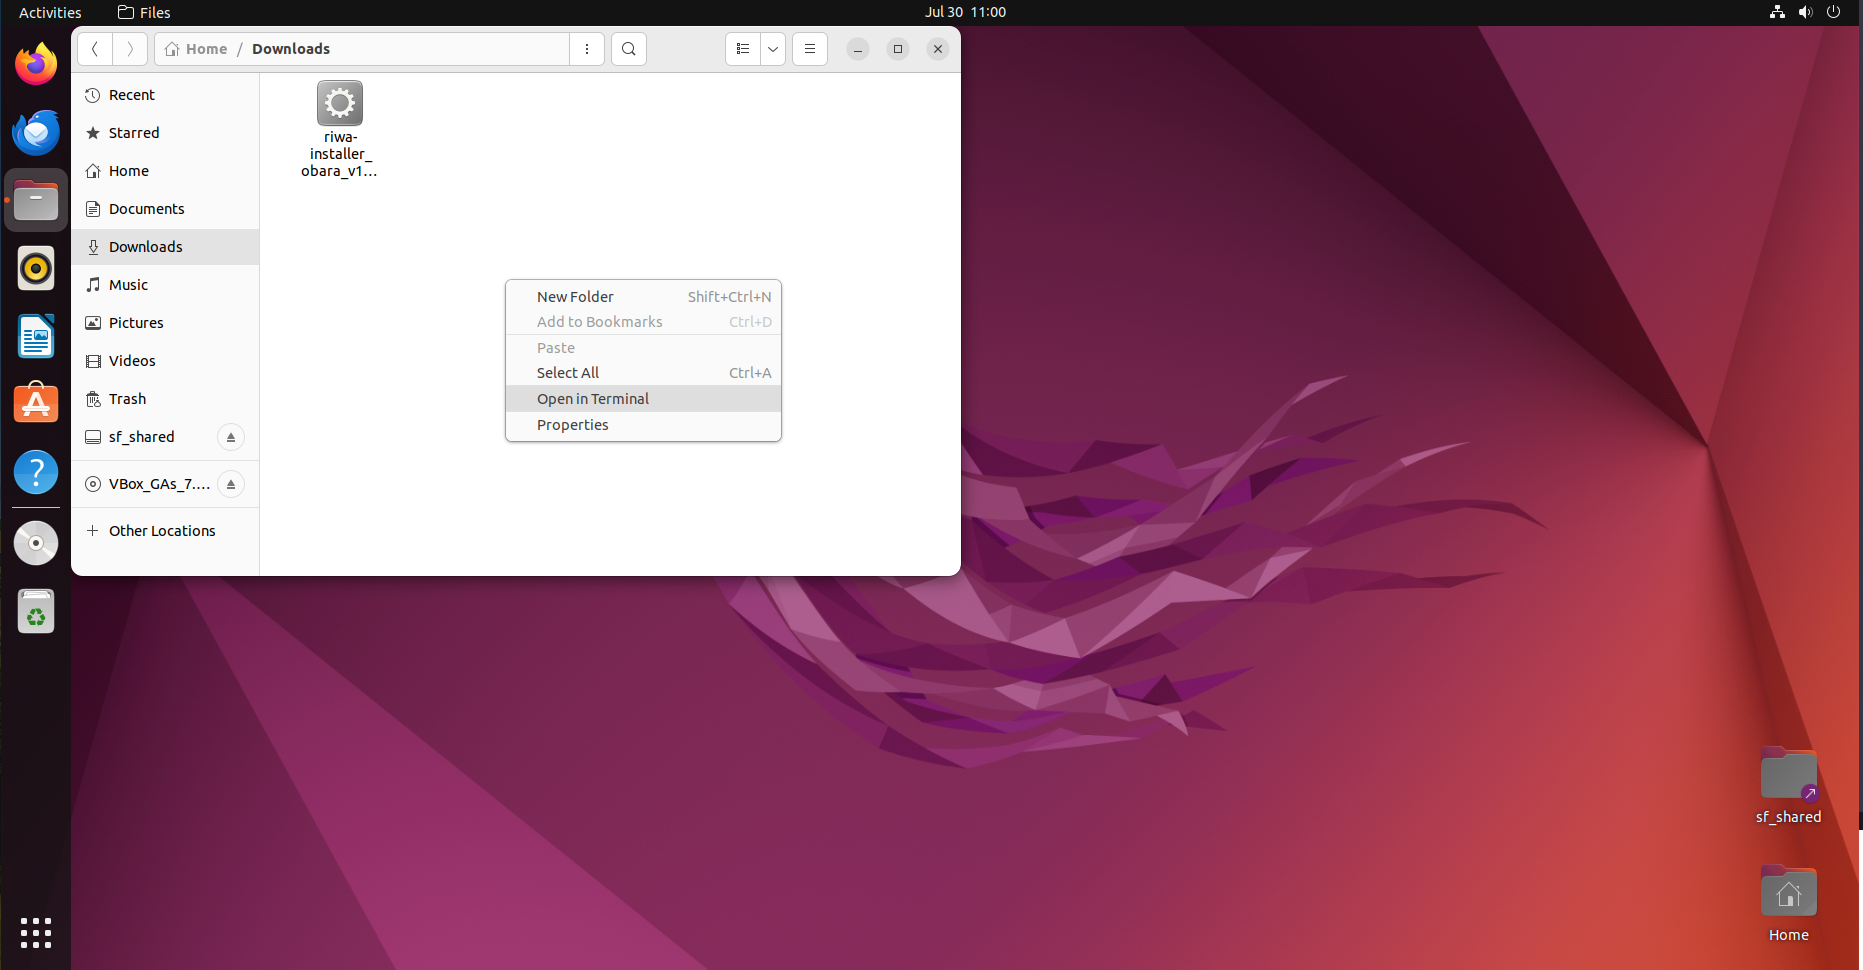
To start the installation of your RIWA UAC Software, right-click anywhere inside of the folder and press Open in Terminal
Setting Up UAC Install
From here, you may be required to turn the file into a proper executable to install the RIWA UAC Software. To ensure the RIWA UAC file you downloaded is a proper executable, run the following command in your terminal:
sudo chmod +x ./riwa-installer_obara_v{version_number}_linux_amd64
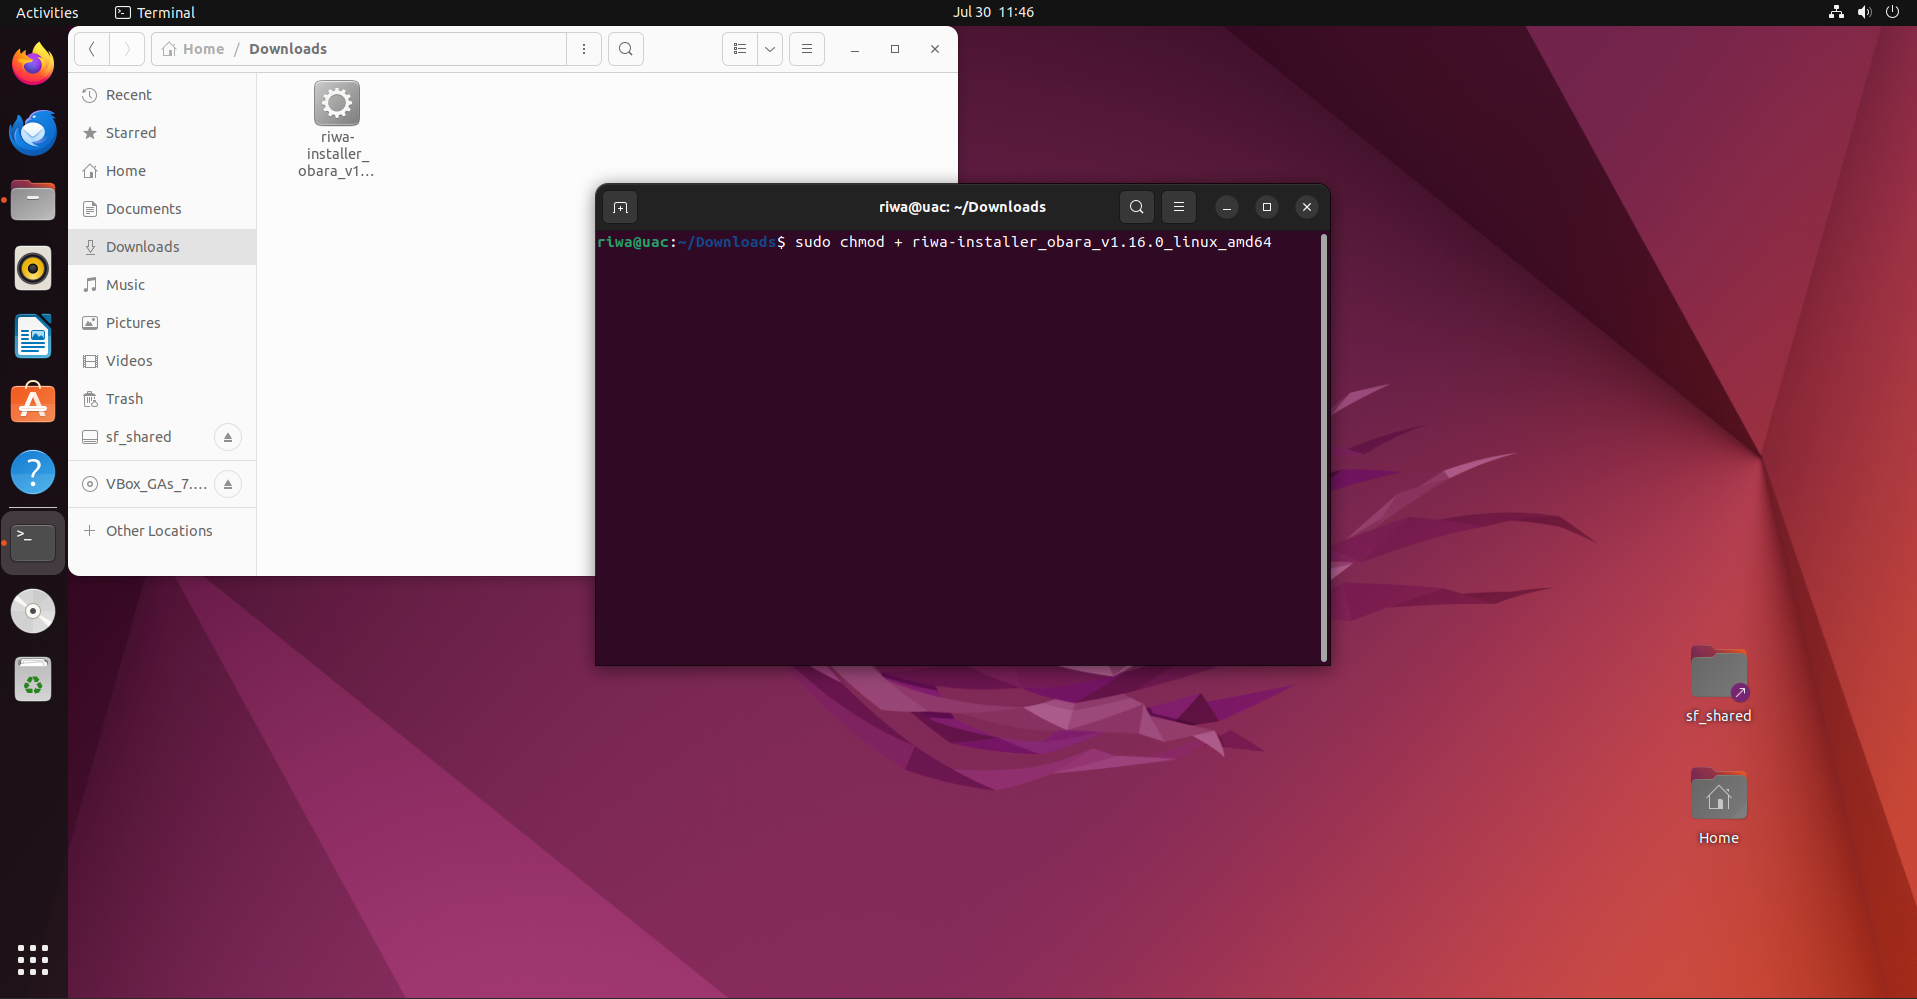
After ensuring your RIWA UAC Software is a proper executable, you can install your UAC by running the following command in the terminal:
./riwa-installer_obara_v{version_number}_linux_amd64
or
./riwa-installer_obara_v{version_number}_linux_amd64 install
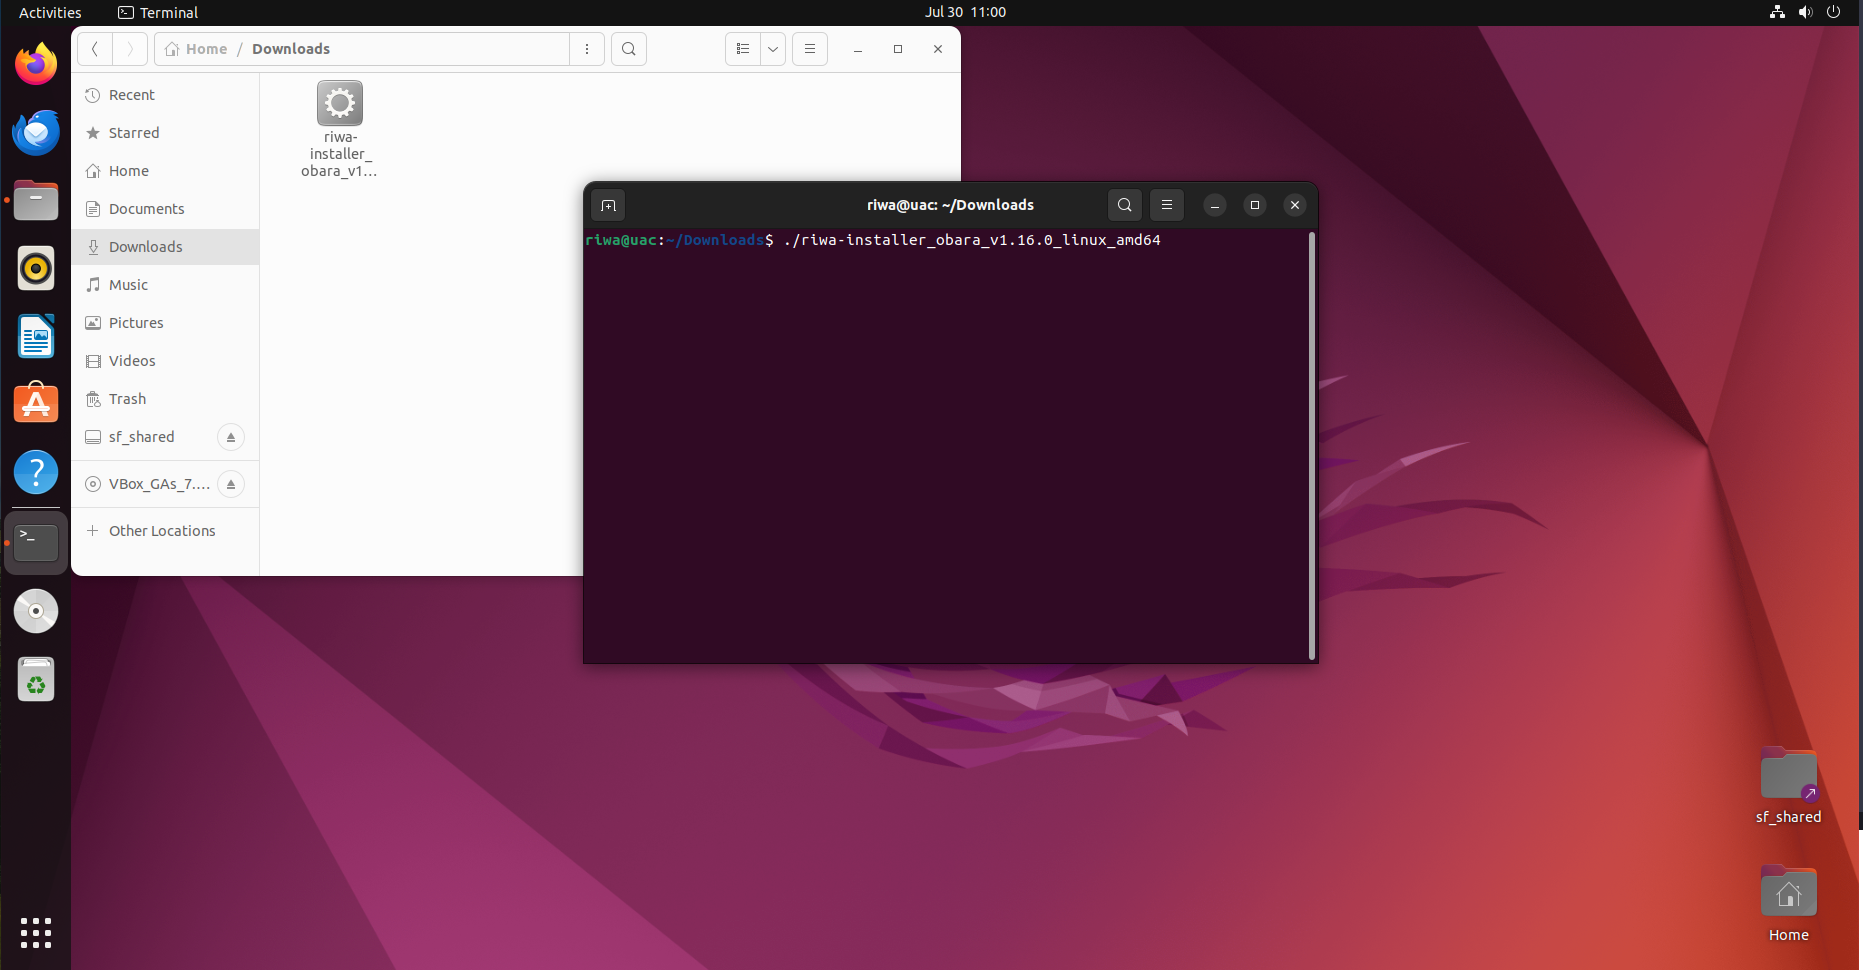
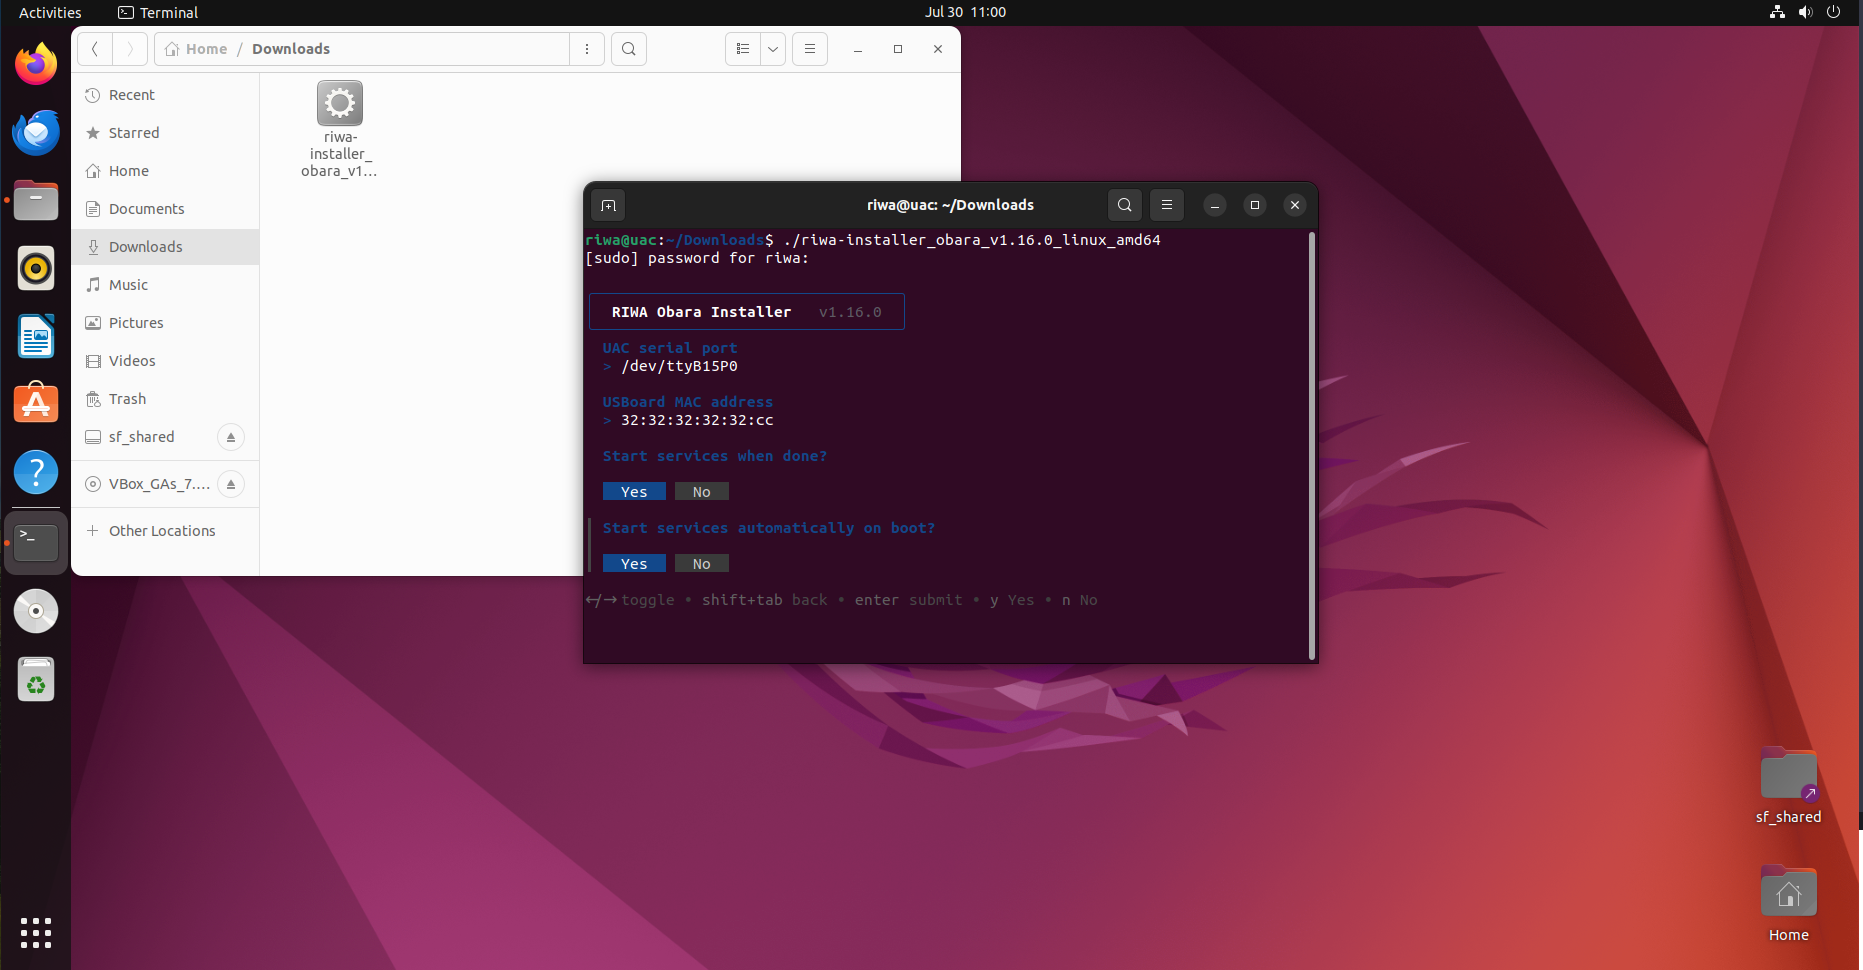
After starting the installation for your RIWA UAC, you will be asked to enter some information regarding the installation of the software. You will be asked to enter the following information:
- UAC Serial Port
- USBoard MAC Address
- Start services after installation [defaulted to
yes] - Start services automatically on boot [defaulted to
yes]
both the UAC Serial Port and USBoard MAC Address can be configured after the installation by running the command configuration_manager in a terminal and locating either obara_config.json or usboard_config.json.
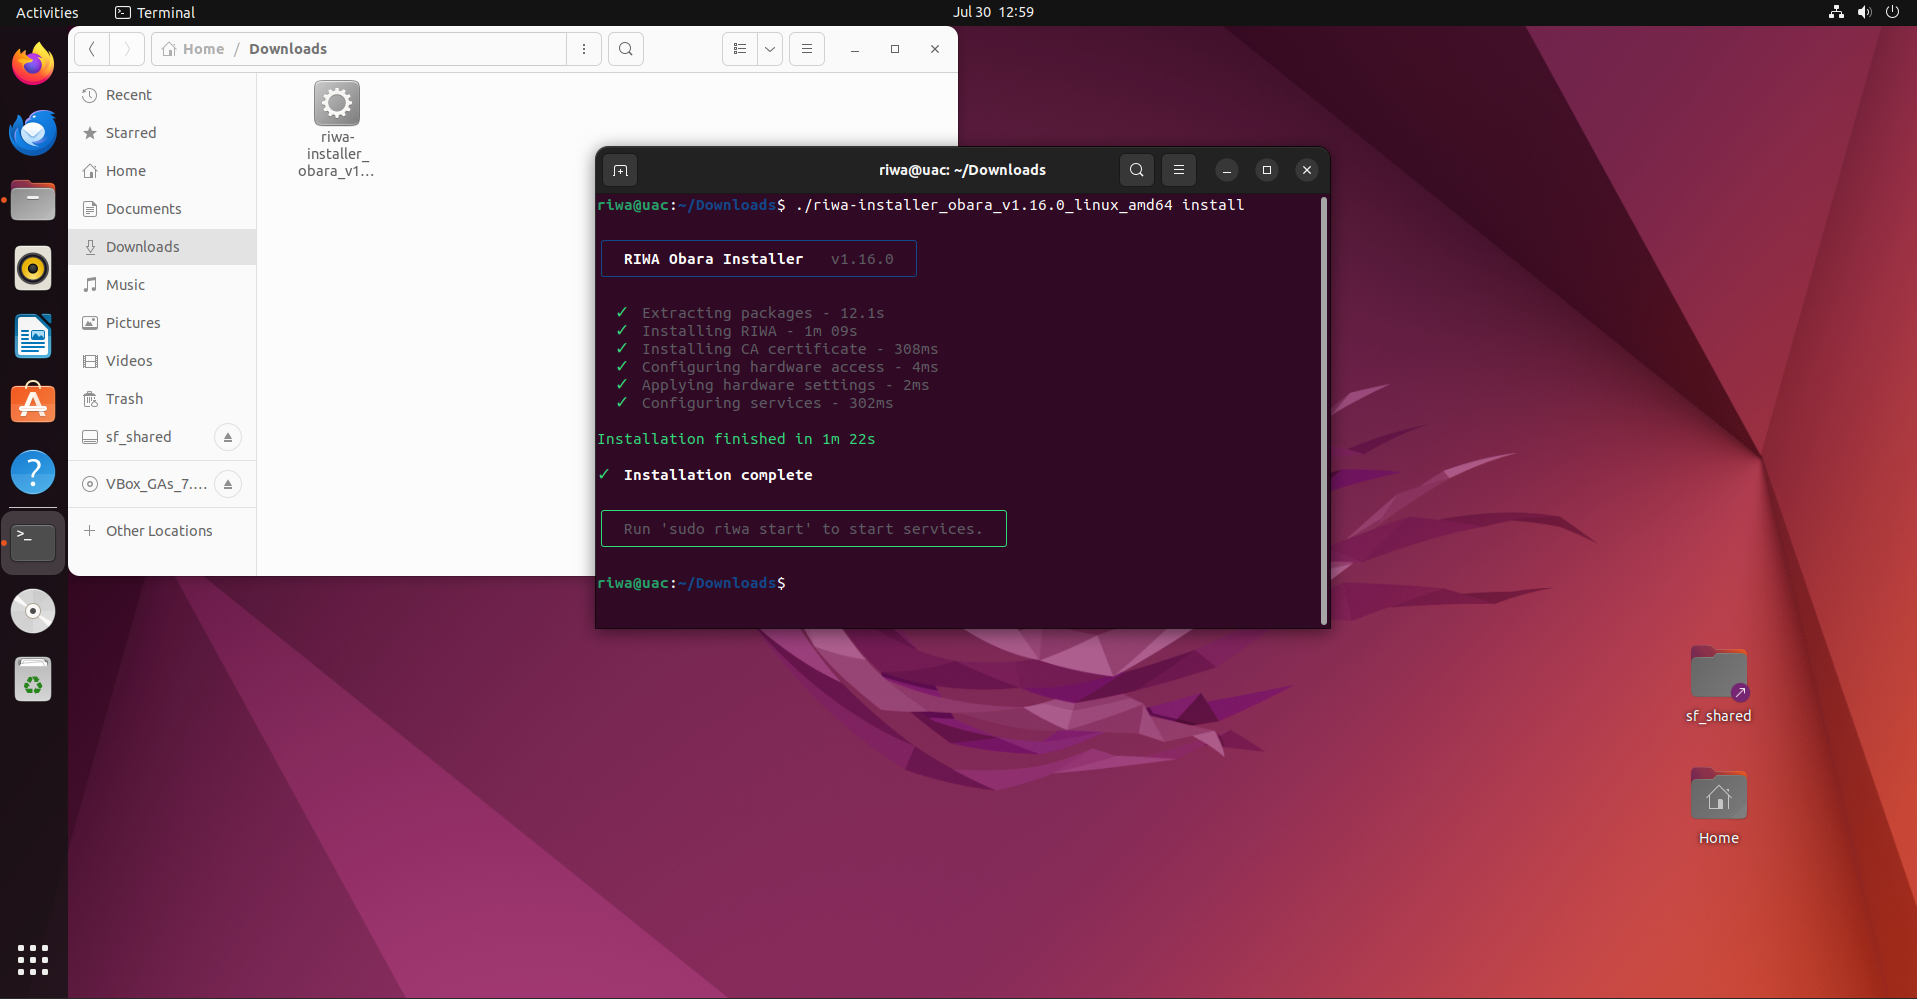
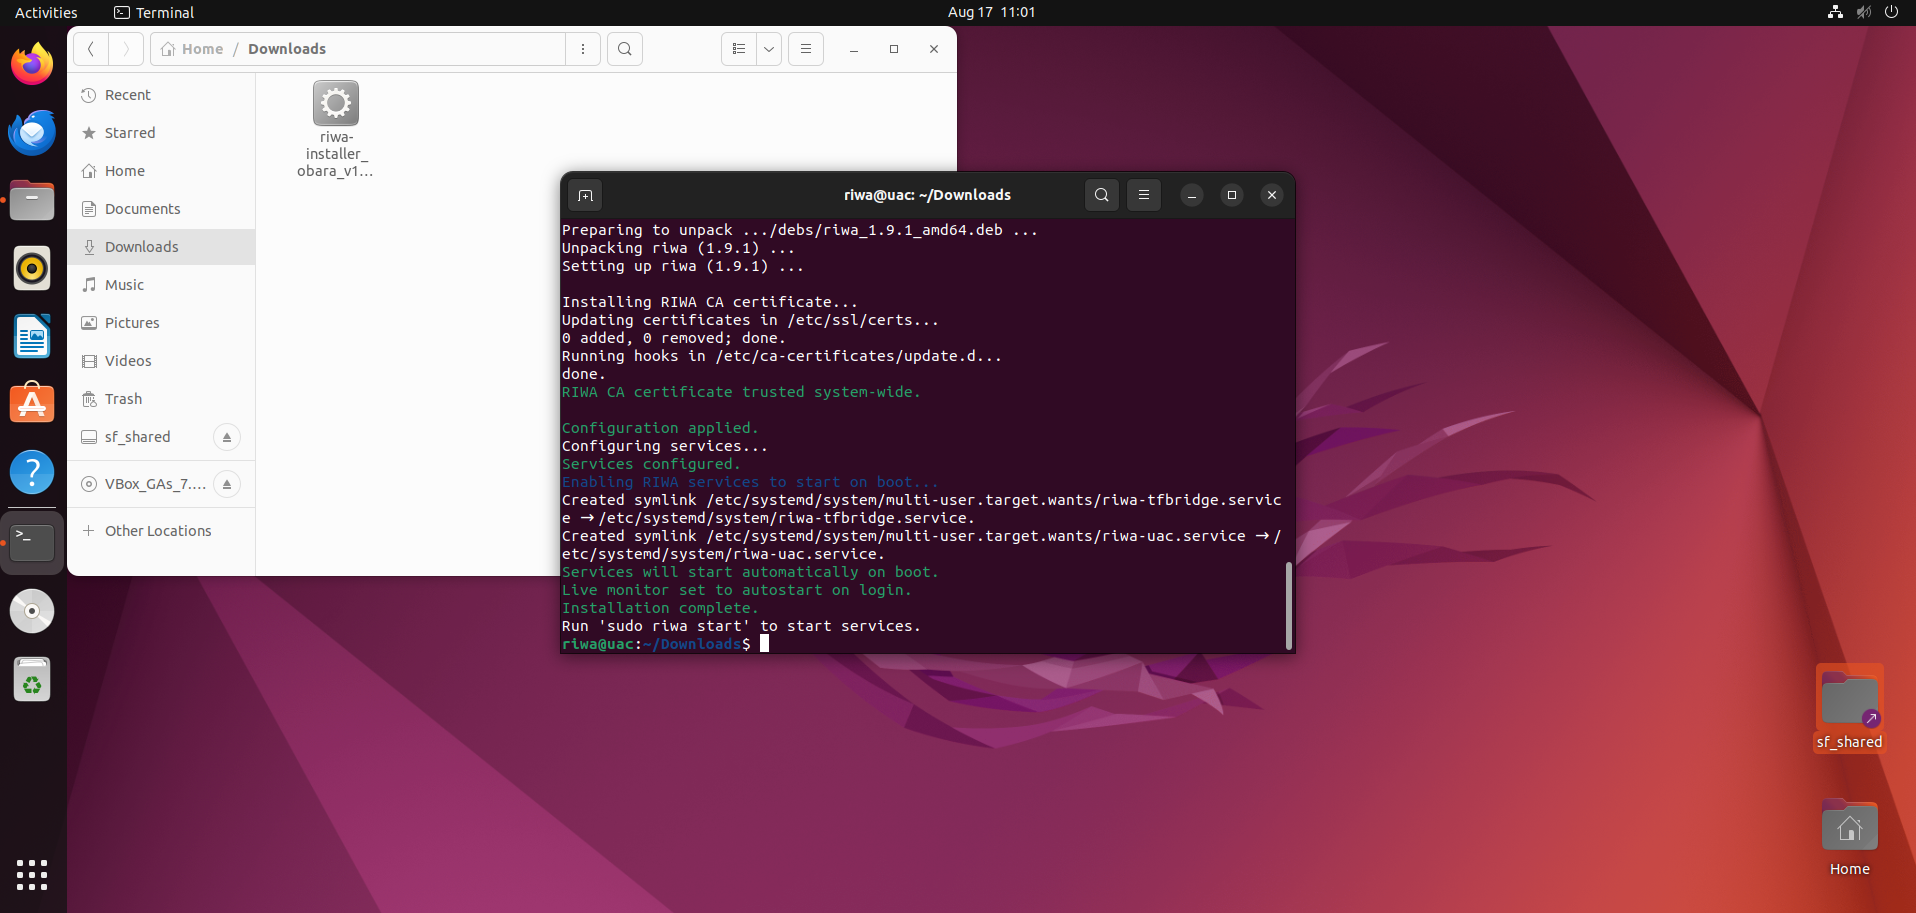
Once you have finished configuring your RIWA UAC installation, you should see a message similar to the one shown in the image below. This message confirms that the RIWA UAC installation completed successfully.
Locating Your RIWA UAC Download
Before starting with the installation, you should have received an executable named
riwa-installer_obara_v{version_number}_linux_amd64
{version_number} is a placeholder and thus the file you received will not actually appear as riwa-installer_obara_v{version_number}_linux_amd64 but something similar to riwa-installer_obara_v1.0.0_linux_amd64
After confirming this file has been downloaded, on your Ubuntu desktop to access your Downloads folder, you will need to start by pressing the file button on your task bar.
Once inside your Home directory folder, you can click on the Downloads button on the vertical tab bar to direct yourself to the Downloads folder.
Now inside of your Downloads directory, you should see your downloaded copy of the RIWA UAC Software
To start the installation of your RIWA UAC Software, right-click anywhere inside of the folder and press Open in Terminal
Setting Up UAC Install
From here, you may be required to turn the file into a proper executable to install the RIWA UAC Software. To ensure the RIWA UAC file you downloaded is a proper executable, run the following command in your terminal:
sudo chmod +x ./riwa-installer_obara_v{version_number}_linux_amd64
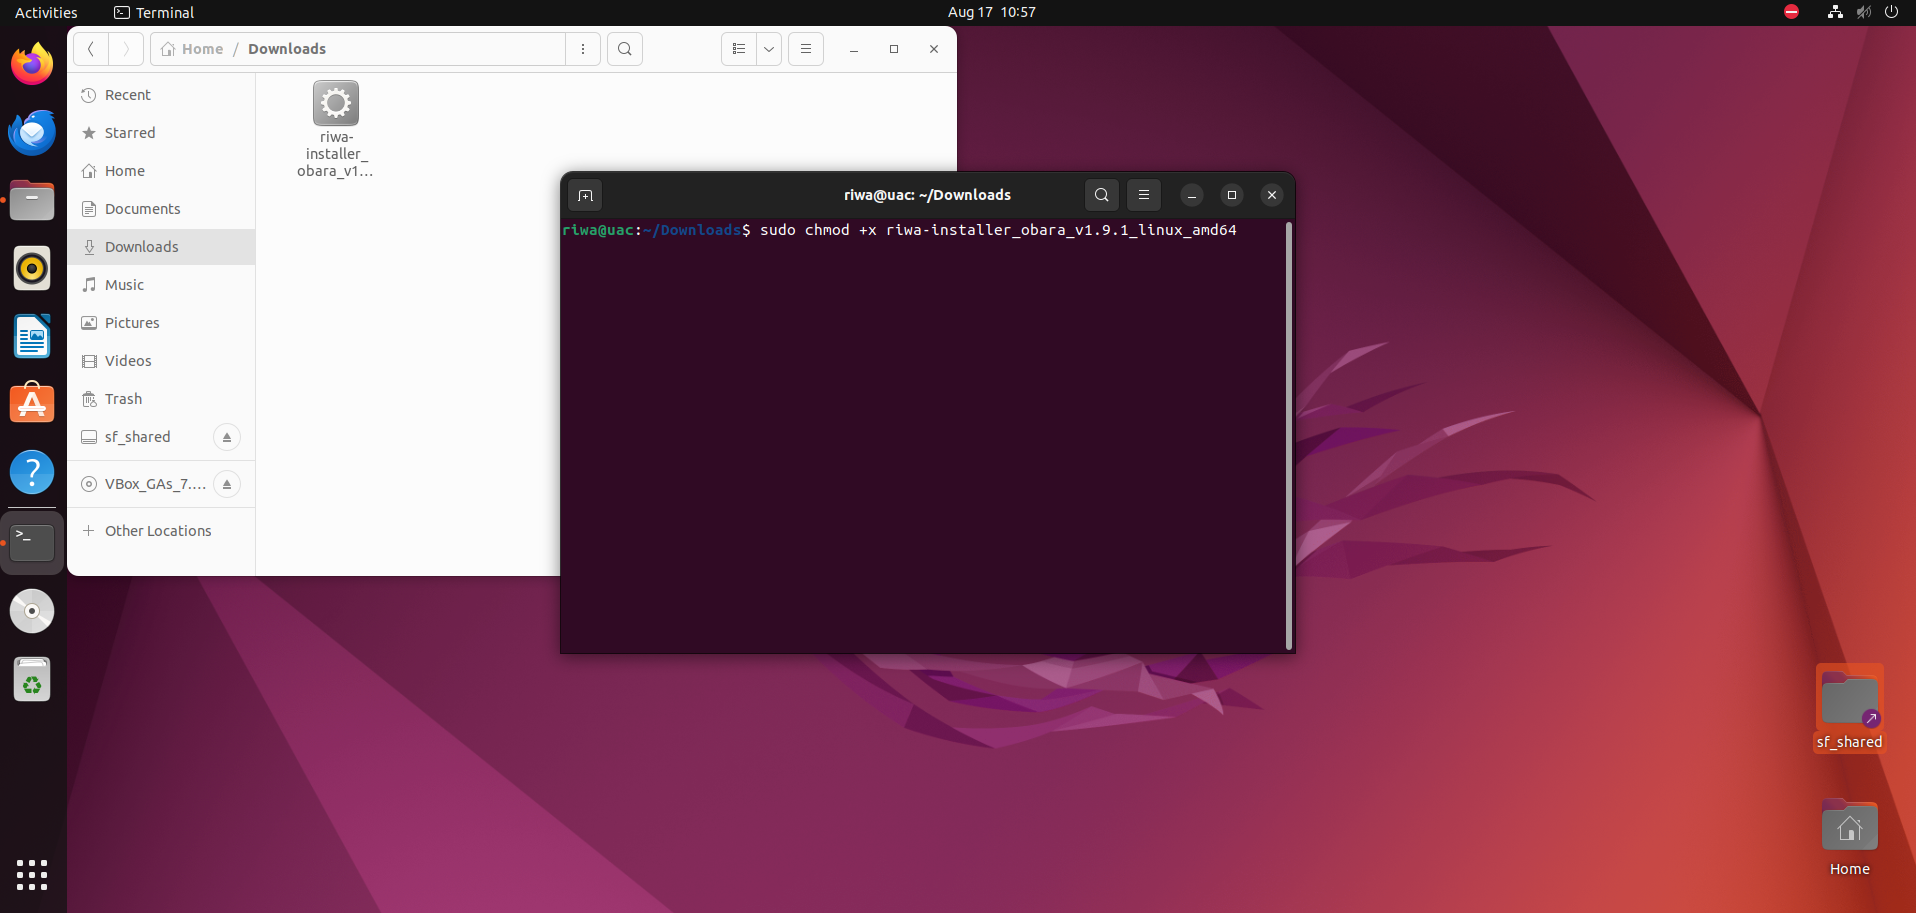
After ensuring your RIWA UAC Software is a proper executable, you can install your UAC by running the following command in the terminal:
sudo ./riwa-installer_obara_v{version_number}_linux_amd64 install
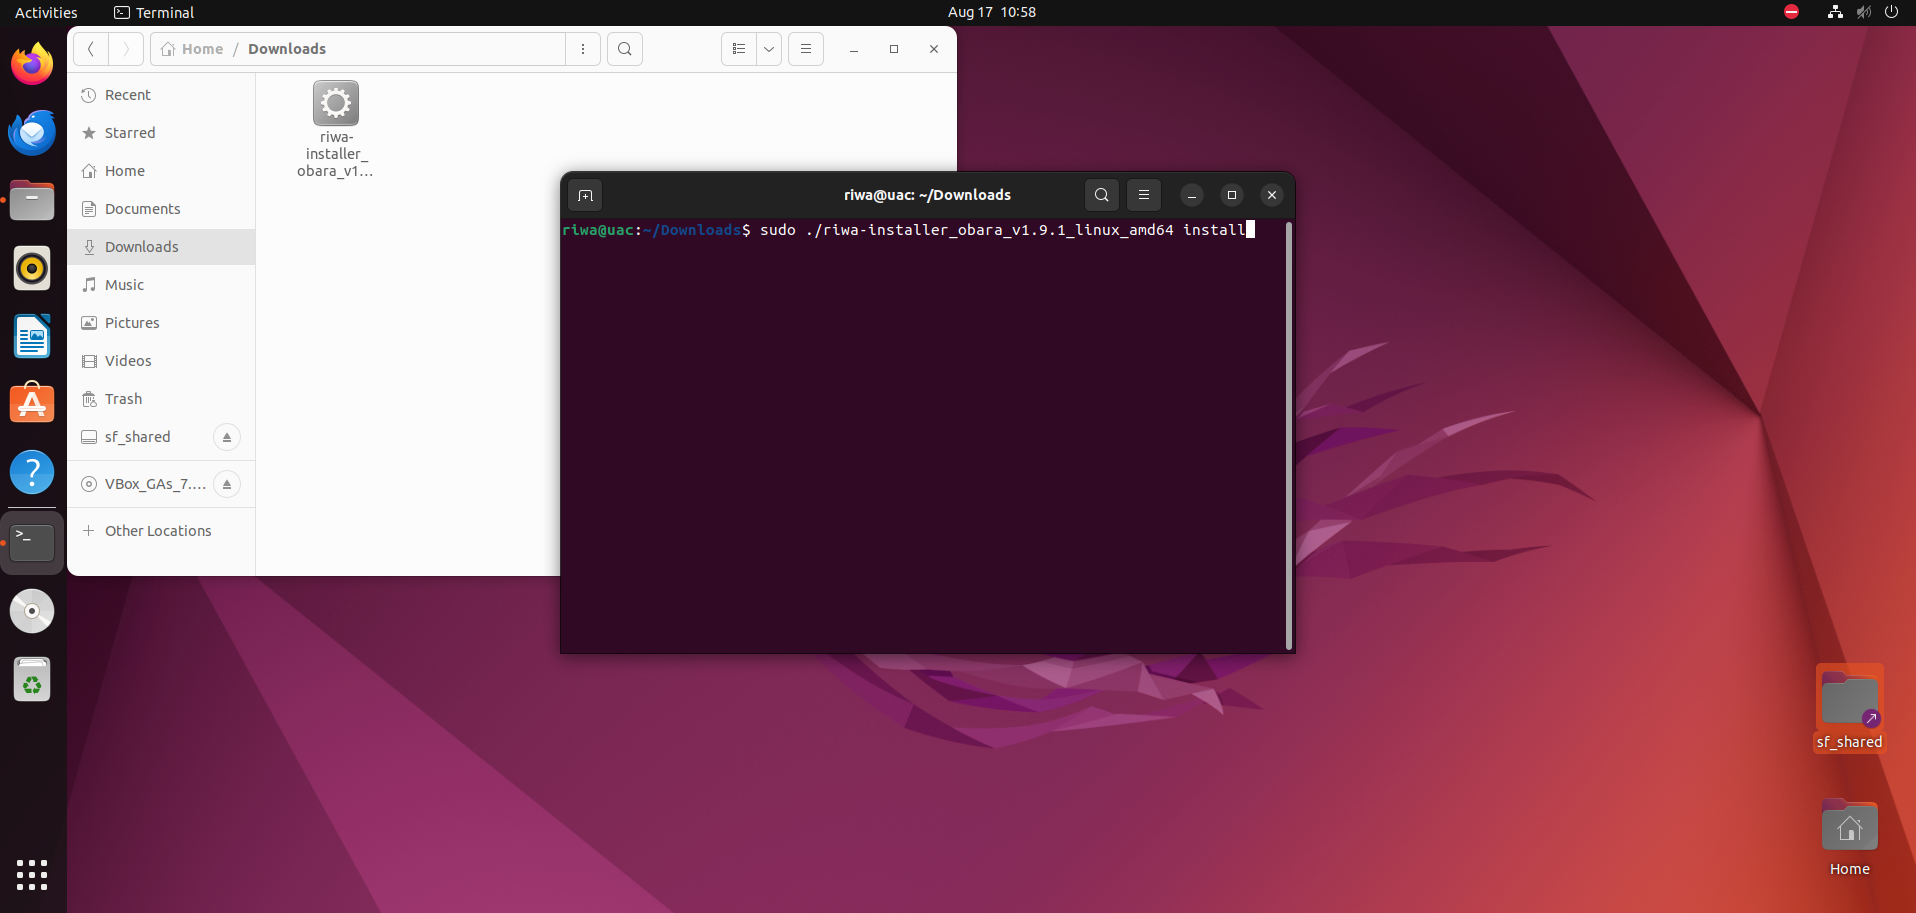
After starting the installation for your RIWA UAC, you will be asked to enter some information regarding the installation of the software. You will be asked to enter the following information:
- UAC Serial Port
- USBoard MAC Address
- Start services after installation [defaulted to
yes]
both the UAC Serial Port and USBoard MAC Address can be configured after the installation by running the command configuration_manager in a terminal and locating either obara_config.json or usboard_config.json.
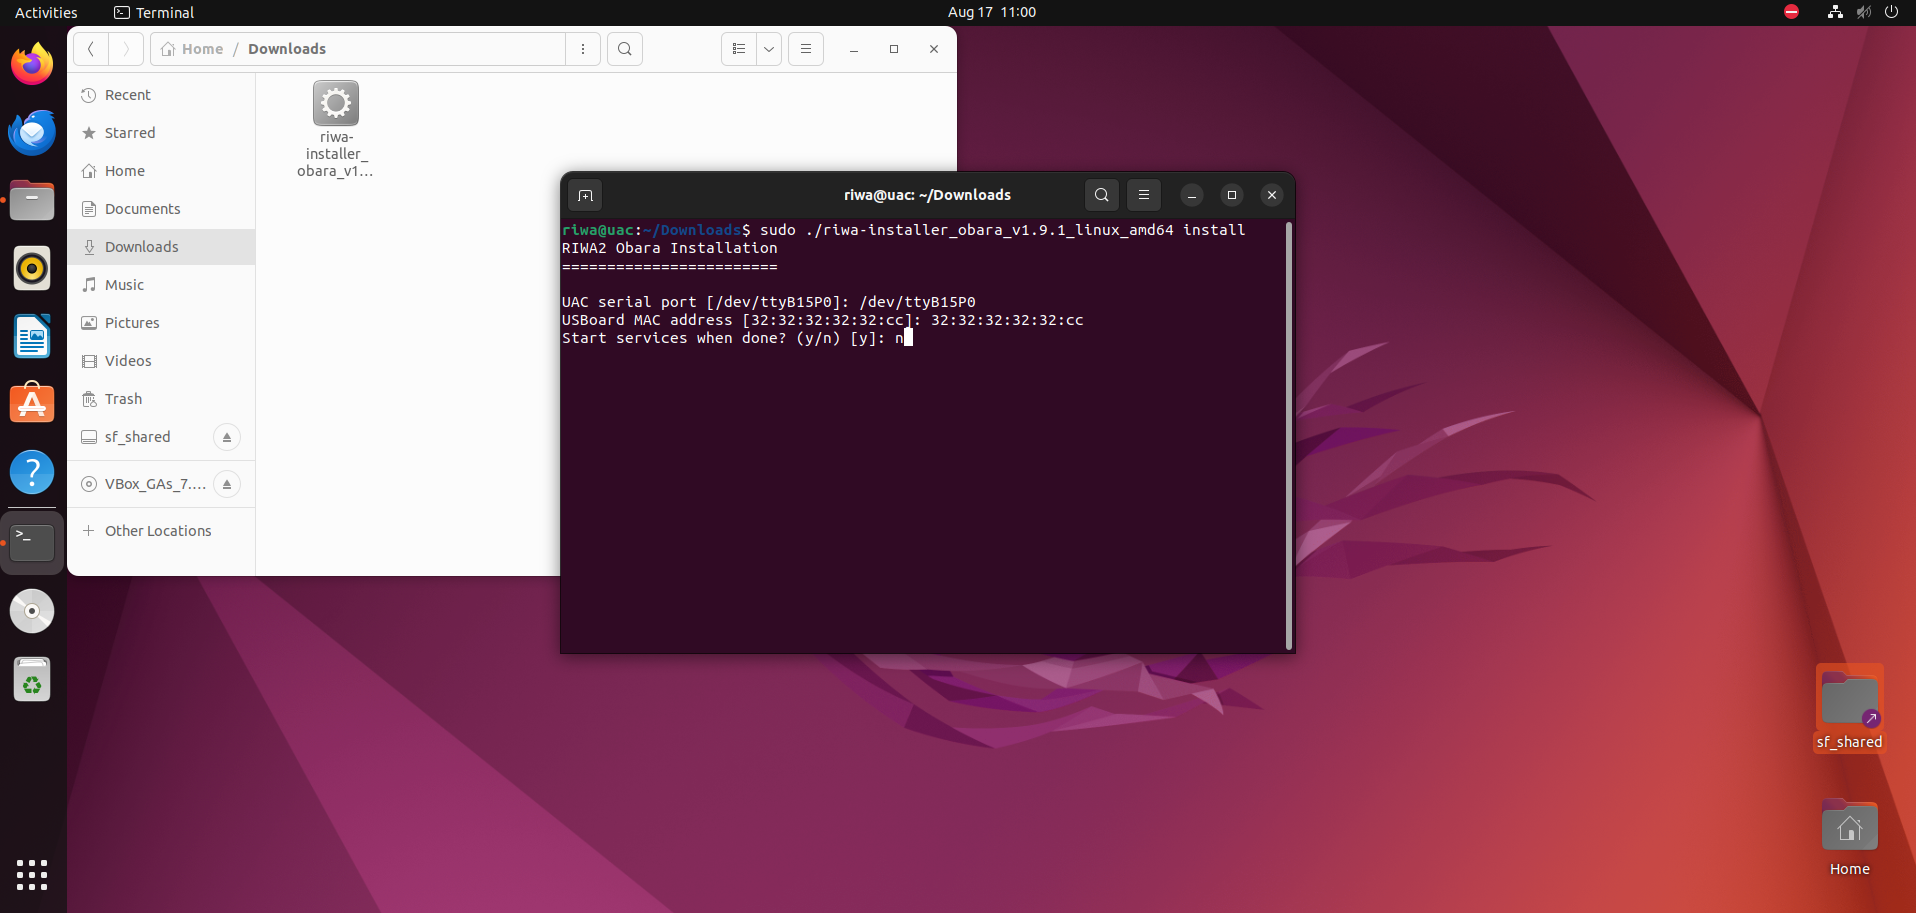
Once you have finished configuring your RIWA UAC installation, you should see a message similar to the one shown in the image below. This message confirms that the RIWA UAC installation completed successfully.
Running Commands from the Correct Folder
For the remainder of the instructions, you will be executing commands in the Linux terminal.
To ensure the commands function correctly, you must open the terminal from the folder that contains all required software packages. Follow these steps:
- Open your file browser and navigate to the folder where the software packages are located.
- Right-click anywhere within the folder (not on a specific file).
- Select Open in Terminal from the context menu.
This will open a terminal window with the current working directory set appropriately.
One-Time Setup
Before proceeding, the following components must be set up once on your system:
- Upgrade the system compiler to GCC/G++ 13.
- To check the system compiler version, use the command
gcc --versionandg++ --version.
- To check the system compiler version, use the command
- Install the necessary Advantech drivers.
These steps will be performed by the scripts provided in the next steps, and require elevated (root) privileges and Internet access.
Installing RIWA2-RT Software (One-Time Setup + Main Packages)
You will receive a ZIP archive named:
RIWA2-Obara-v{version_number}.zip
Where {version_number} refers to the version of the software.
This archive contains the following installation scripts:
setup.sh- Installs one-time system dependencies (GCC 13, Advantech drivers).update.sh- Updates the main RIWA2 software packages.uninstall.sh- Uninstalls the RIWA2 software packages.
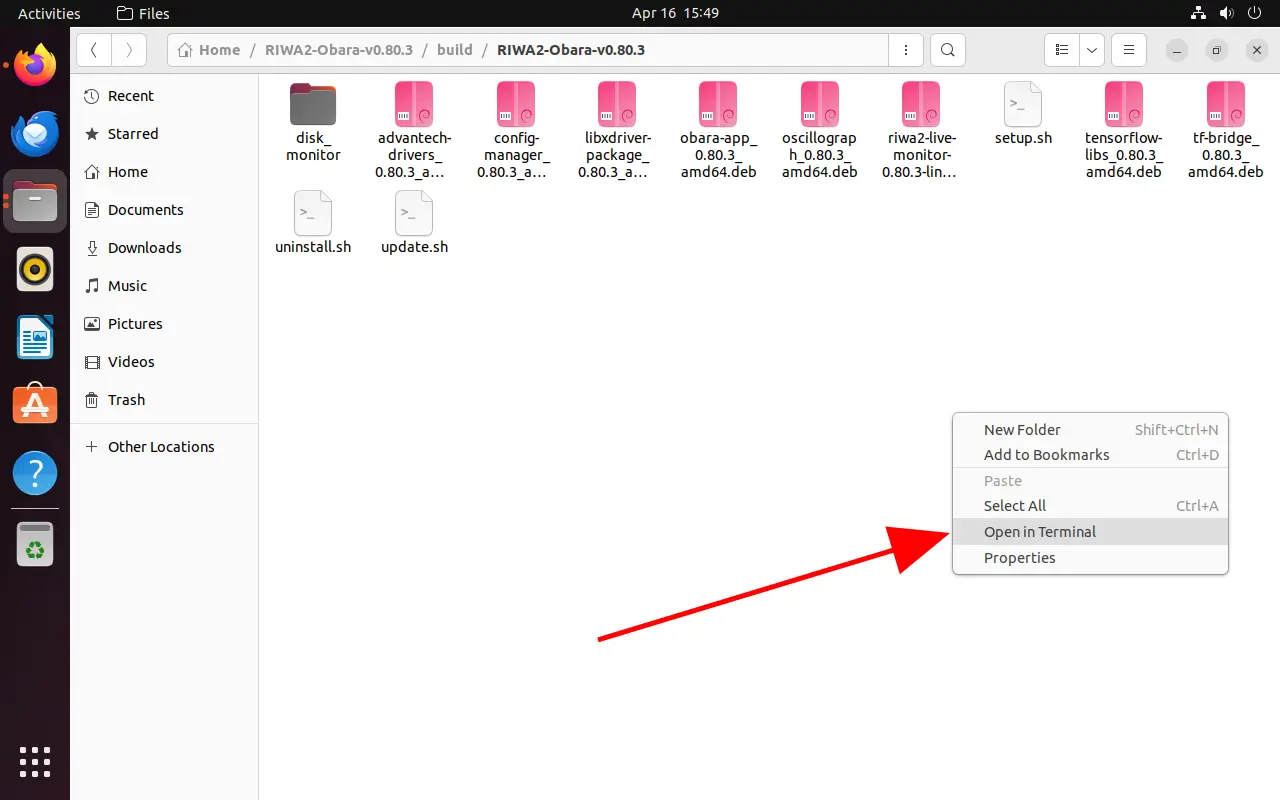
Shown in the image below:
One-Time Dependency Installation
Before installing the main software, one-time system dependencies must be installed.
-
Extract the contents of the ZIP archive.
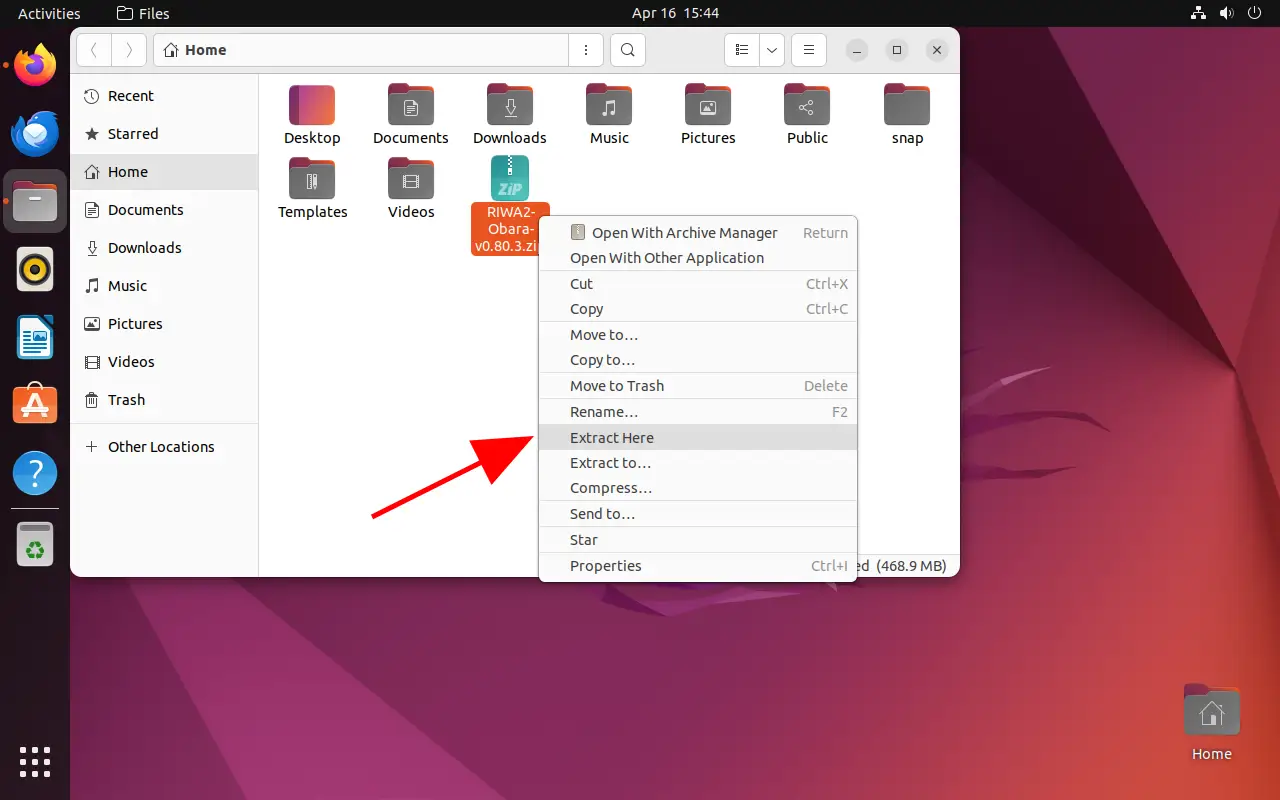
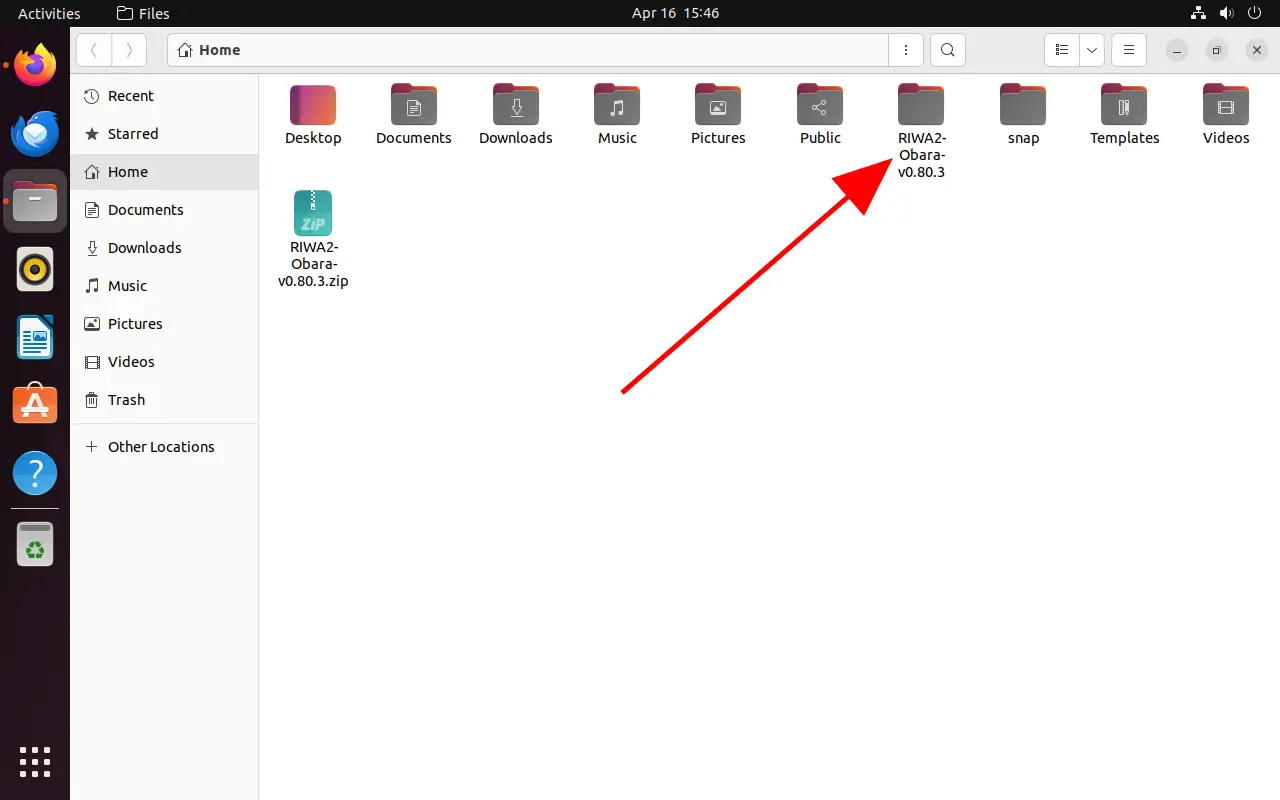
-
Open your file browser and navigate to the extracted folder.
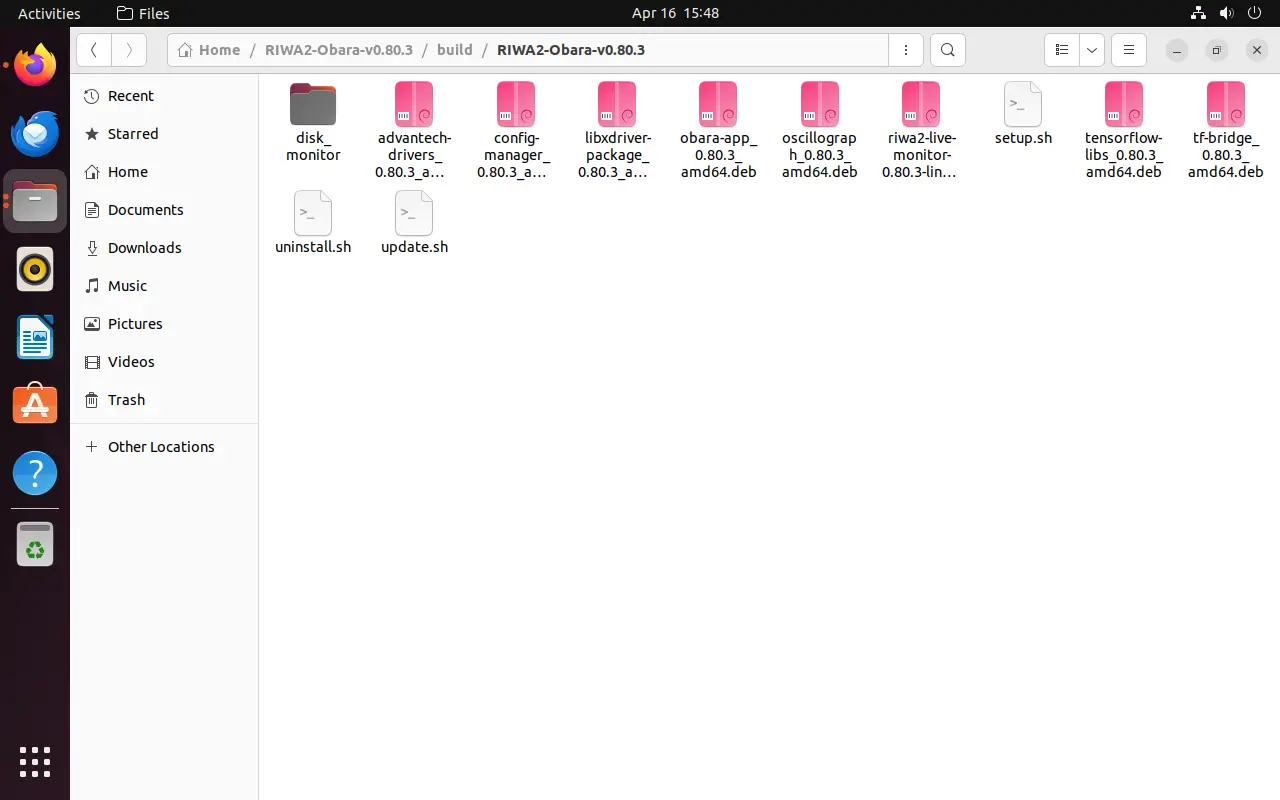
-
Right-click anywhere inside the folder and select Open in Terminal.
-
Run the following command:
sudo ./setup.sh. This script will:- Upgrade your GCC/G++ compiler to version 13.
- Install the required Advantech PCIE drivers.
- Ensure you have an active Internet connection and appropriate permissions. You will be prompted for your password during the installation.
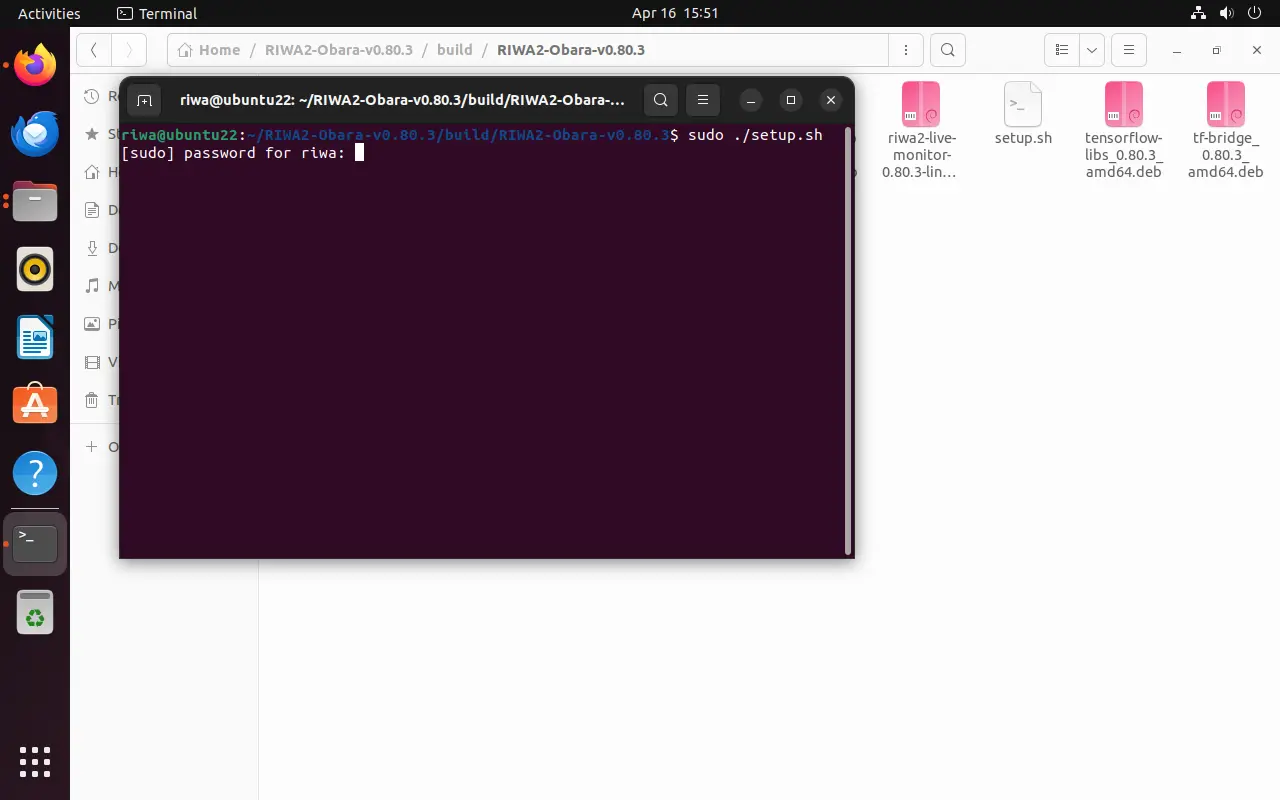
Please make sure the terminal is opened from the extracted folder.
Running the software
After installation, follow the steps below to run the Obara Analyzer system. Ensure all configuration files are set correctly before launching the applications.
Configure the System
Before launching the software, you must configure the following files:
usboard_config.jsonobara_config.json
Use the Configuration Manager tool to modify these files by opening it using the terminal:
sudo configuration_manager
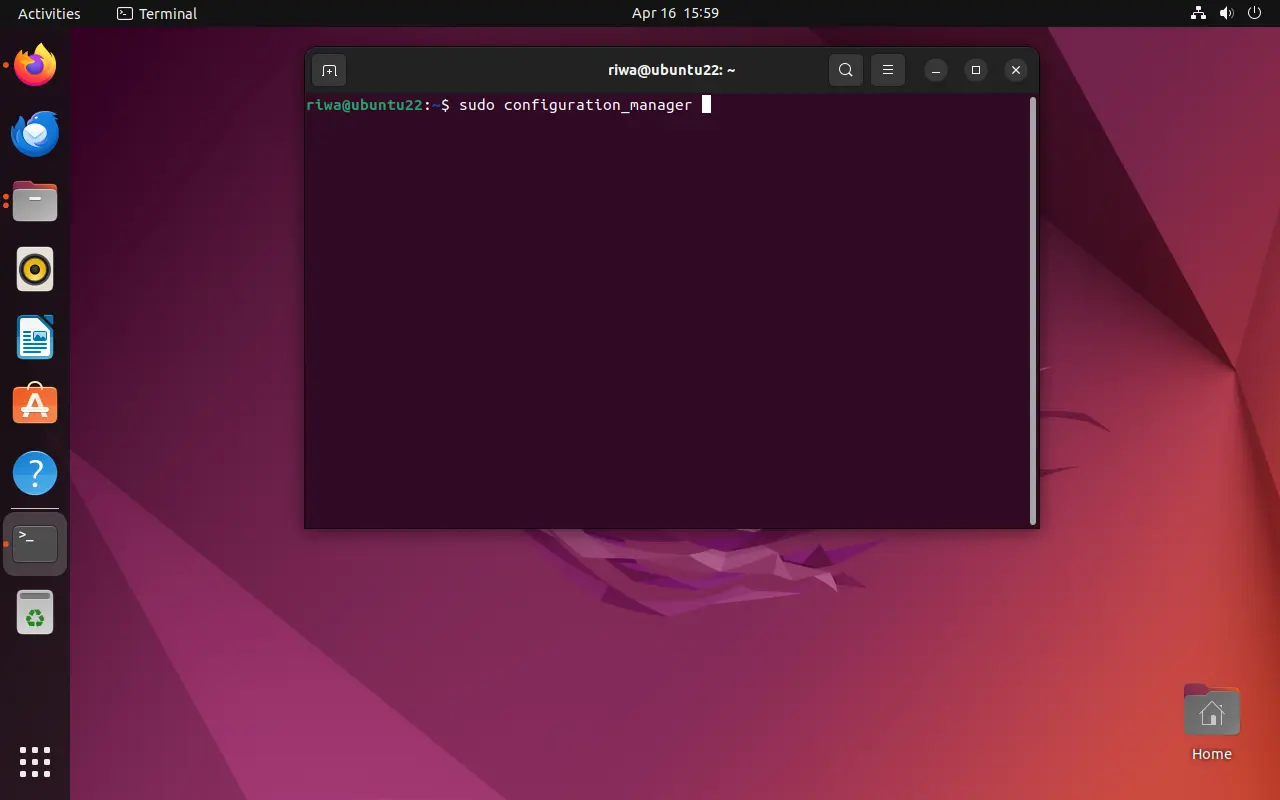
software from this point onwards can be executed from the terminal, regardless of the current directory.
Ensure the following within your configuration for obara_config.json:
- GUI mode is enabled; and
- The correct COM port name is entered under the COM port section (e.g.,
/dev/ttyB15P0).
Identifying Correct COM Port
To identify the correct COM port for your system, follow these steps (given the install script was successful):
- Open the terminal and run the following commands:
cd /usr/lib/advantech_drivers
make test - Look for entries such as the following:
/dev/ttyB15P0 is RS422S/RS485
/dev/ttyB15P1 is RS422S/RS485 - Use one of these detected ports (e.g.,
/dev/ttyB15P0) in yourobara_config.json. - If the ports are not found:
- Ensure the peripheral is correctly setup.
- Driver installation may have failed.
- Please refer to the FAQ page if there is an issue with kernel.
Below is an example configuration for obara_config.json:

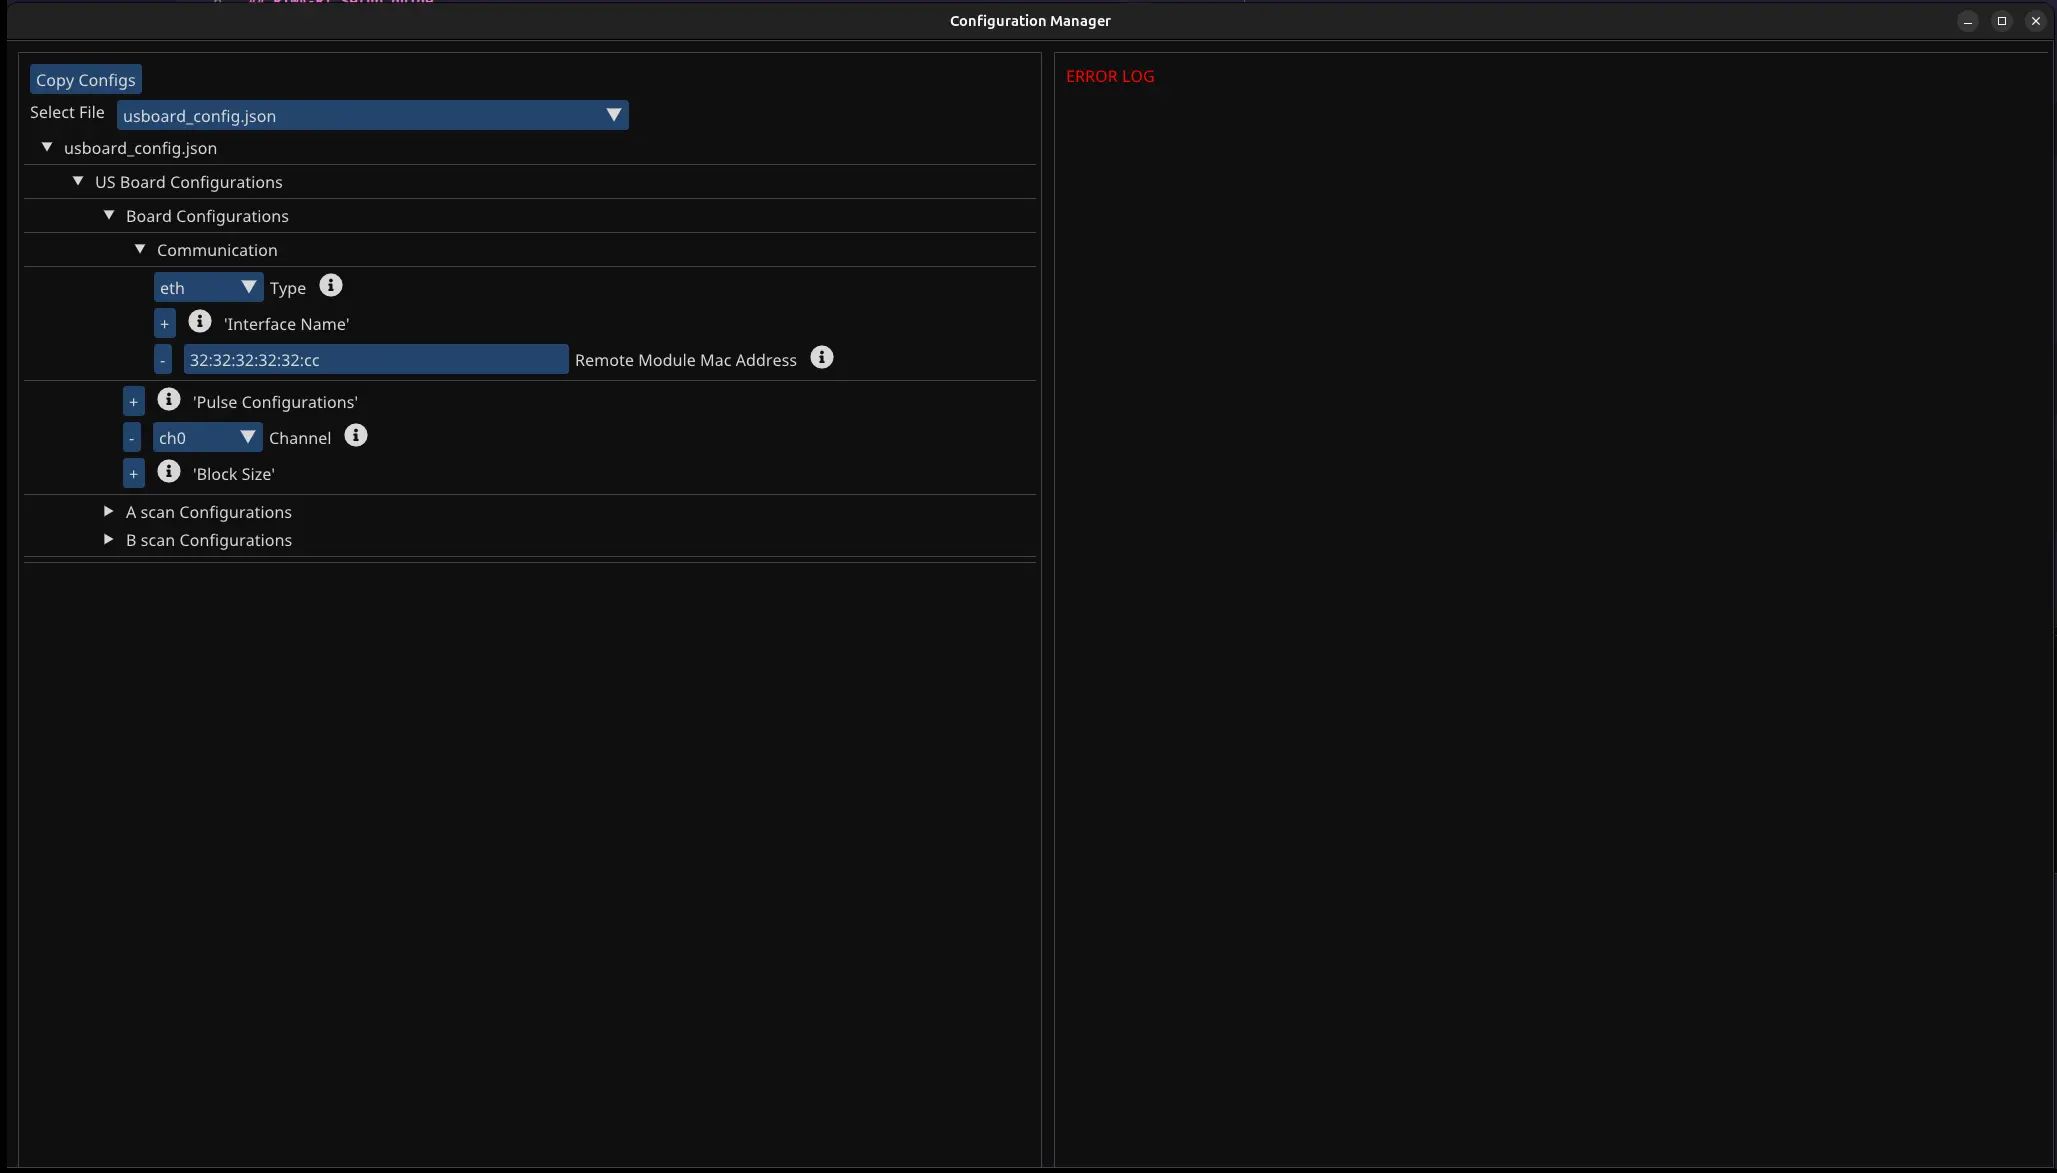
Ensure the following within your configuration for usboard_config.json:
Mac address: Set this to the MAC address of the ultrasound board associated with the gun. The RIWA RT installation follows a 1:1 mapping—each gun is paired with a single ultrasound board.
Here is an example configuration for usboard_config.json:
Launching the RIWA UAC
- v1.14.0 and Newer
- v1.0.0 to v1.14.0
- v0.257.0 and Earlier (Deprecated)
To launch the RIWA UAC, start by right-clicking on the desktop and pressing the Open in Terminal button which will open a new terminal window.
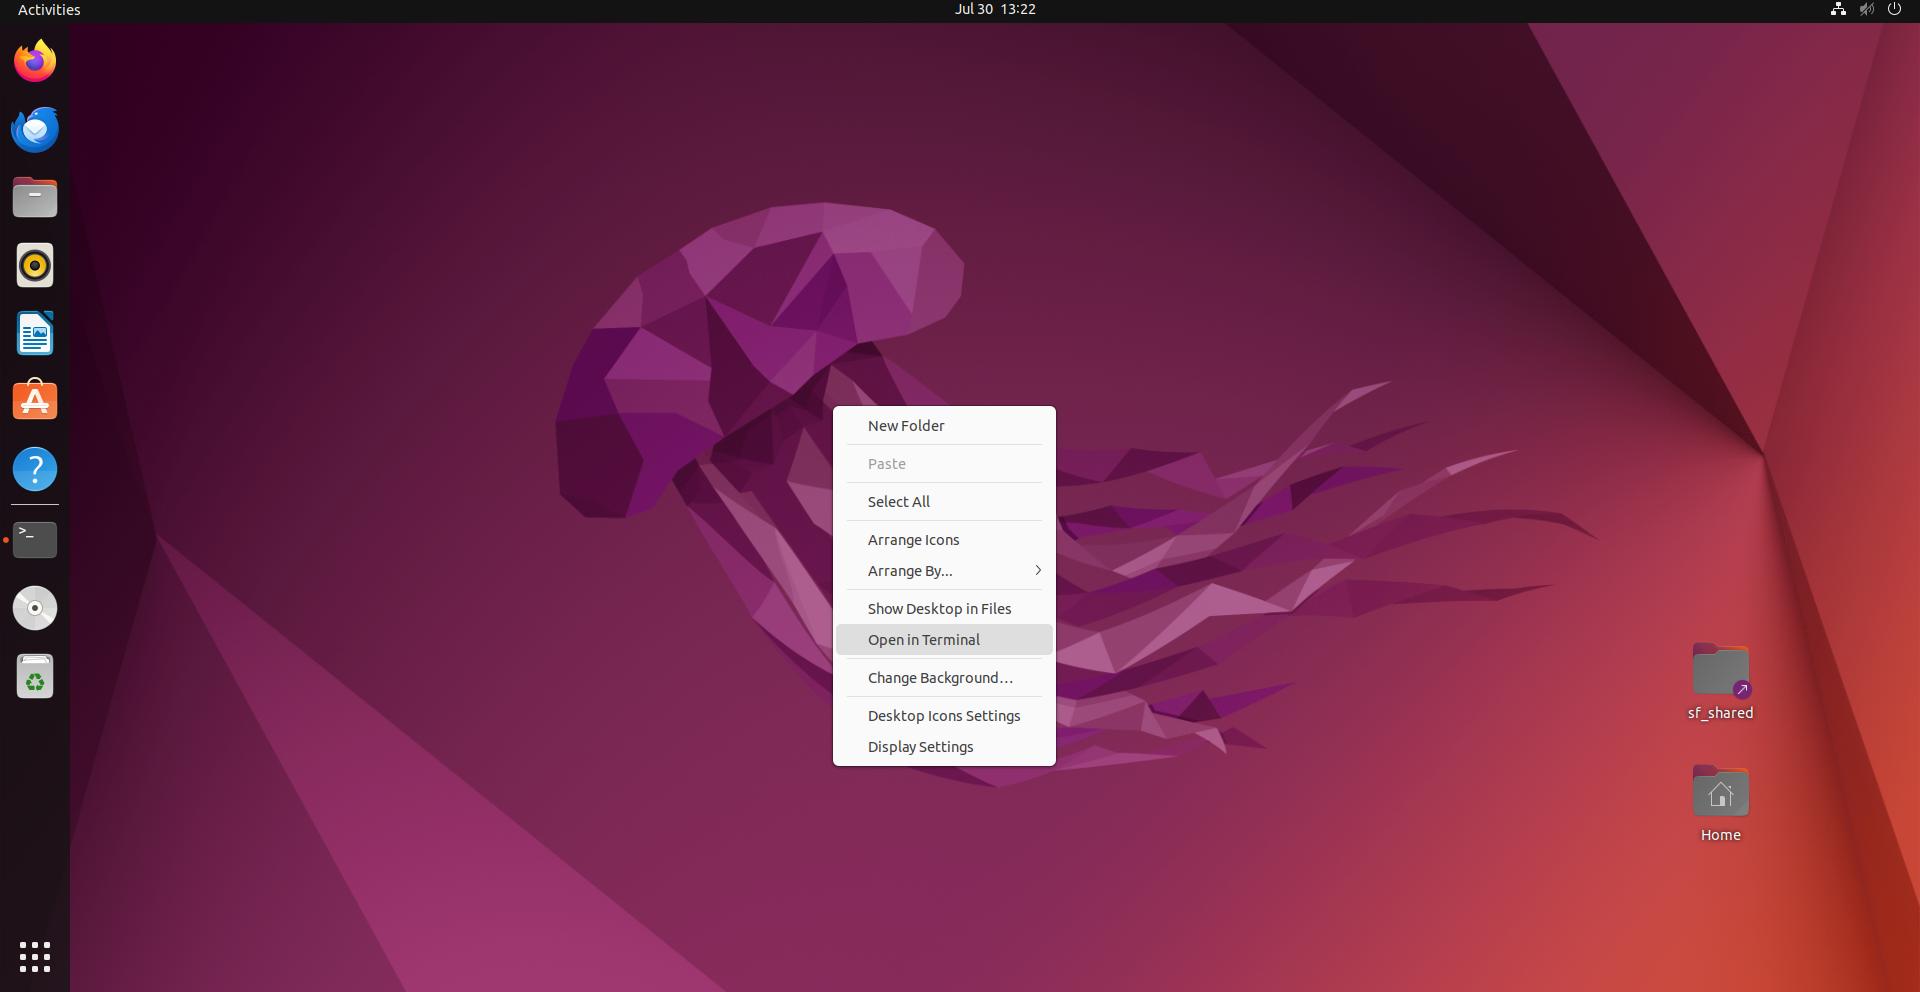
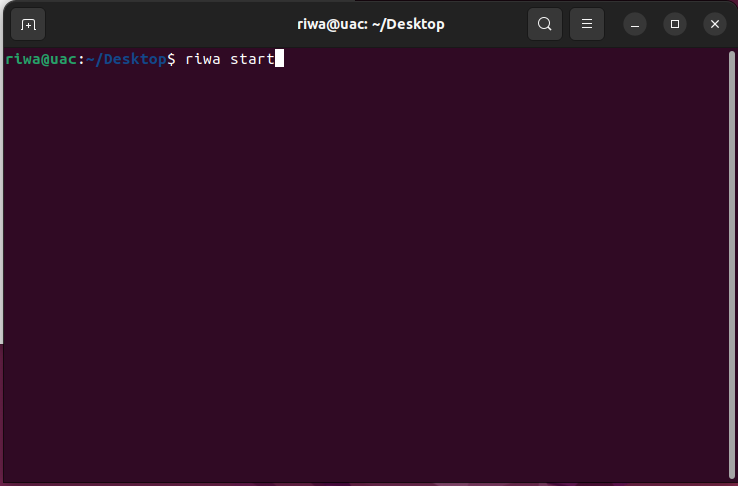
Now inside of the terminal, to start the RIWA UAC software, run the following command in the terminal:
riwa start
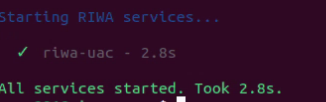
After the application has started, you should see a message in the terminal similar to the one shown below.
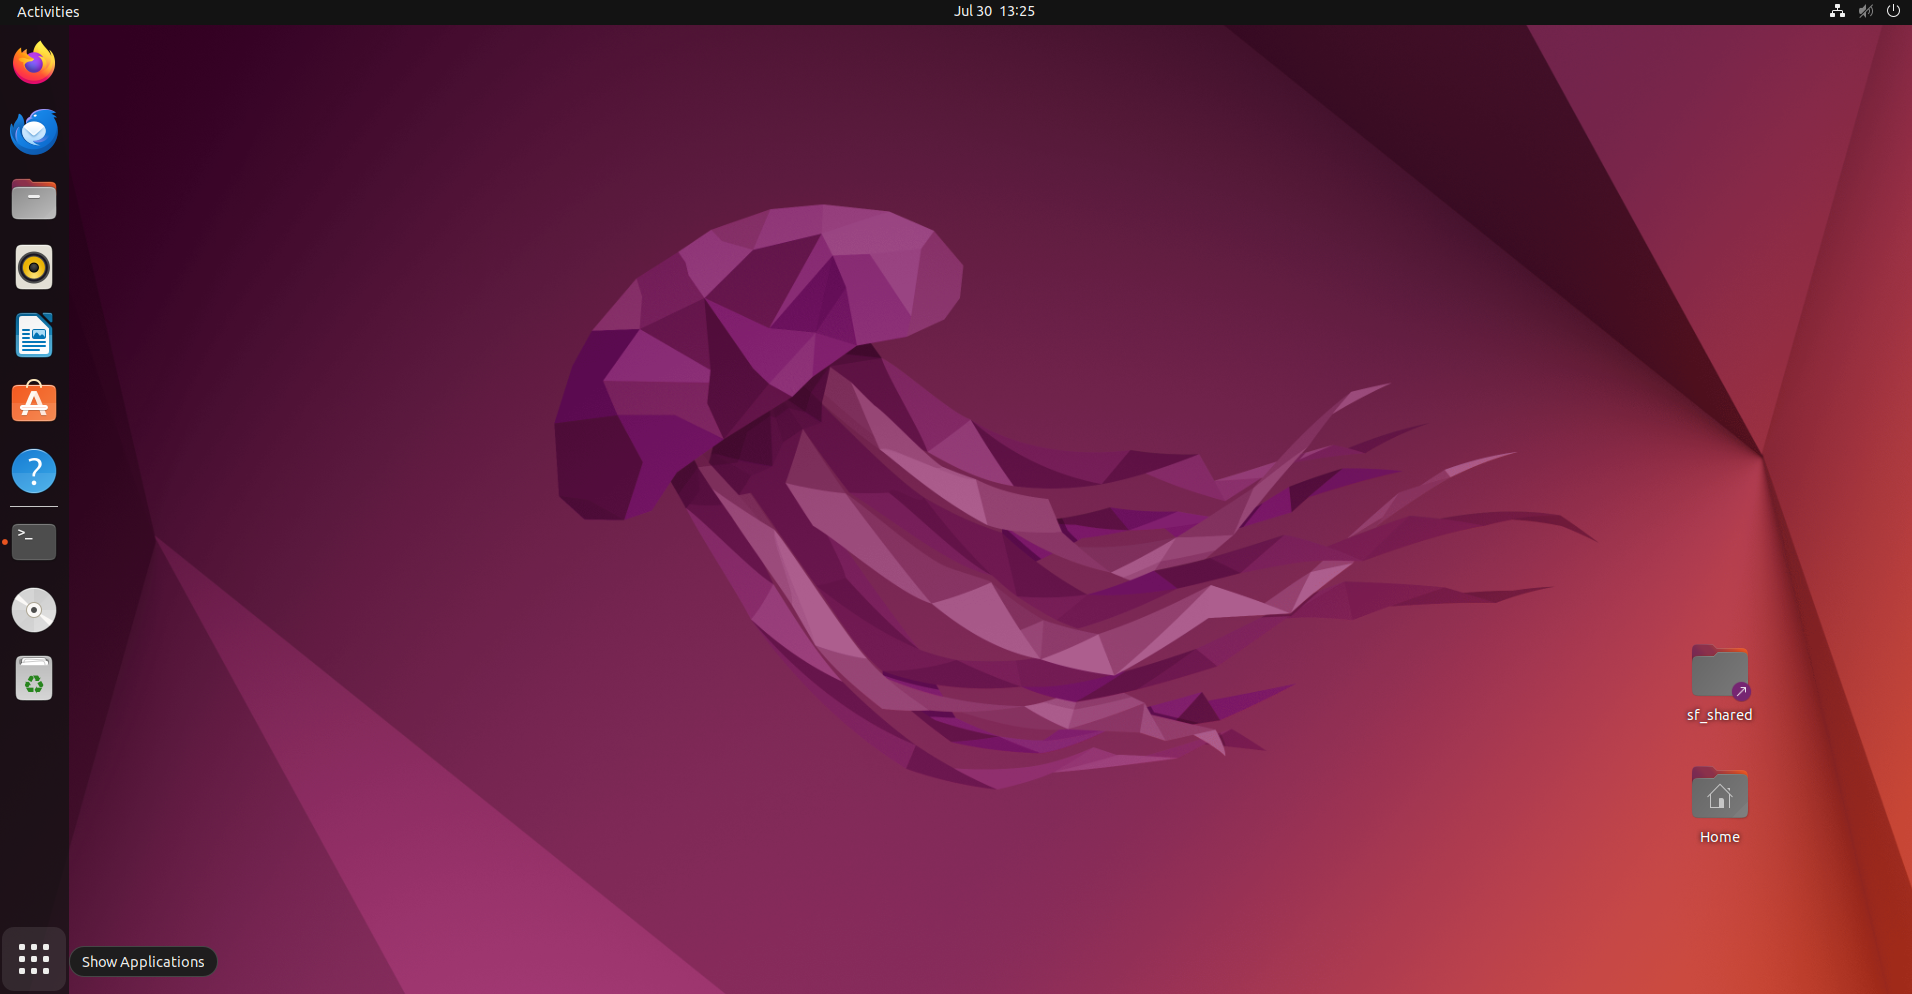
Once you have ensured the RIWA UAC is launched, you can begin to open up the Live Monitor. To start, click the grid button on the task bar labeled Show Applications.
Once inside your applications, you will need to find the application named RIWA2 Live Monitor. Double click on the application to launch it.
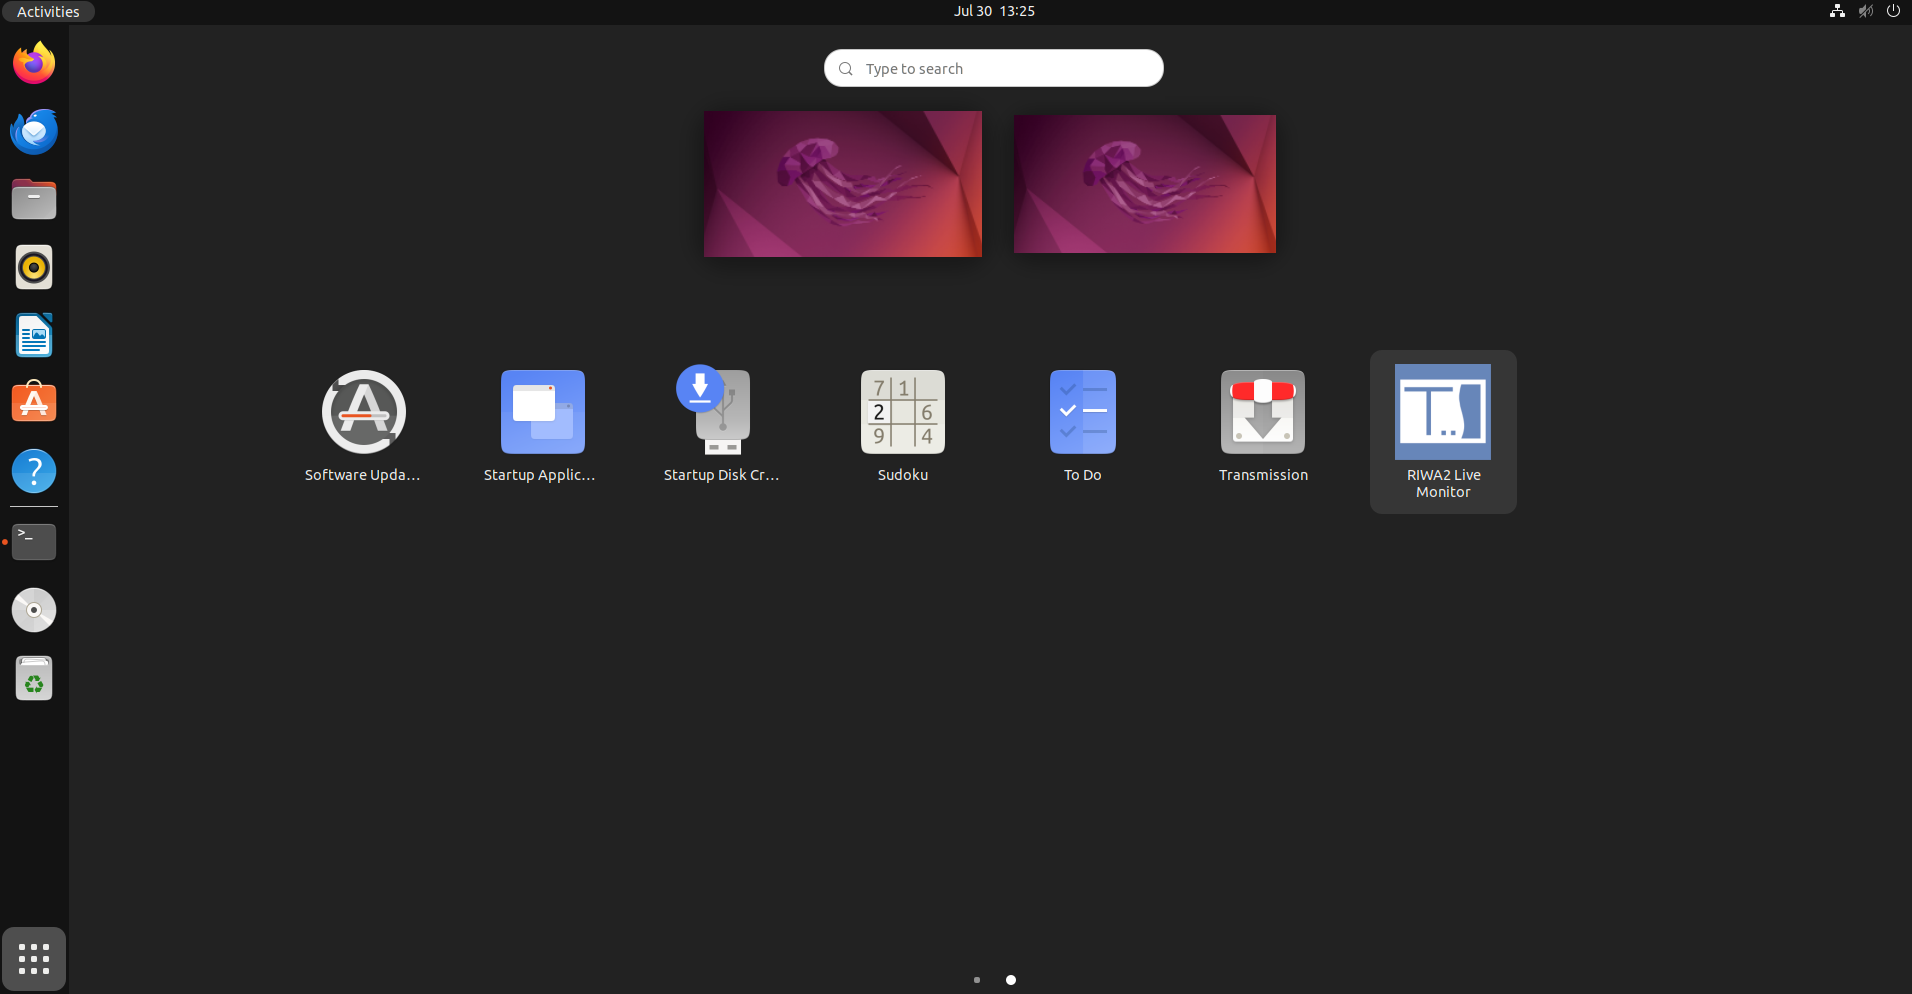
Once the Live Monitor launches, ensure that the Analyzer Connection, Board Connection, Signal Strength, and Controller Connection are all live to signal that your application is live and running. Once this is confirmed, you can begin to use the application.
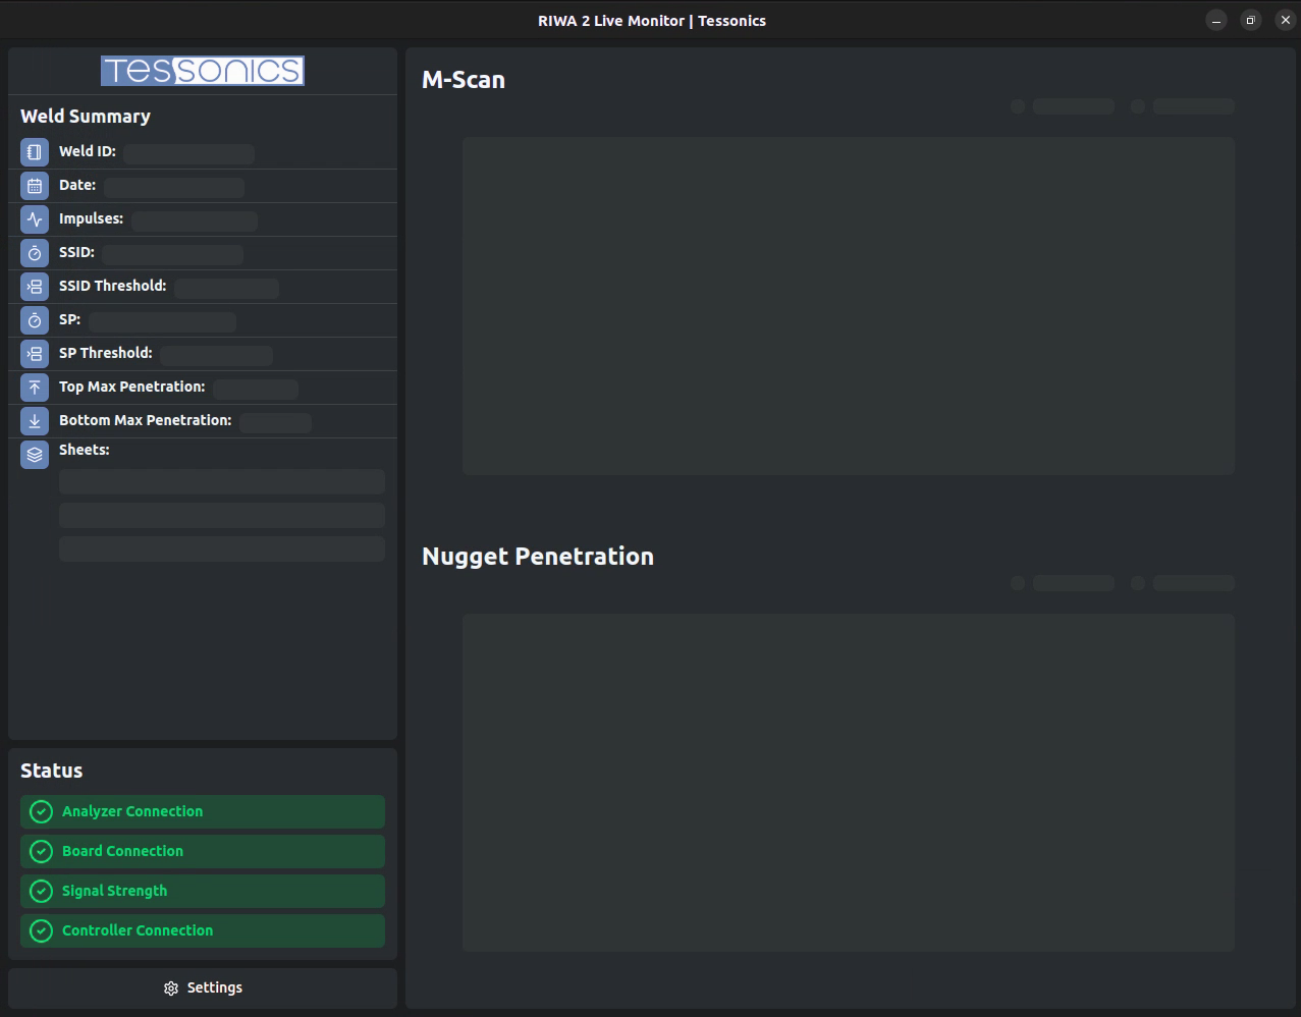
To launch the RIWA UAC, start by right-clicking on the desktop and pressing the Open in Terminal button which will open a new terminal window.
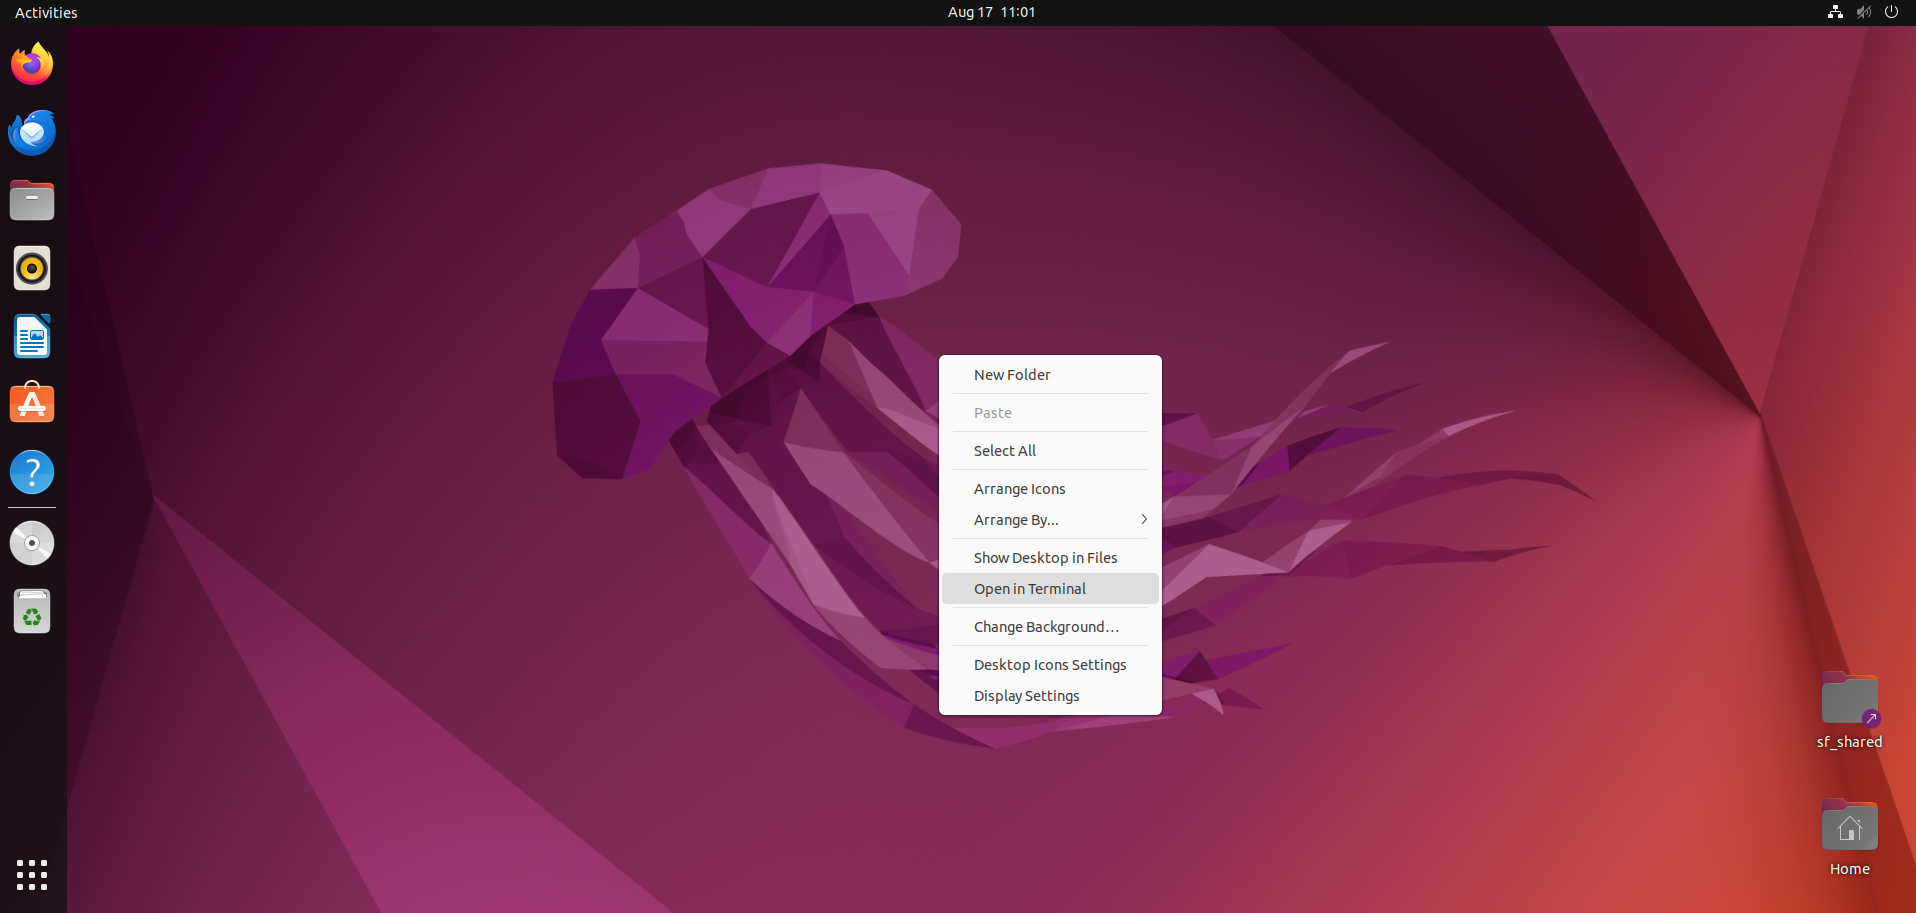
Now inside of the terminal, to start the RIWA UAC software, run the following command in the terminal:
sudo riwa start
After the application has started, you should see a message in the terminal similar to the one shown below.
Starting RIWA services...

1. Starting tf-bridge...
    tf-bridge is ready.
2. Starting riwa-uac...
    riwa-uac is ready.

All services started.
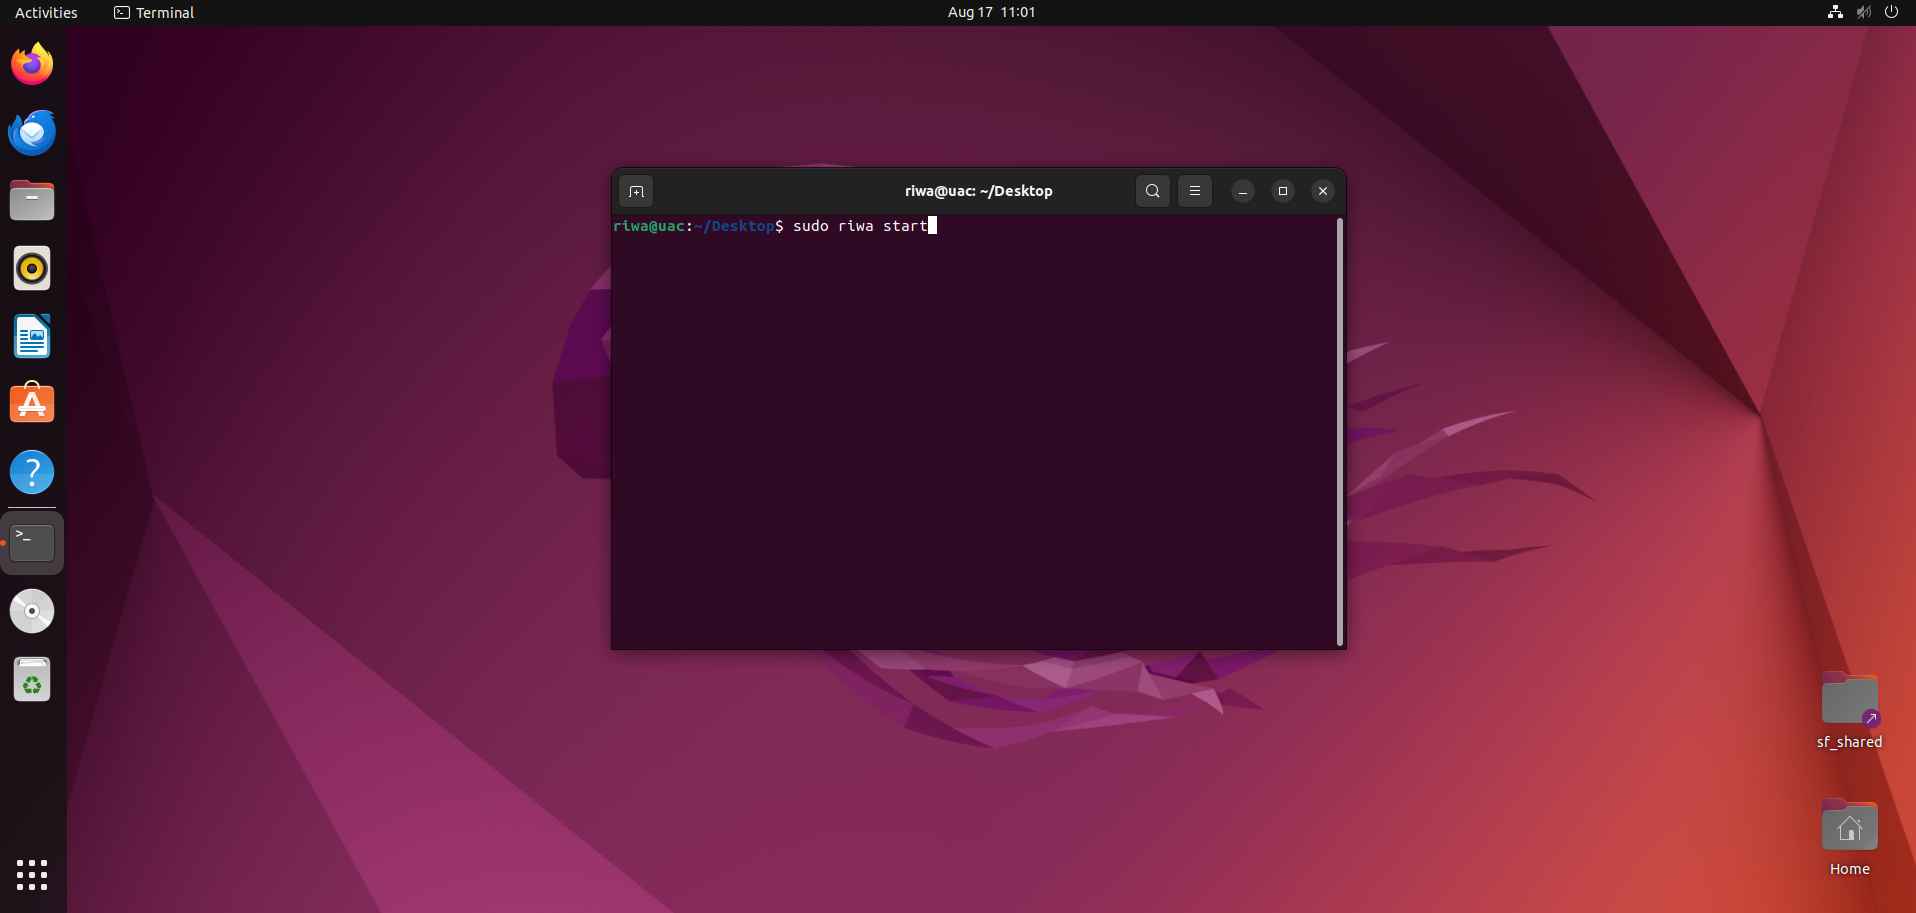
Once you have ensured the RIWA UAC is launched, you can begin to open up the Live Monitor. To start, click the grid button on the task bar labeled Show Applications.
Once inside your applications, you will need to find the application named RIWA2 Live Monitor. Double click on the application to launch it.
Once the Live Monitor launches, ensure that the Analyzer Connection, Board Connection, Signal Strength, and Controller Connection are all live to signal that your application is live and running. Once this is confirmed, you can begin to use the application.
Launch TF Bridge
Once configuration is complete, open a new terminal and run the following:
sudo tf_bridge_app
Wait until you see a startup message similar to the following:
/home/akshat-sharma/riwa-v2/build/external/TF-Bridge_v2/modules/tf_bridge_app/tf_bridge_app
[2025-04-15 16:55:55.253] [TF Bridge] [info] -----------------------------------------------
    Tessonics RIWA - Tensorflow TCP Bridge
-----------------------------------------------

[2025-04-15 16:55:55.253] [TF Bridge] [info] Tensorflow TCP Segmentation Bridge Version : Tue Apr  1 16:28:43 2025
[2025-04-15 16:55:55.253] [TF Bridge] [info] Tensorflow Version: 2.8.4-dev20221115
[2025-04-15 16:55:55.253] [TF Bridge] [info] OpenCV Version: 4.8.1
Please note that it will hang for a minute or so to initialize, this is normal.
Once it is finished initializing and loading this message will appear:
[2025-04-15 16:55:55.253] [TF Bridge] [info] -----------------------------------------------
    Tessonics RIWA - Tensorflow TCP Bridge
-----------------------------------------------

[2025-04-15 16:55:55.253] [TF Bridge] [info] Tensorflow TCP Segmentation Bridge Version : Tue Apr  1 16:28:43 2025
[2025-04-15 16:55:55.253] [TF Bridge] [info] Tensorflow Version: 2.8.4-dev20221115
[2025-04-15 16:55:55.253] [TF Bridge] [info] OpenCV Version: 4.8.1
2025-04-15 16:56:08.863280: I tensorflow/core/platform/cpu_feature_guard.cc:151] This TensorFlow binary is optimized with oneAPI Deep Neural Network Library (oneDNN) to use the following CPU instructions in performance-critical operations:  AVX2 FMA
To enable them in other operations, rebuild TensorFlow with the appropriate compiler flags.
[2025-04-15 16:56:08.917] [Standard #1] [info] Opening Server On Port: 27015
[2025-04-15 16:56:08.917] [Standard #1] [info] Listening for connections on port: 27015
[2025-04-15 16:56:08.917] [Standard #1] [info] Connected Over TCP
[2025-04-15 16:56:08.917] [Standard #1] [info] Connected!
[2025-04-15 16:56:09.370] [Standard #1] [debug] Elapsed Inference Time: 451ms
Pay special attention to the final three lines:
[2025-04-15 11:46:36.105] [Standard #1] [info] Connected Over TCP
[2025-04-15 11:46:36.105] [Standard #1] [info] Connected!
[2025-04-15 11:46:36.465] [Standard #1] [debug] Elapsed Inference Time: 359ms
These indicate that the server has successfully started and is ready.
Launch riwa-uac
Open a new terminal and run the following:
sudo riwa_uac
On successful startup this will show up on the terminal.
[2025-01-22 12:28:56.897] [Obara Analyzer] [debug] Parsed usboard_config.json
[2025-01-22 12:28:56.897] [Obara Analyzer] [debug] Initializing the eth interface for us-board. The requested address is '32:32:32:32:32:14' and requested interface name '<missing>'
[2025-01-22 12:28:56.910] [Obara Analyzer] [info] Checking ultrasound board security status.
[2025-01-22 12:28:57.873] [Obara Analyzer] [warning] Security passed.
[2025-01-22 12:28:57.873] [Obara Analyzer] [debug] FPGA Version: RIWA            HARDWARE        DATE:2021_12_20 REV:02.00.00    FIRMWARE        DATE:2021_12_22 REV:01.00.00
[2025-01-22 12:28:57.873] [Obara Analyzer] [info] Opened Serial on Port: /dev/ttyB15P0
[2025-01-22 12:28:57.873] [Obara Analyzer] [info] Targeting COM Port: /dev/ttyB15P0
[2025-01-22 12:28:57.873] [Obara Analyzer] [debug] Listening...
[2025-01-22 12:28:57.874] [Obara Analyzer] [info] Listening for connections on port: 5000
The actual Mac address and port may vary based on your setup.
Live Monitor
Live monitor is a GUI software that is bundled with RIWA to view the results visually.
It can be run either by opening a new terminal and using the command (Ubuntu Only):
riwa2-live-monitor
For Ubuntu this will be configured via the setup script and updated using the update script.
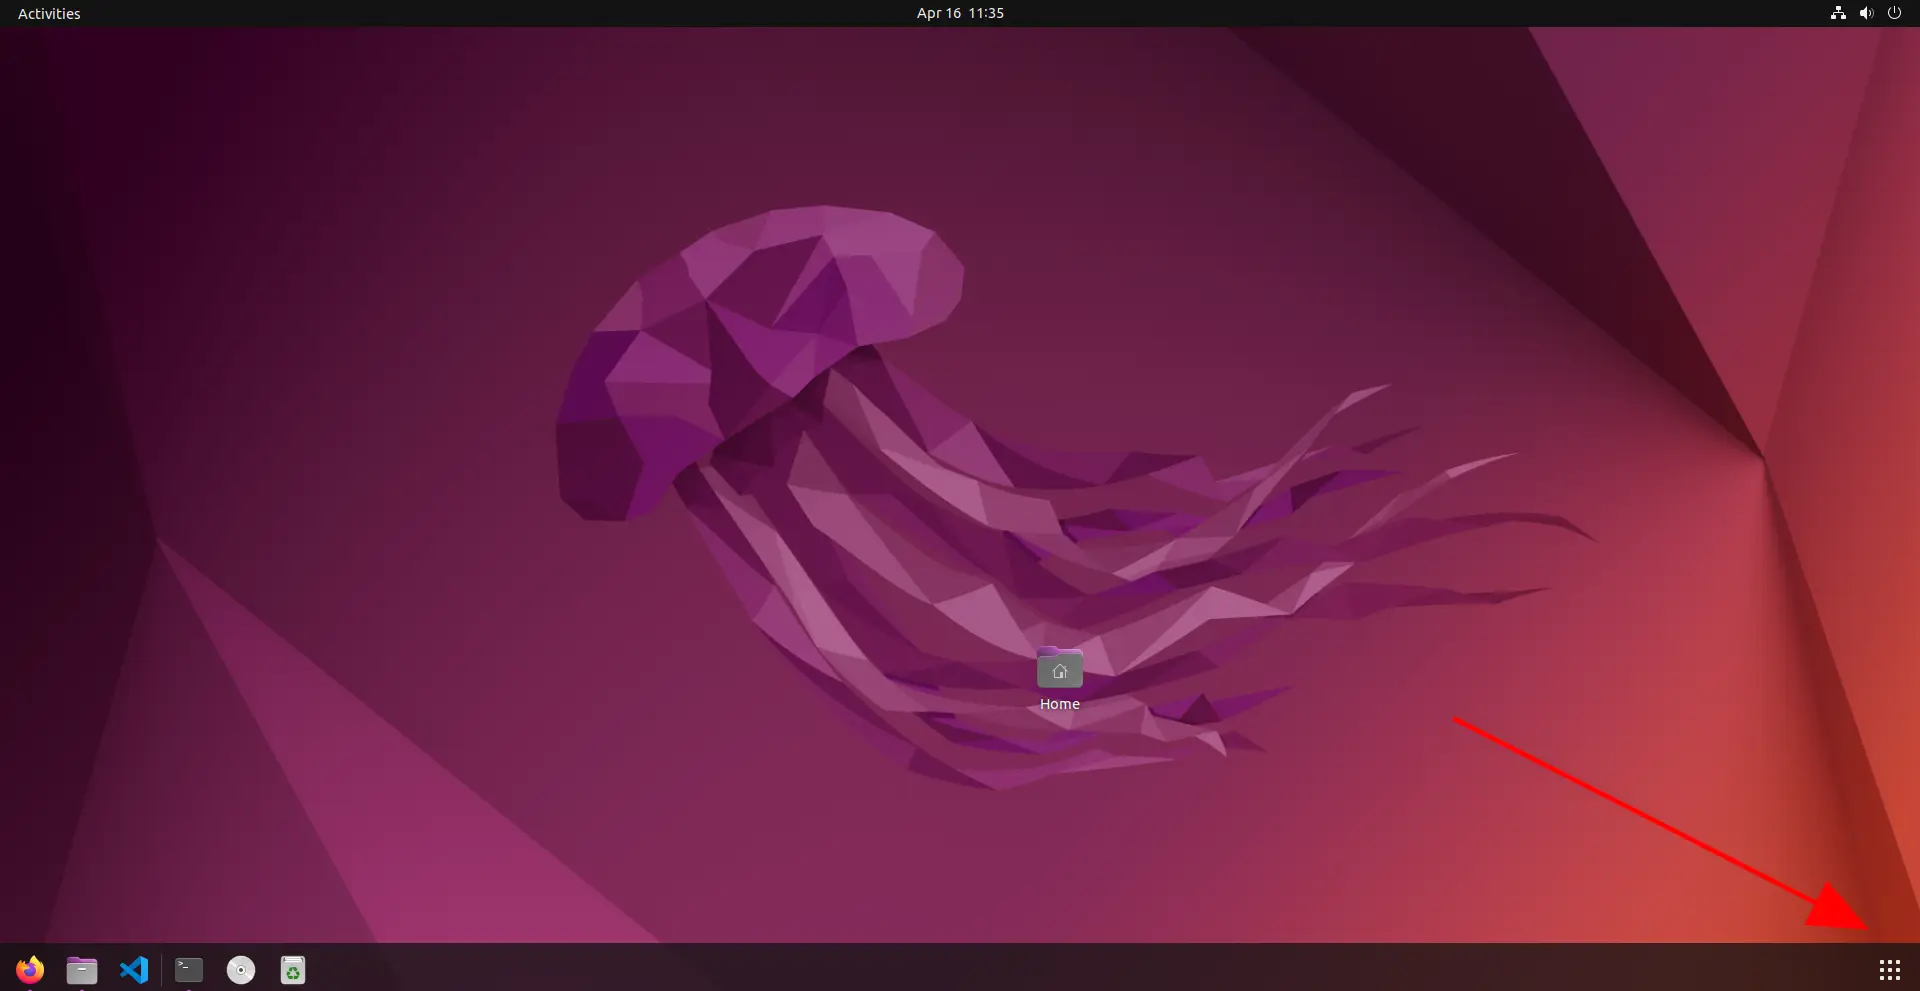
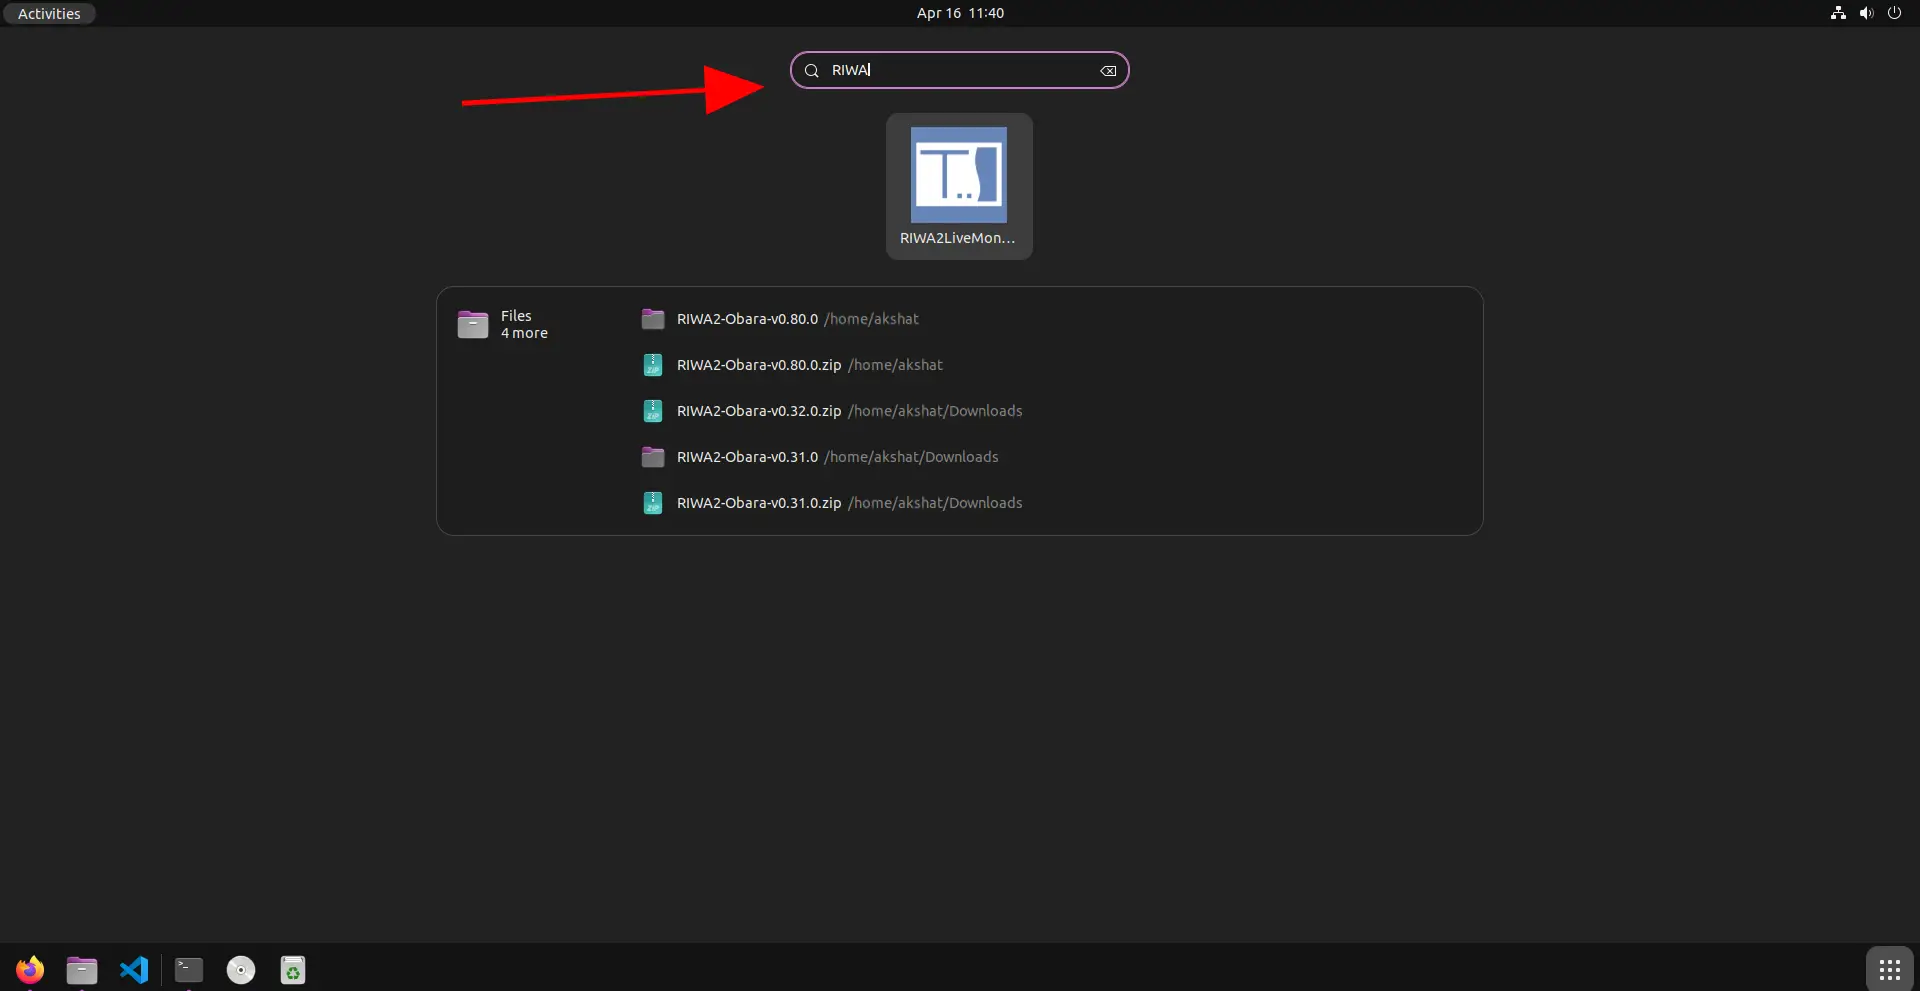
Alternatively, you can open the application through the Apps menu on Ubuntu:
-
Click on the "Show Applications" icon in the bottom-left corner of your screen (Ubuntu dock).
-
In the search bar, type the name of the application (e.g., RIWA).
-
Once it appears in the results, simply click the icon to launch it.
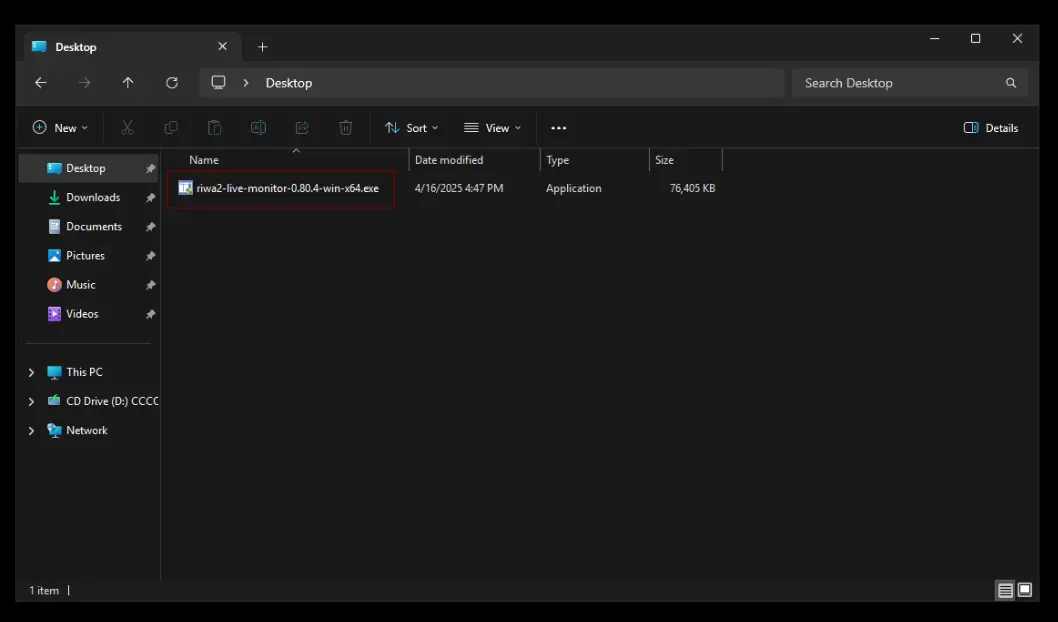
There is also a Windows installer that will be bundled with the package if the user wishes to install the monitor separately from the other applications.
The steps to use it are as follows:
-
Locate the installer exe file.
-
Click on it and follow prompts for the installation.

-
Wait for the installation to complete.


-
To launch the RIWA2 Live Monitor, simply click on the application icon:

-
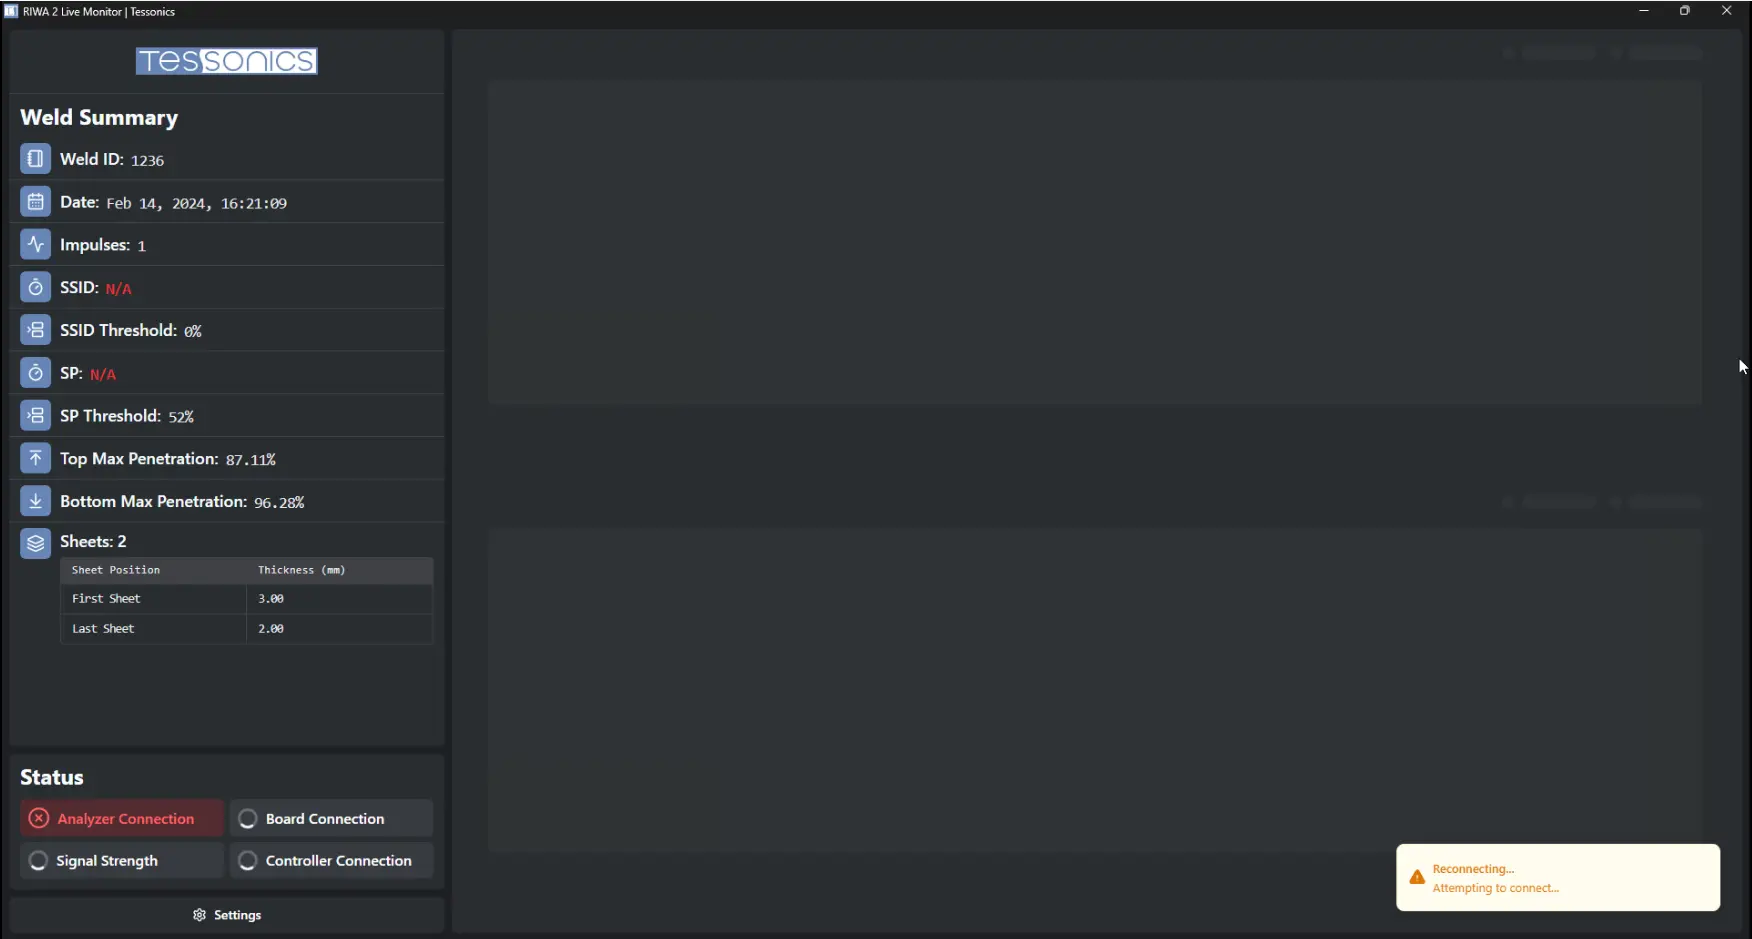
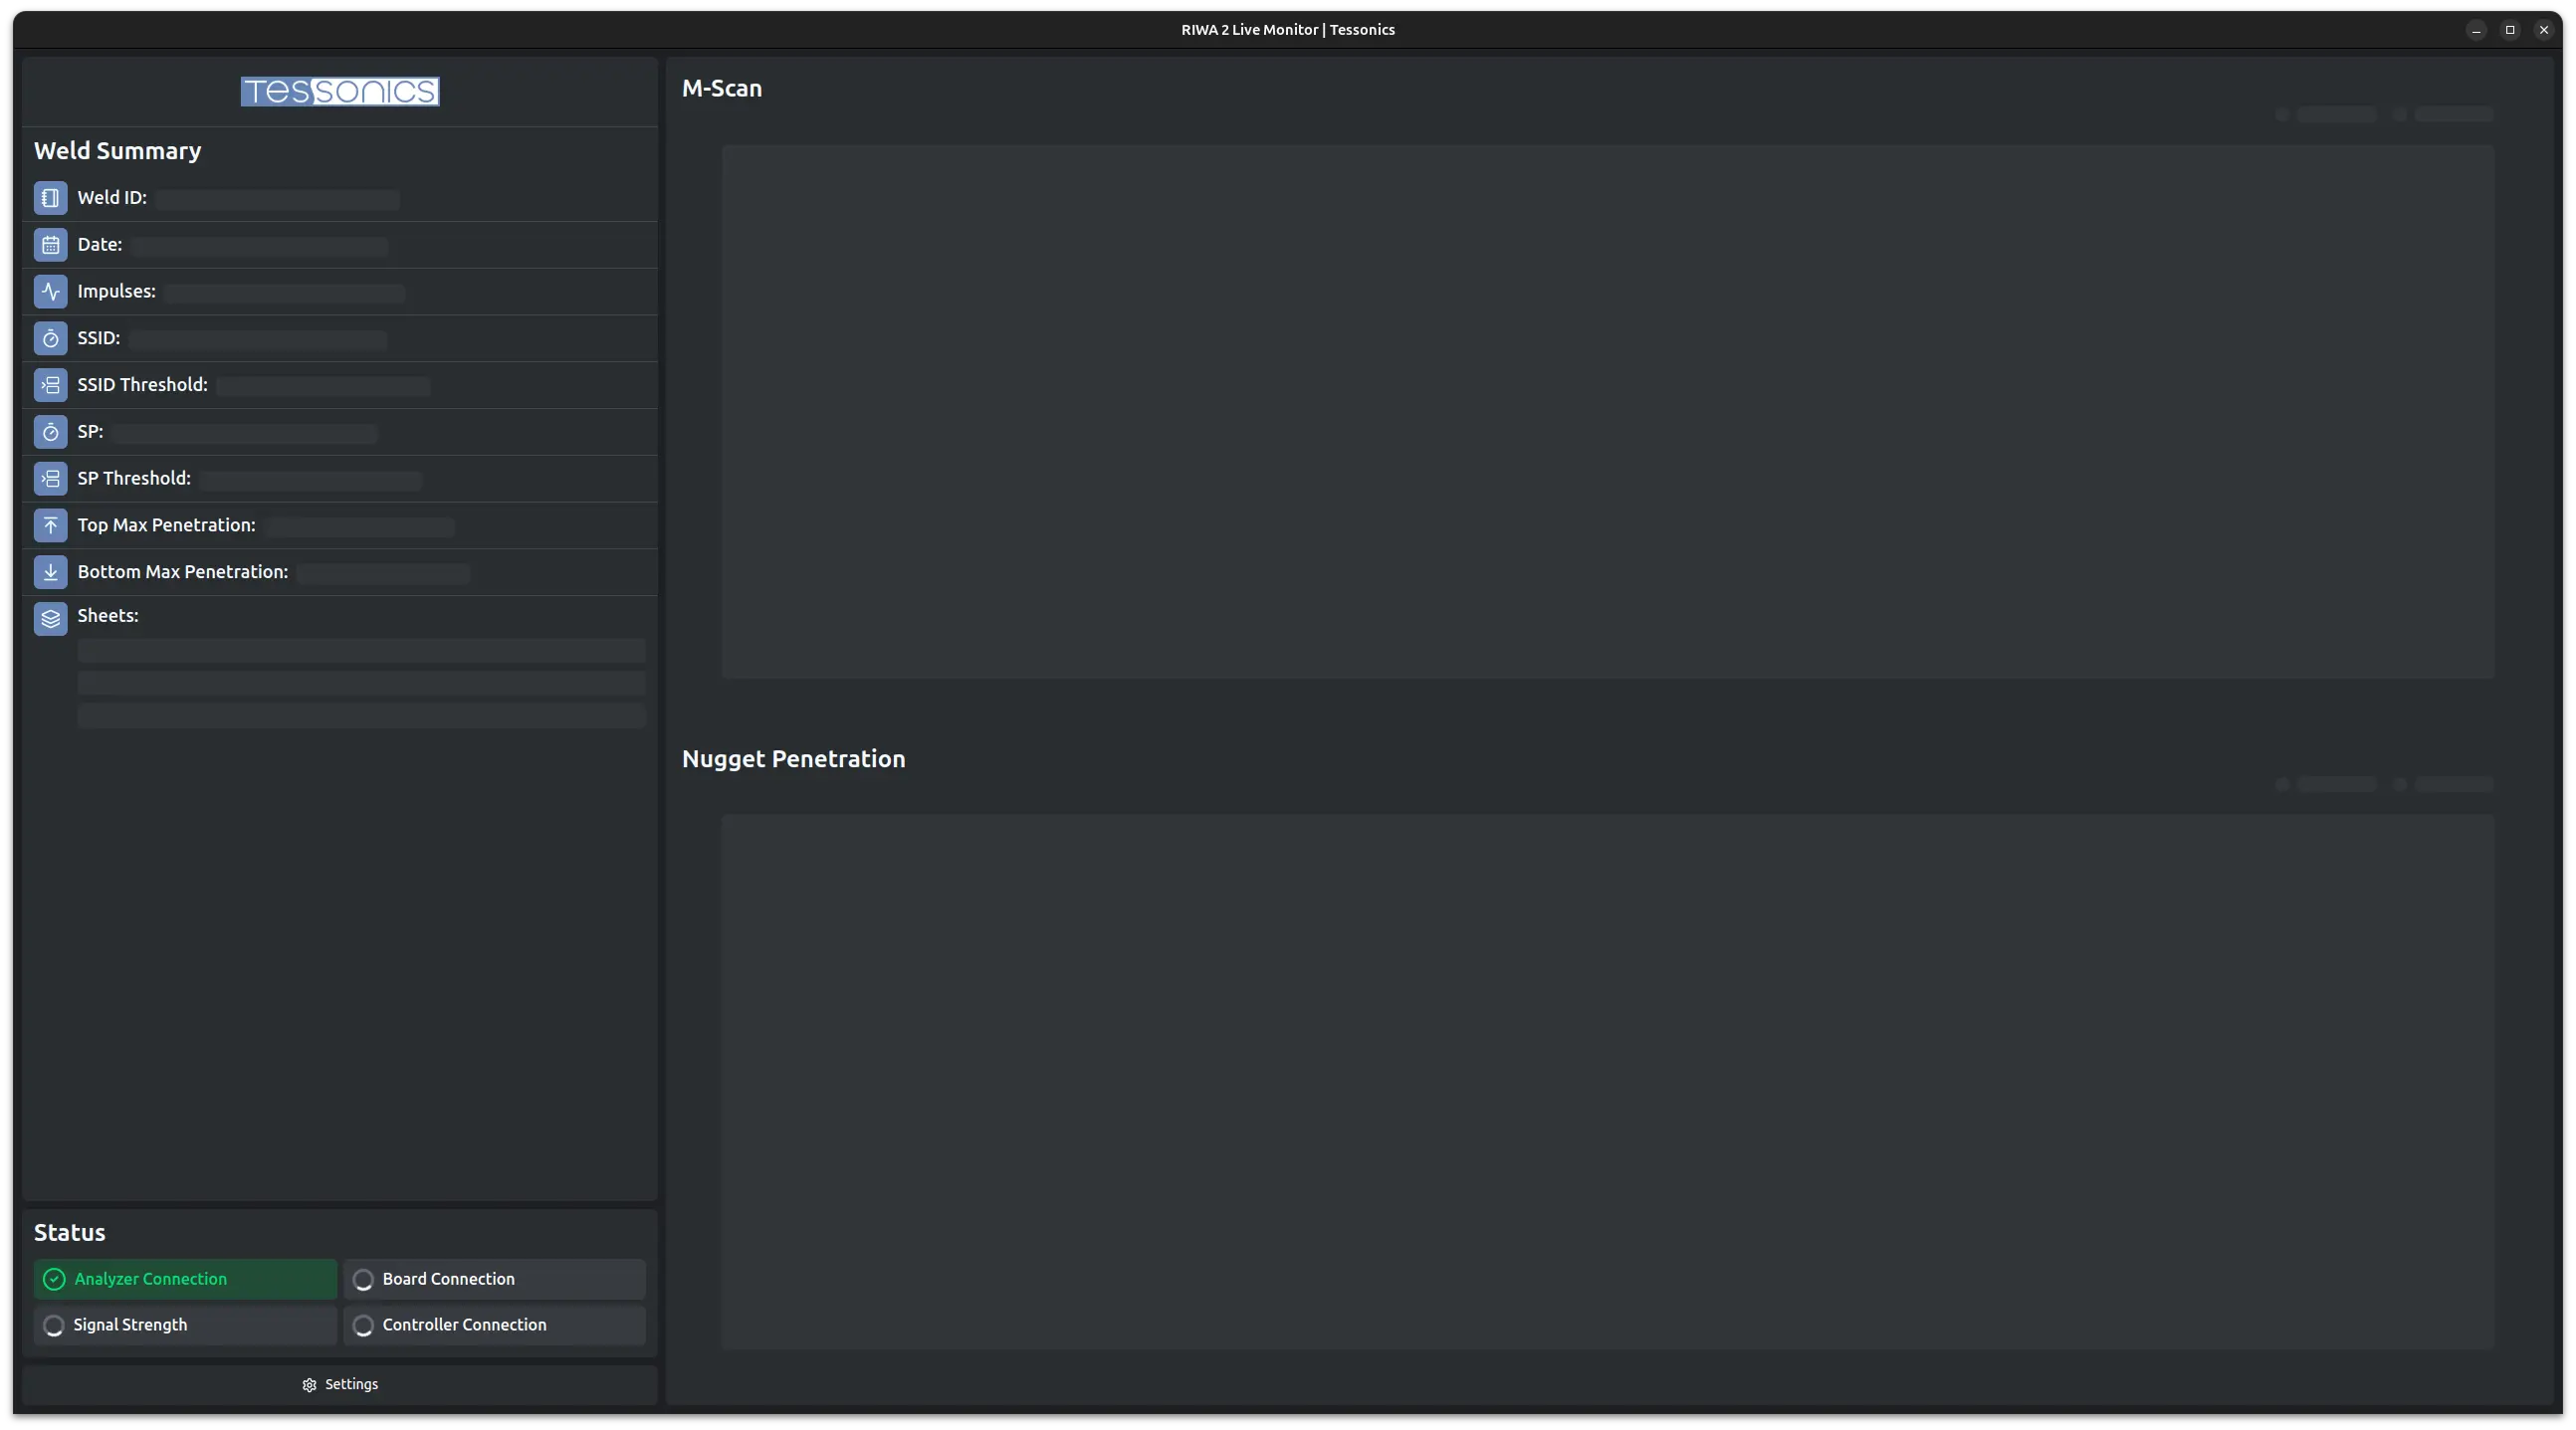
Once launched, the following screen will appear:
Status Indicators
The Live Monitor displays several real-time status indicators:
Analyzer Connection: Indicates whether the riwa_uac is actively connected and communicating with the Live Monitor.Board Connection: Shows the operational status of the Ultrasound Board. If disconnected, this will reflect an error state.Signal Strength: Reflects whether the Ultrasonic Calibration algorithm has successfully located gates and is receiving valid signals.Controller Connection: Displays whether the Weld Controller is connected and actively communicating with the riwa_uac.
Connecting to Live monitor
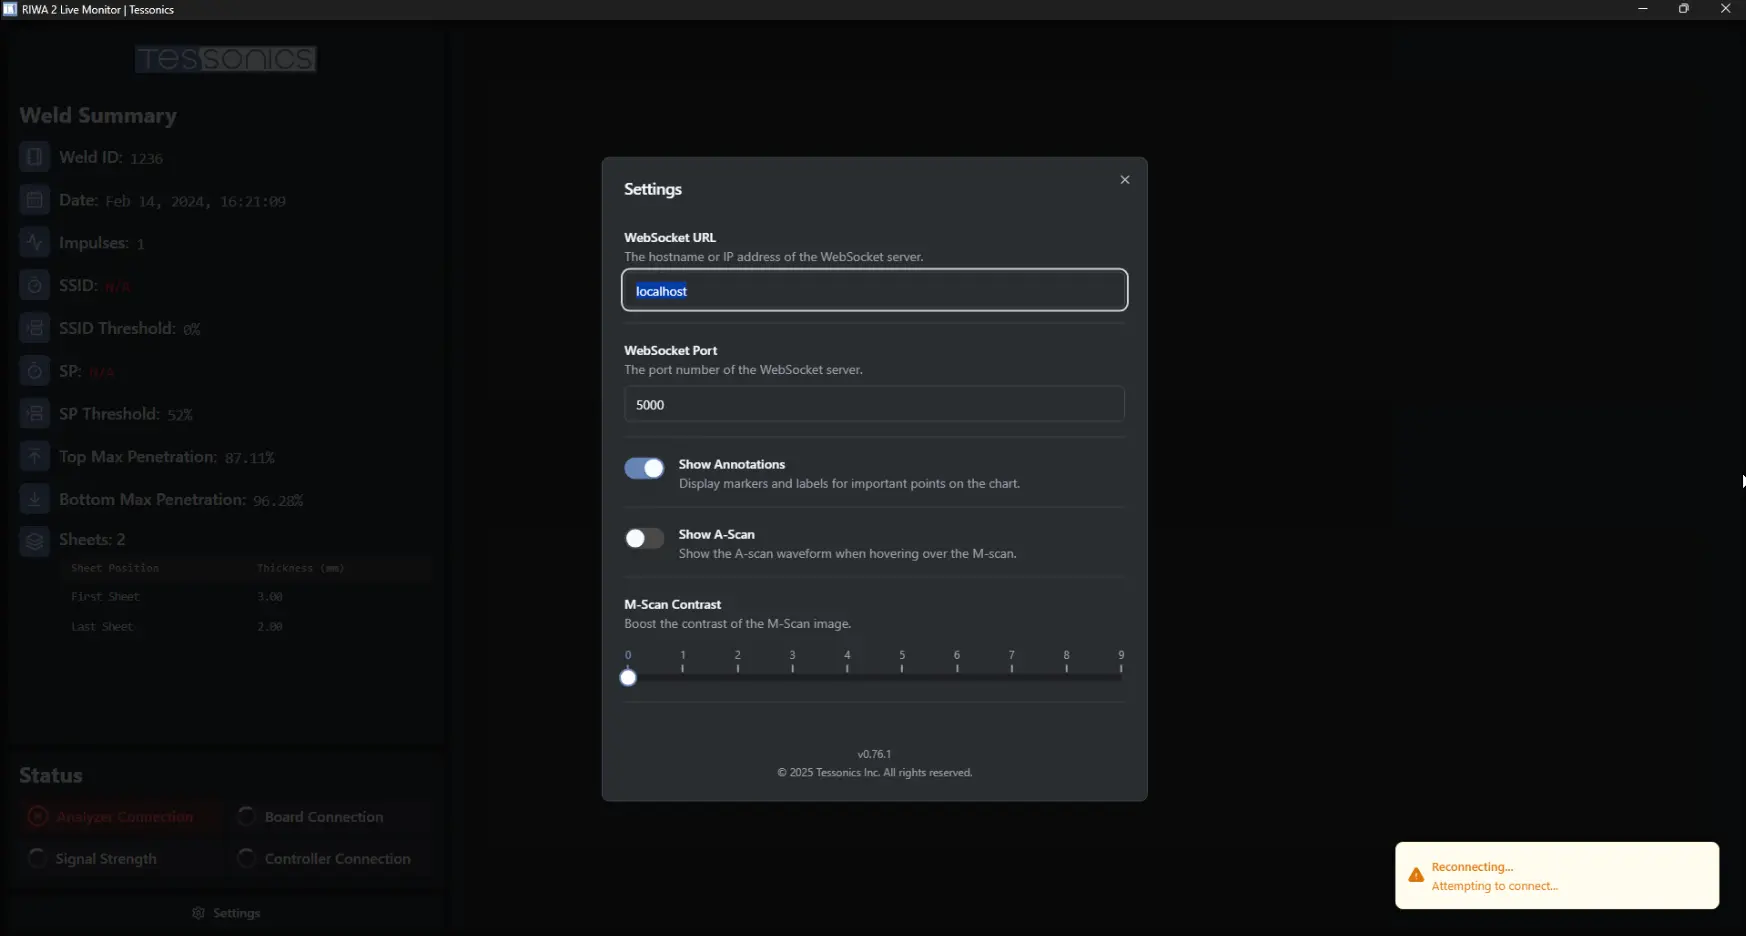
If the RIWA2 Live Monitor and the Obara App are running on different computers, you must configure the Live Monitor to connect to the correct system. To do this:
- Open
Settingswithin the Live Monitor located at the bottom left. - Locate the
WebSocket URLfield. - Enter the
IP addressof the computer where theriwa_uacis running. - If there is a problem connecting:
- Please check the
IP address. - Please check the
Port. - If both of these options dont work, It may be due to expired or outdated security certificates. In this case, Please contact Matthew Belanger at mb@tessonics.com to request updated certificates or further assistance.
- Please check the
Here is an example:
Once the RIWA2 Live Monitor is properly connected and configured, the following screen will appear afterwards:
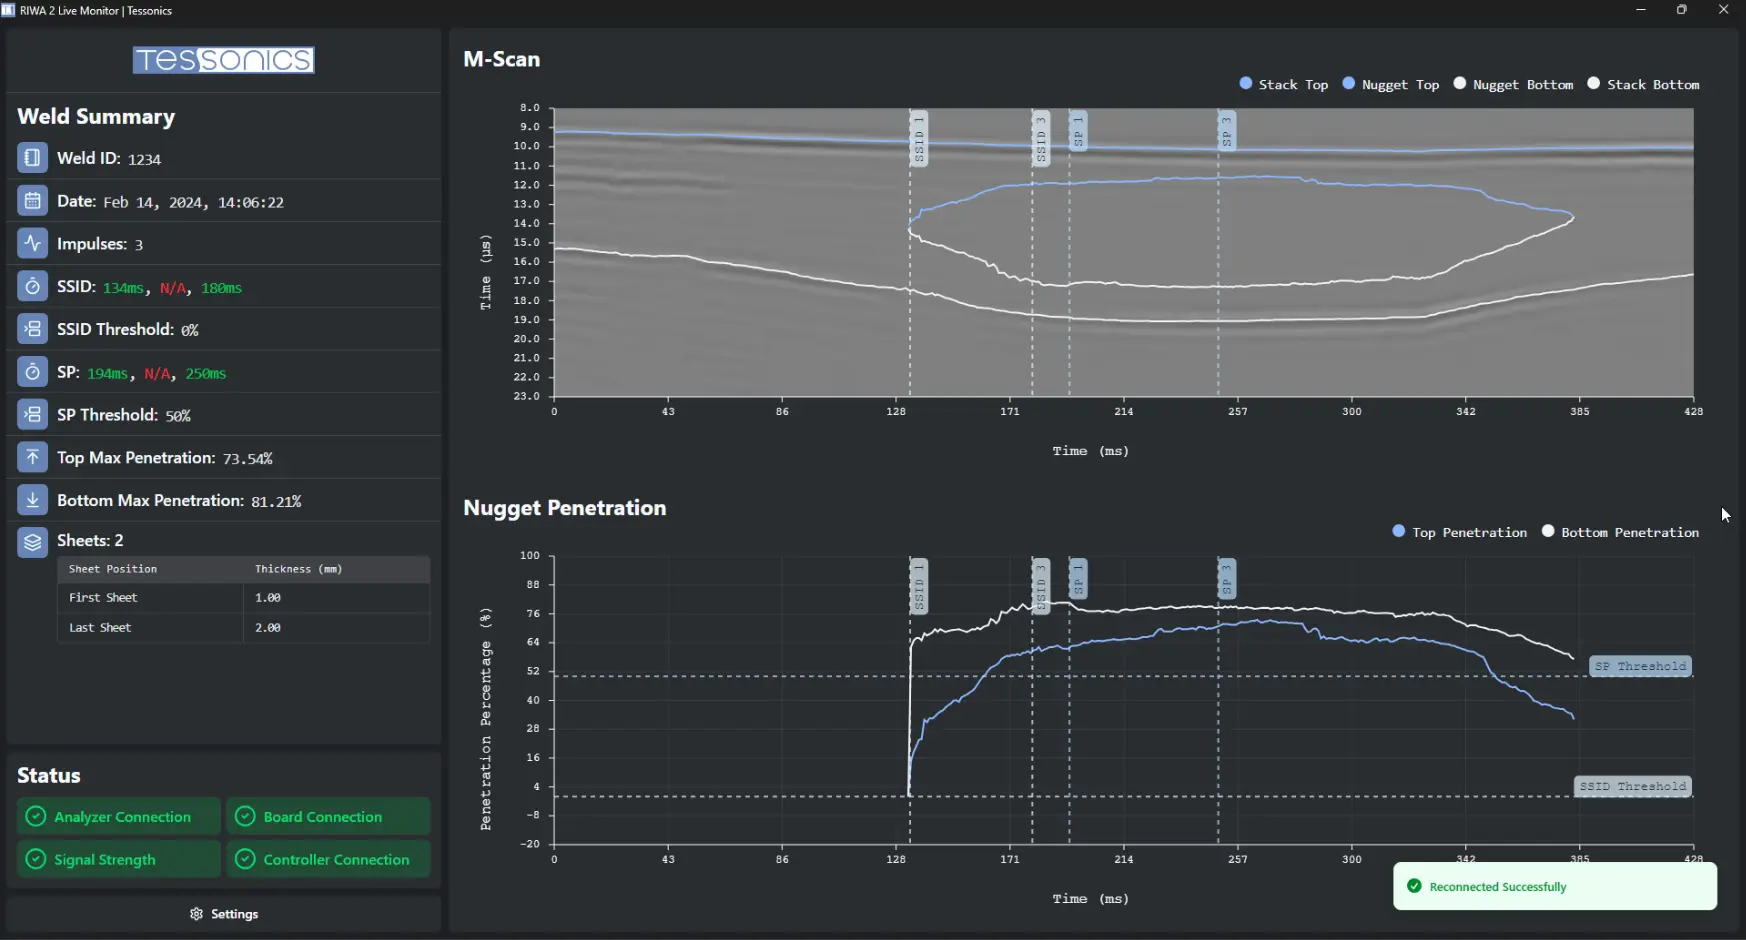
This screen is only shown after a weld has been performed and results are received from the system.
The statuses are updated when weld_id is received.
Viewing Logs
- v1.14.0 and Newer
- v1.0.0 to v1.14.0
- v0.257.0 and Earlier (Deprecated)
To view detailed logs generated by the RIWA UAC for debugging purposes:
- Open up the
Filesapplication. - Navigate to your
Homedirectory by clicking the option on the side bar. - On your keyboard, press
Ctrl+hto show hidden files and folders in the directory (ensure you can see files / folders starting with.). - Start by double clicking the folder called
.localto enter its directory. - From here, follow this file path:
/.local/tessonics/riwa2/logs. - Inside of the
logsdirectory, you will be able to view all logs generated by the RIWA UAC application.
Sort files by last modified to quickly locate the most recent logs.
You can also view logs live by running the following command in a terminal window:
riwa
This will present you with the RIWA UAC CLI tool which will provide the logs above in real time. For further documentation on the RIWA UAC CLI, refer to the embedded documentation.
To view detailed logs generated by the RIWA UAC for debugging purposes:
- Open a new terminal window.
- Run the following command to open the log directory in a file browser:
sudo nautilus /root/.local/tessonics/riwa2/logs/
This will open a file explorer window with the log files.
Sort files by last modified to quickly locate the most recent logs.
You can also view logs live by running the following command in a terminal window:
riwa
This will present you with the RIWA UAC CLI tool which will provide the logs above in real time. For further documentation on the RIWA UAC CLI, refer to the embedded documentation.
To view detailed logs generated by the TF Bridge and Obara App for debugging purposes:
- Open a new terminal window.
- Run the following command to open the log directory in a file browser:
sudo nautilus /root/.local/tessonics/riwa2/logs/
This will open a file explorer window with the log files.
Sort files by last modified to quickly locate the most recent logs.
Updating and Uninstalling
- v1.14.0 and Newer
- v1.0.0 to v1.14.0
- v0.257.0 and Earlier (Deprecated)
To apply updates or reinstall a newer version of the software, follow the following instructions:
Update RIWA UAC
Once inside the same directory as your new RIWA UAC version, open a terminal and run the following command and follow the provided instructions:
riwa-installer_obara_v{version_number}_linux_amd64 update
Uninstall RIWA UAC
To uninstall the RIWA UAC, inside of a terminal run the following command and follow the provided instructions:
riwa uninstall
To apply updates or reinstall a newer version of the software, follow the following instructions:
Update RIWA UAC
Once inside the same directory as your new RIWA UAC version, open a terminal and run the following command and follow the provided instructions:
sudo riwa-installer_obara_v{version_number}_linux_amd64 update
Uninstall RIWA UAC
To uninstall the RIWA UAC, inside of a terminal run the following command and follow the provided instructions:
sudo riwa uninstall
To apply updates or reinstall a newer version of the software:
- Uninstall the current version by running
sudo ./uninstall.shvia the terminal. - Update the software to the latest version by running
sudo ./update.shvia the terminal.
Always uninstall the previous version before updating to a new one. Skipping this step may result in leftover files or conflicting configurations.
For futher documentation on using the RIWA UAC, please refer to the UAC Auto Launch, Disk Monitor, and CLI Tool documentation and filter by the version you are using.