Instructions for installing RIWA-Cluster
RIWA-Cluster Setup guide
This document contains instructions on how to install and setup RIWA2-Cluster provided all of the OS and hardware requirements are met according to the specifications provided.
Some steps need to be performed every time there's an update, while others are part of a one-time setup.
Operating System Requirements
- OS: Ubuntu 22.04.5 LTS (64-bit).
- Kernel: Must be running Linux kernel version between
6.5.0-15-genericand6.8.0-52-generic. - Architecture: x86_64 (Intel/AMD systems only).
If your current kernel version is outside the supported range, refer to the Kernel Rollback Guide for detailed instructions.
Running Commands from the Correct Folder
For the remainder of the instructions, you will be executing commands in the Linux terminal.
To ensure the commands function correctly, you must open the terminal from the folder that contains all required software packages. Follow these steps:
- Open your file browser and navigate to the folder where the software packages are located.
- Right-click anywhere within the folder (not on a specific file).
- Select Open in Terminal from the context menu.
This will open a terminal window with the current working directory set appropriately.
Installing RIWA2 Software (One-Time Setup + Main Packages)
You will receive a ZIP archive named:
RIWA2-General-v{version_number}.zip
Extract the contents of the ZIP archive.
Where {version_number} refers to the version of the software.
This archive contains the following installation scripts:
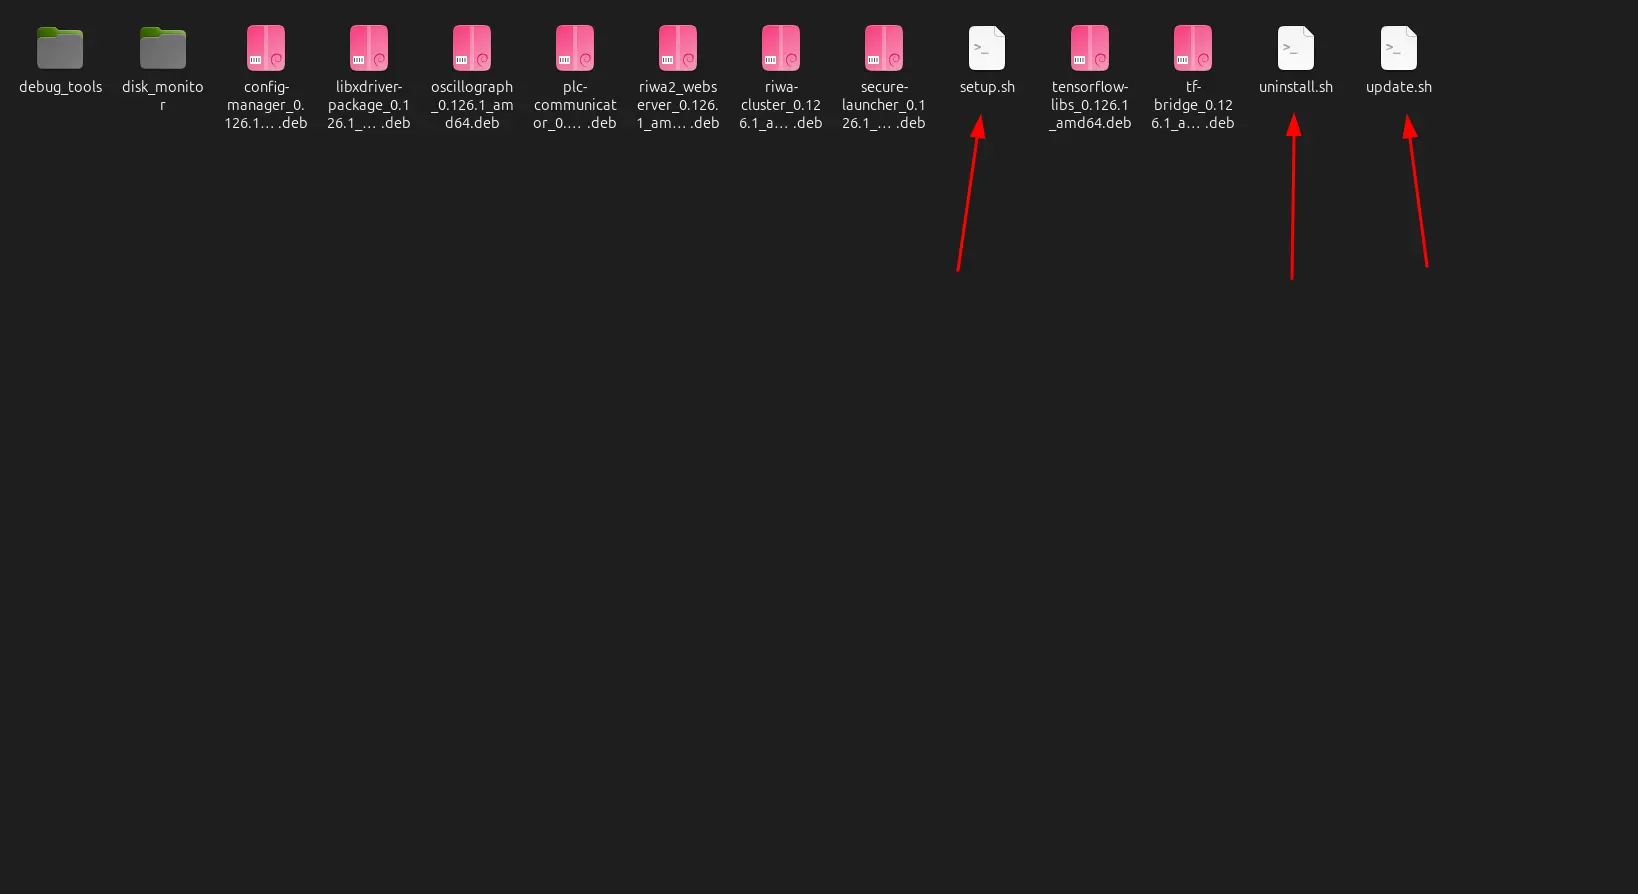
setup.sh- Installs one-time system dependencies (GCC 13, Advantech drivers).update.sh- Updates the main RIWA2 software packages.uninstall.sh- Uninstalls the RIWA2 software packages.
As show in the image below:
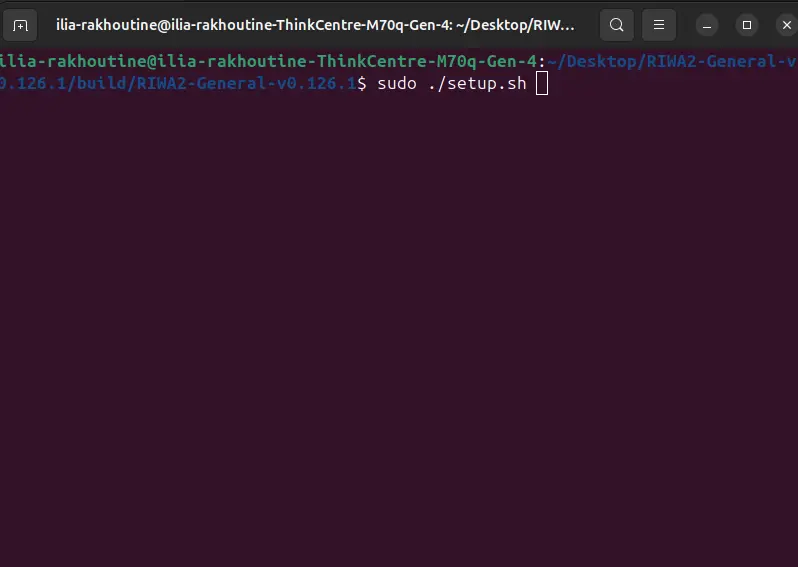
Right click inside that folder and open a terminal then run:
sudo ./setup.sh
Running the software
After installation, follow the steps below to run the RIWA-Cluster.
Running docker
Similarly to the previous setup steps you are going to need to navitage to a folder called .riwa2_webserver, this folder will be automatically located inside your home directory
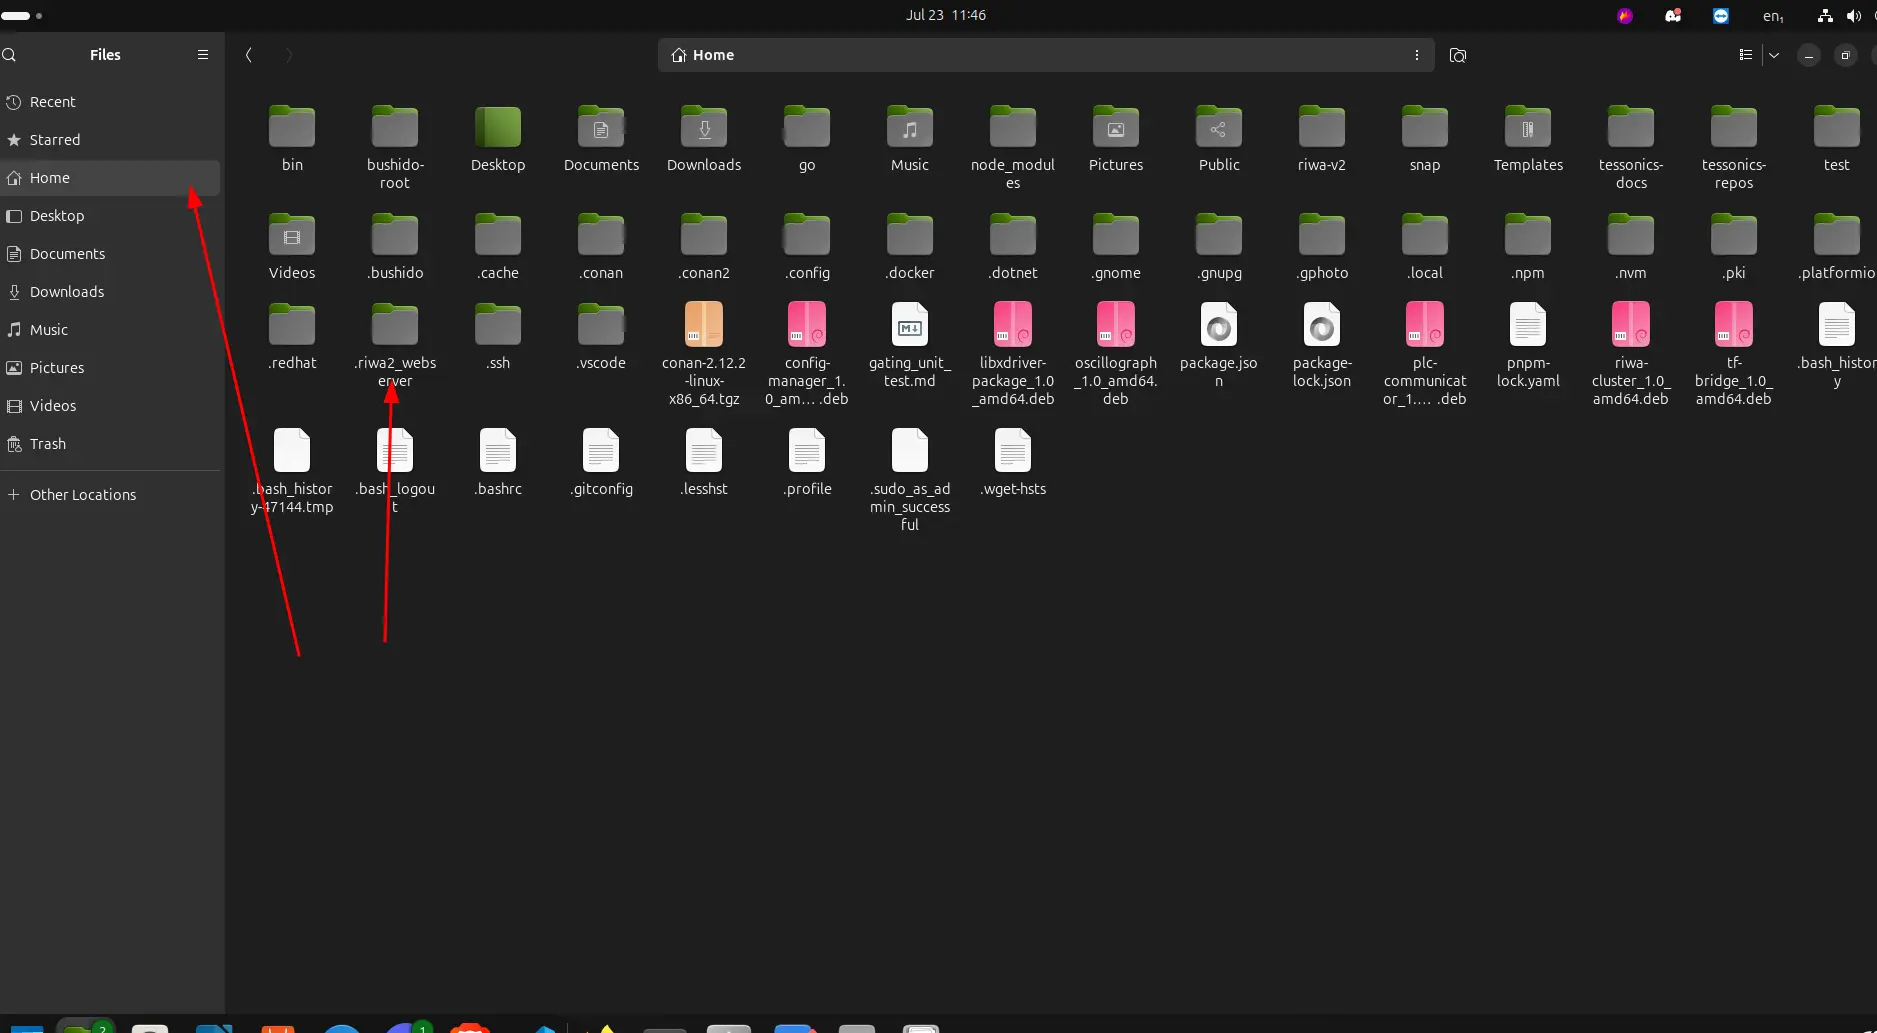
Open this folder inside it should look like this:
This folder is different from the folder that you will be running and executing the remaining commands from.
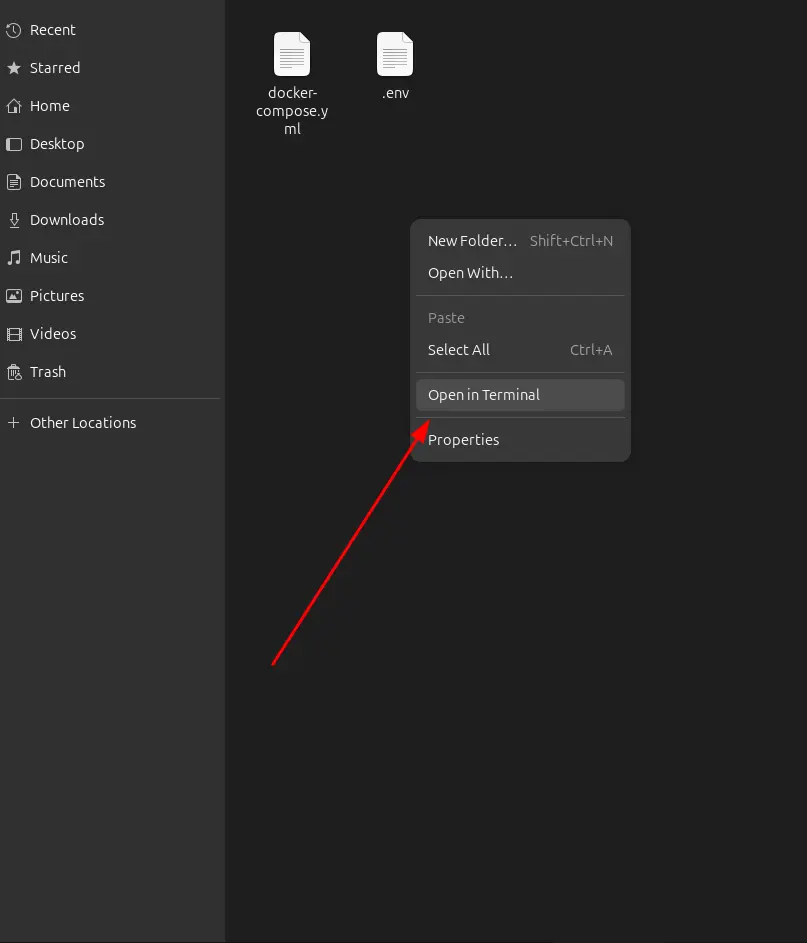
Once insde, right click, and run the following command:
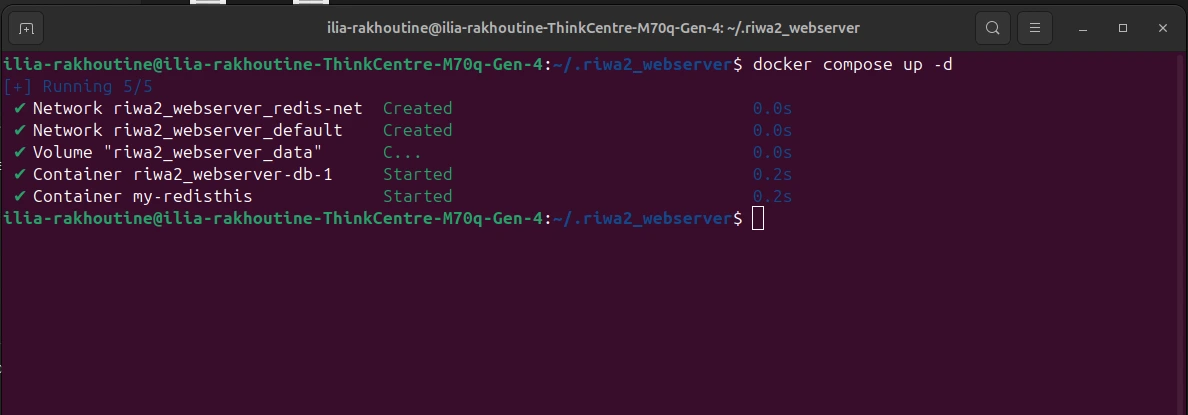
docker compose up -d
The terminal should output something similar to this:
[+] Running 5/5
 ✔ Network riwa2_webserver_redis-net  Created                              0.0s
 ✔ Network riwa2_webserver_default    Created                              0.0s
 ✔ Volume "riwa2_webserver_data"      C...                                 0.0s
 ✔ Container riwa2_webserver-db-1     Started                              0.2s
 ✔ Container my-redisthis             Started                              0.2s
How it would look in practice:
Launch TF Bridge
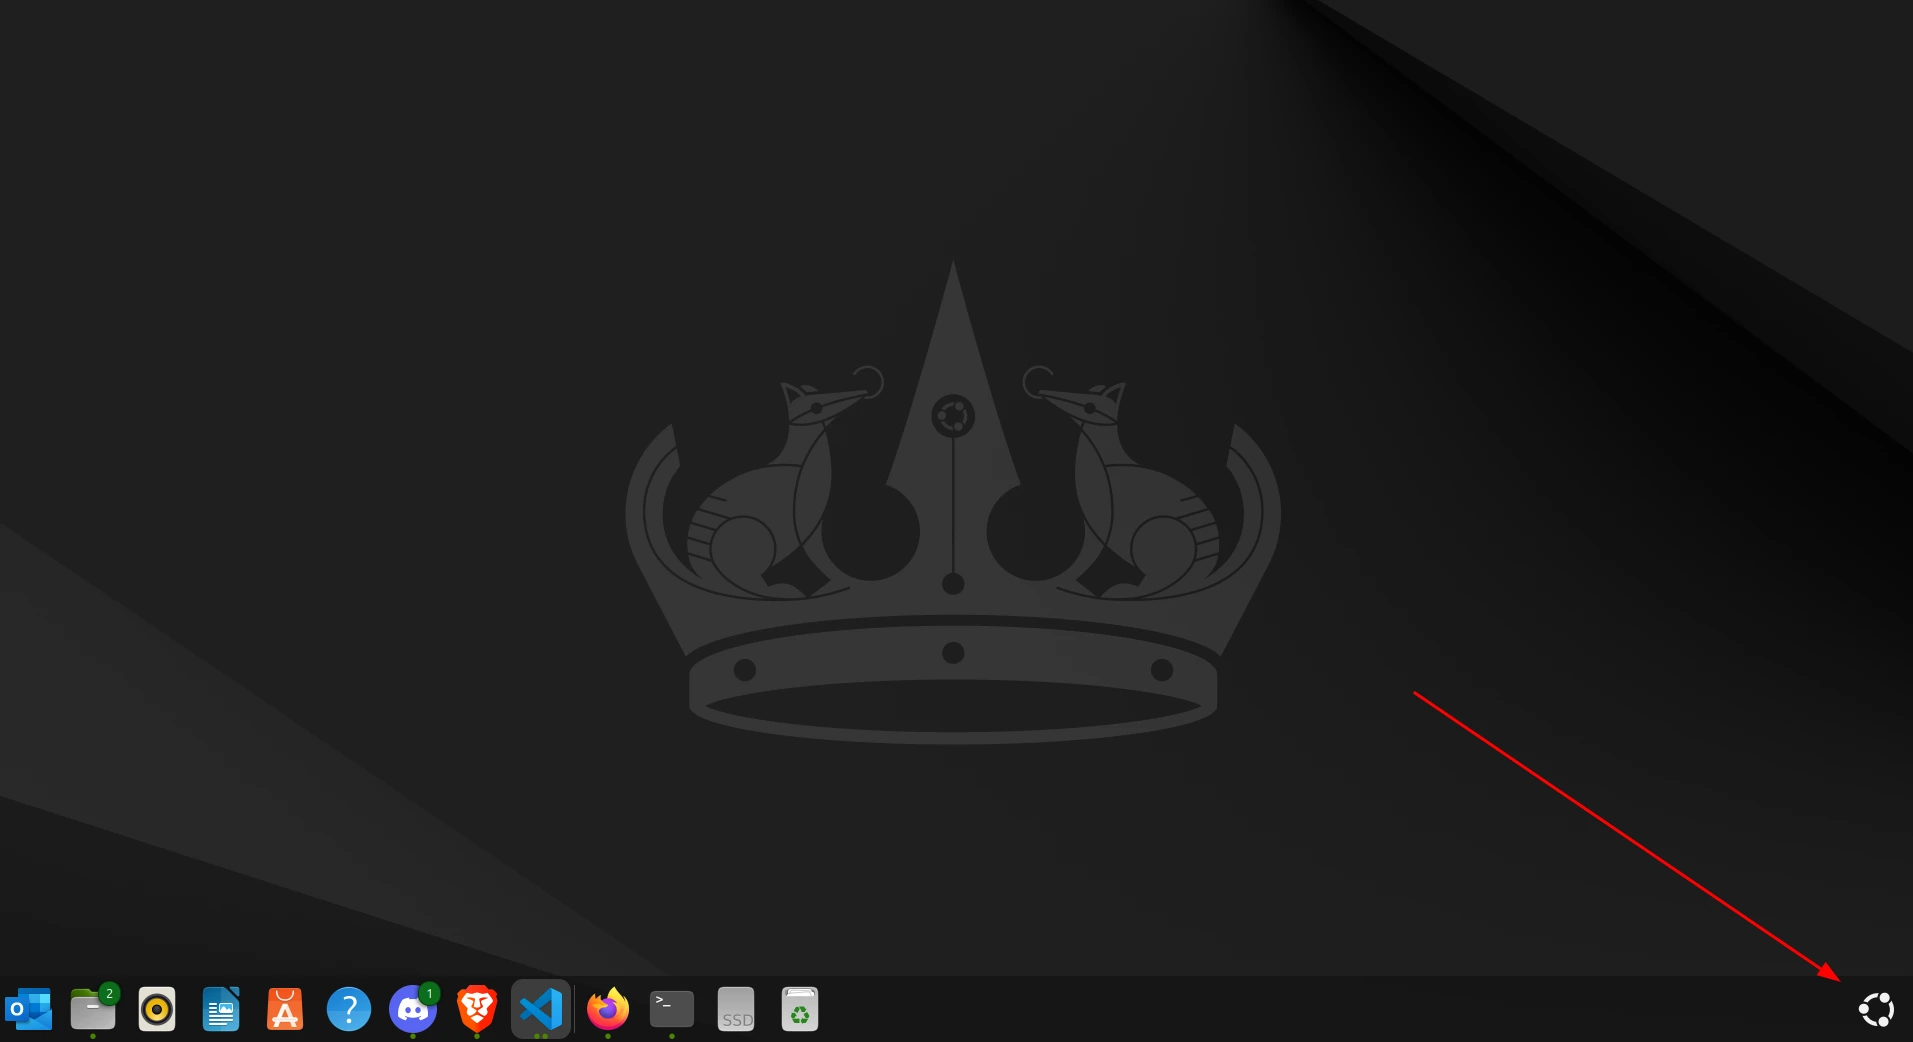
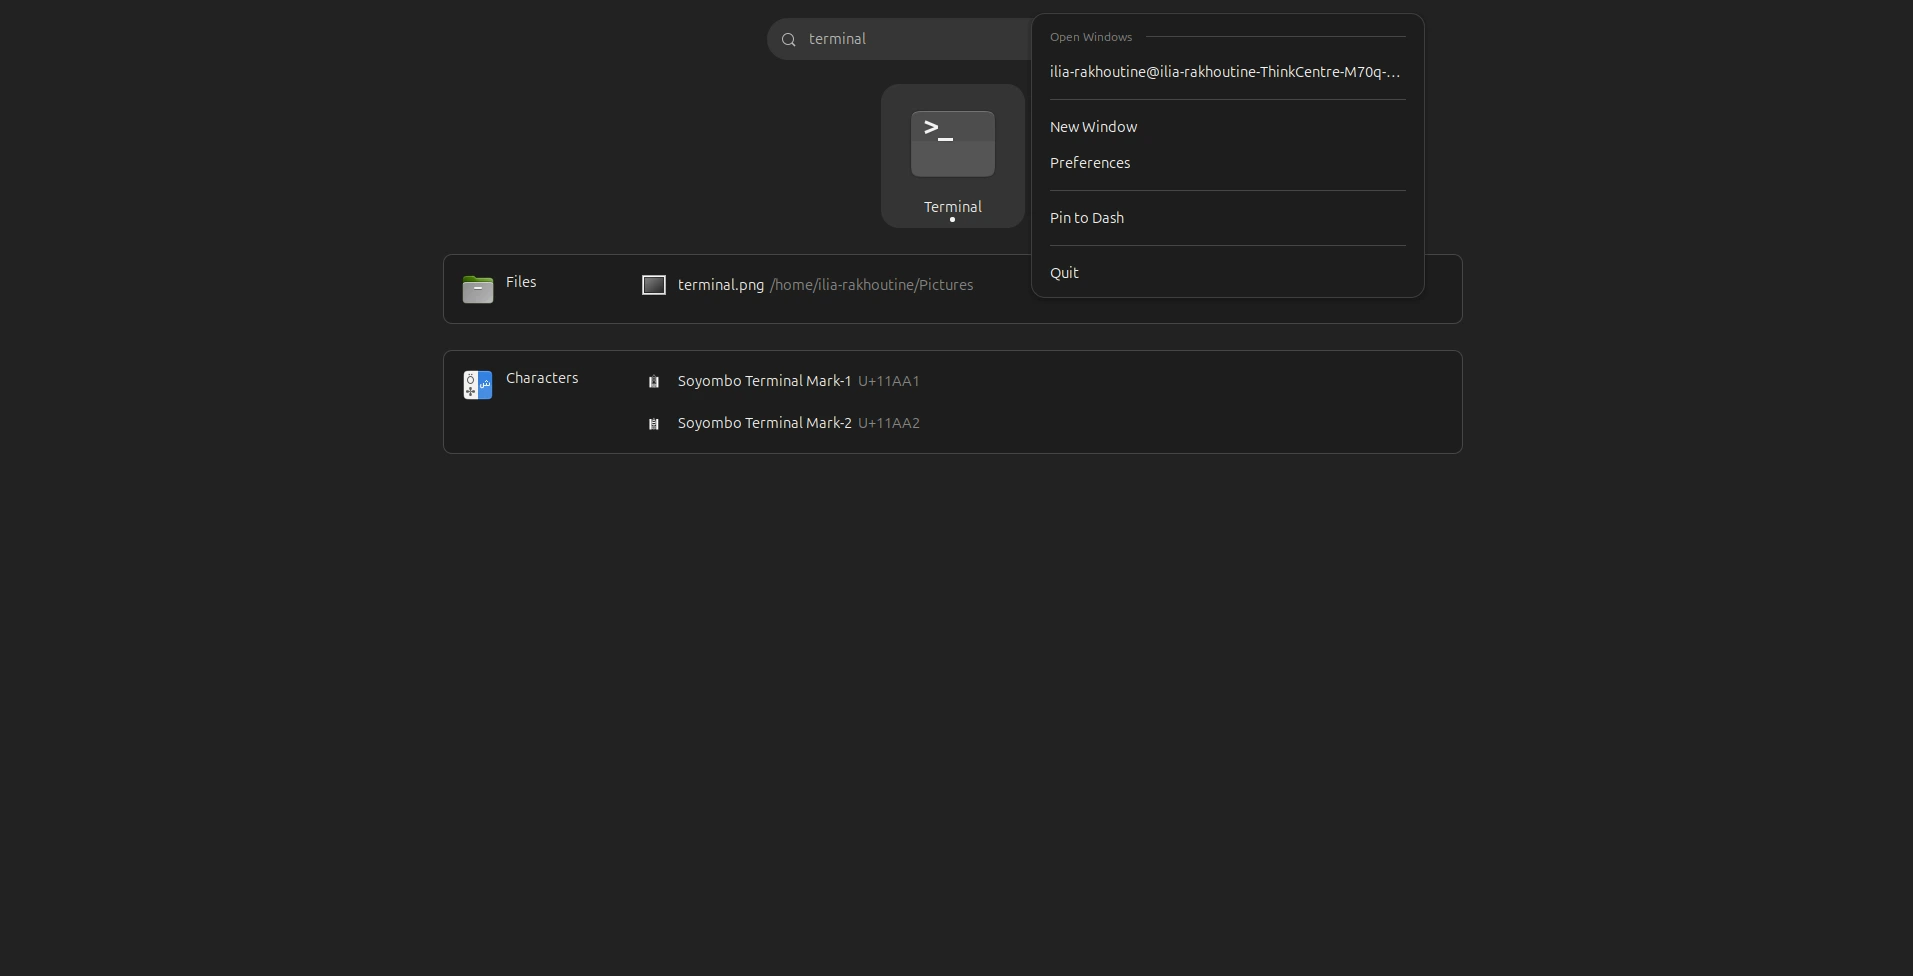
To open a terminal simply press the highlighted button and inside the search bar type "Terminal", after that left click on the icon and press New Window
Then, once inside run:
sudo tf_bridge_app
Wait until you see a startup message similar to the following:
[2025-07-23 15:16:07.688] [TF Bridge] [info] -----------------------------------------------
    Tessonics RIWA - Tensorflow TCP Bridge
-----------------------------------------------

[2025-07-23 15:16:07.688] [TF Bridge] [info] Tensorflow TCP Segmentation Bridge Version : Wed Jun 25 15:35:08 2025
[2025-07-23 15:16:07.688] [TF Bridge] [info] Tensorflow Version: 2.8.4-dev20221115
[2025-07-23 15:16:07.688] [TF Bridge] [info] OpenCV Version: 4.8.1
[2025-07-23 15:16:07.688] [TF Bridge] [info] Model Type: standard
2025-07-23 15:16:30.077491: I tensorflow/core/platform/cpu_feature_guard.cc:151] This TensorFlow binary is optimized with oneAPI Deep Neural Network Library (oneDNN) to use the following CPU instructions in performance-critical operations:  AVX2 FMA
To enable them in other operations, rebuild TensorFlow with the appropriate compiler flags.
[2025-07-23 15:16:30.142] [Standard #1] [info] Opening Server On Port: 27015
[2025-07-23 15:16:30.142] [Standard #1] [info] Listening for connections on port: 27015
[2025-07-23 15:16:30.142] [Standard #1] [info] Connected Over TCP
[2025-07-23 15:16:30.142] [Standard #1] [info] Connected!
[2025-07-23 15:16:30.619] [TF Bridge] [debug] Elapsed Inference Time: 476ms
[2025-07-23 15:16:30.621] [Standard #1] [debug] Successfully created TFStatus.txt
Pay special attention to the final three lines:
[2025-04-15 11:46:36.105] [Standard #1] [info] Connected Over TCP
[2025-04-15 11:46:36.105] [Standard #1] [info] Connected!
[2025-04-15 11:46:36.465] [Standard #1] [debug] Elapsed Inference Time: 359ms
Please note that it will hang for a minute or so to initialize, this is normal.
These indicate that the server has successfully started and is ready.
Launch Web-Server
Open a new terminal and run:
riwa2_webserver
When running this command, there are also different inputs. You can view them by running this command:
riwa2_webserver -help
It should look like this:

To clear the database, run the command as such:
riwa2_webserver -reset-db
Once the server is running, your terminal should output this message:
2025-08-05 14:08:54 INF ==================================================
2025-08-05 14:08:54 INF ADMIN SETUP REQUIRED
2025-08-05 14:08:54 INF ==================================================
2025-08-05 14:08:54 INF No admin users found in the system.
2025-08-05 14:08:54 INF Please use the following invitation to create an admin account:
2025-08-05 14:08:54 INF
2025-08-05 14:08:54 INF Email: admin@tessonics.com
2025-08-05 14:08:54 INF Registration URL: https://localhost:3001/register?token=47dd46c3a66c9bc5fb070bdca641a928484ccd5ed88d53b97c0584dd36e8ba19
2025-08-05 14:08:54 INF Expires: 2025-08-12 10:21:45 UTC
2025-08-05 14:08:54 INF
2025-08-05 14:08:54 INF After creating the admin account, this message will no longer appear.
2025-08-05 14:08:54 INF ==================================================
2025-08-05 14:08:54 DBG Using file-based TLS certificates: cert=../../../tls_cert_generator/certs/riwa2/RIWA2Webserver/RIWA2Webserver.pem, key=../../../tls_cert_generator/certs/riwa2/RIWA2Webserver/RIWA2Webserver-key.pem

2025/08/05 14:08:54 /home/ilia-rakhoutine/riwa-v2/web_apps/non_adaptive/backend/routes/auth/middleware.go:331
[0.511ms] [rows:0] DELETE FROM "sessions" WHERE expires_at < '2025-08-05 14:08:54.098' OR is_active = false

 ┌───────────────────────────────────────────────────┐
 │                 RIWA2 Web Server                  │
 │                   Fiber v2.52.9                   │
 │                 https://[::]:8080                 │
 │                                                   │
 │ Handlers ........... 268  Processes ........... 1 │
 │ Prefork ....... Disabled  PID ............ 194883 │
 └───────────────────────────────────────────────────┘
Pay attention to these special lines
2025-08-05 14:08:54 INF ==================================================
2025-08-05 14:08:54 INF ADMIN SETUP REQUIRED
2025-08-05 14:08:54 INF ==================================================
2025-08-05 14:08:54 INF No admin users found in the system.
2025-08-05 14:08:54 INF Please use the following invitation to create an admin account:
2025-08-05 14:08:54 INF
2025-08-05 14:08:54 INF Email: admin@tessonics.com
2025-08-05 14:08:54 INF Registration URL: https://localhost:3001/register?token=47dd46c3a66c9bc5fb070bdca641a928484ccd5ed88d53b97c0584dd36e8ba19
2025-08-05 14:08:54 INF Expires: 2025-08-12 10:21:45 UTC
2025-08-05 14:08:54 INF
2025-08-05 14:08:54 INF After creating the admin account, this message will no longer appear.
2025-08-05 14:08:54 INF ==================================================
This indicates that you will need to register as an admin inside the webserver. Simply click the provided link and sign up. For more details, refer to the Admin Dashboard documentation.
Launch RIWA-Cluster
Once both of those applications are running in their respective terminals, run this command in a new terminal:
sudo riwa-cluster
If all steps provided are executed properly, this terminal will now output the data provided by the RIWA-Cluster. This should include a log of all the connected weld analyzer boards being initialized, and the log should look something like this:
[2025-07-24 11:13:20.371] [Weld Analyzer1] [warning] Security passed.
[2025-07-24 11:13:20.378] [Weld Analyzer1] [debug] FPGA Version: RIWA            HARDWARE        DATE:2021_12_20 REV:02.00.00    FIRMWARE        DATE:2025_07_01 REV:02.01.00
[2025-07-24 11:13:20.378] [Weld Analyzer1] [info] Set US BOARD TIMEOUT TO 400ms
[2025-07-24 11:13:20.380] [Weld Analyzer1] [info] Opening tf bridge connection
[2025-07-24 11:13:20.381] [Weld Analyzer1] [info] Pre-verification status: Passed
[2025-07-24 11:13:20.381] [Weld Analyzer1] [info] Pre-verification status: Passed
[2025-07-24 11:13:20.384] [Weld Analyzer1] [info] WebSocket connected to 127.0.0.1:27015
[2025-07-24 11:13:20.384] [Weld Analyzer1] [info] Starting Weld Analyzer