Date and Time
- 4.6.0 and Newer
- 4.5.0 and Earlier
Since version 4.6.0, this setting was removed from the Array Explorer software due to complications in certain cases. Instead, this feature can be used via the Windows Control Panel.
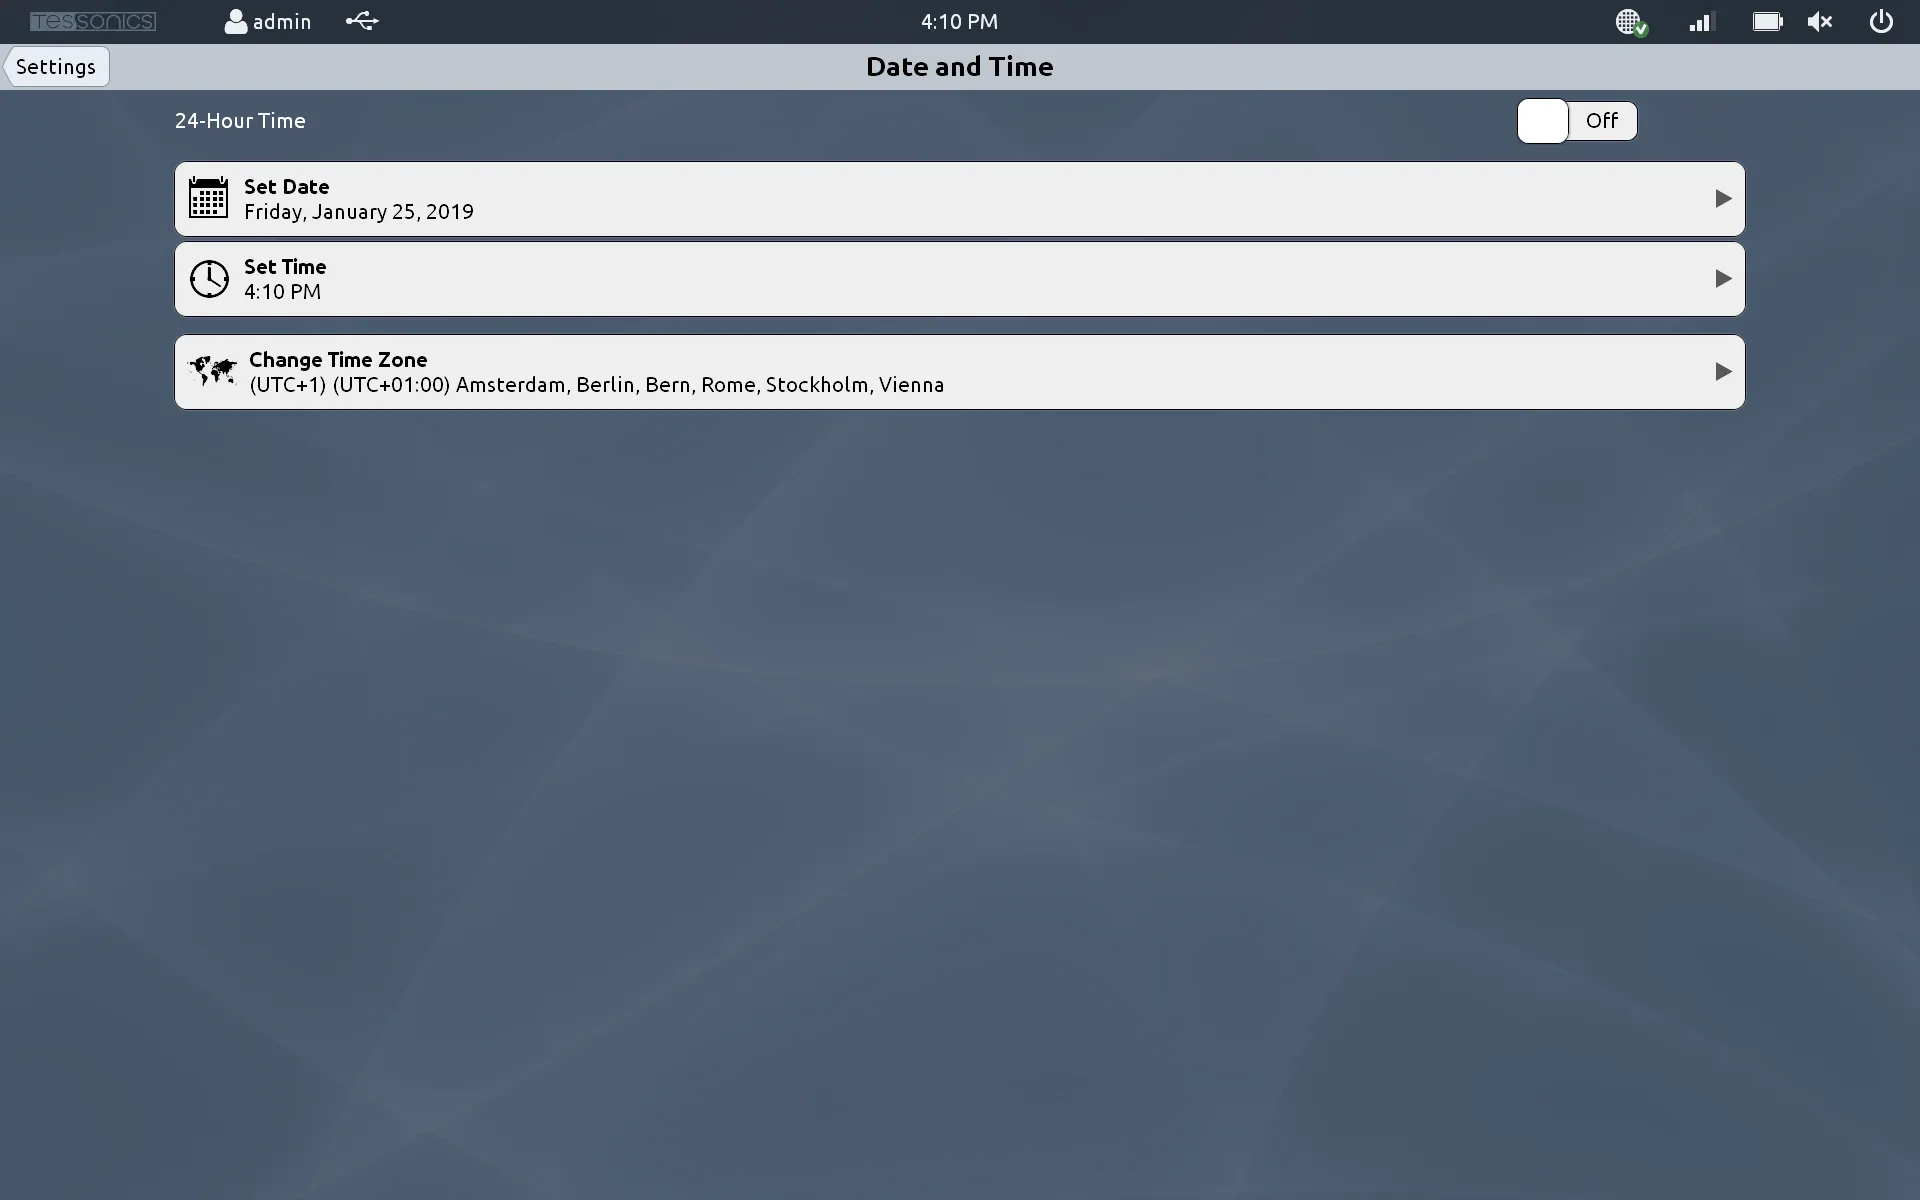
This is where you can set the date, time and timezone.
You must be logged in as an admin account to view this setting.
For all of these settings, you must click Apply in order for the changes to come in effect. If you click the Date And Time arrow at the top left, it will go back without saving.
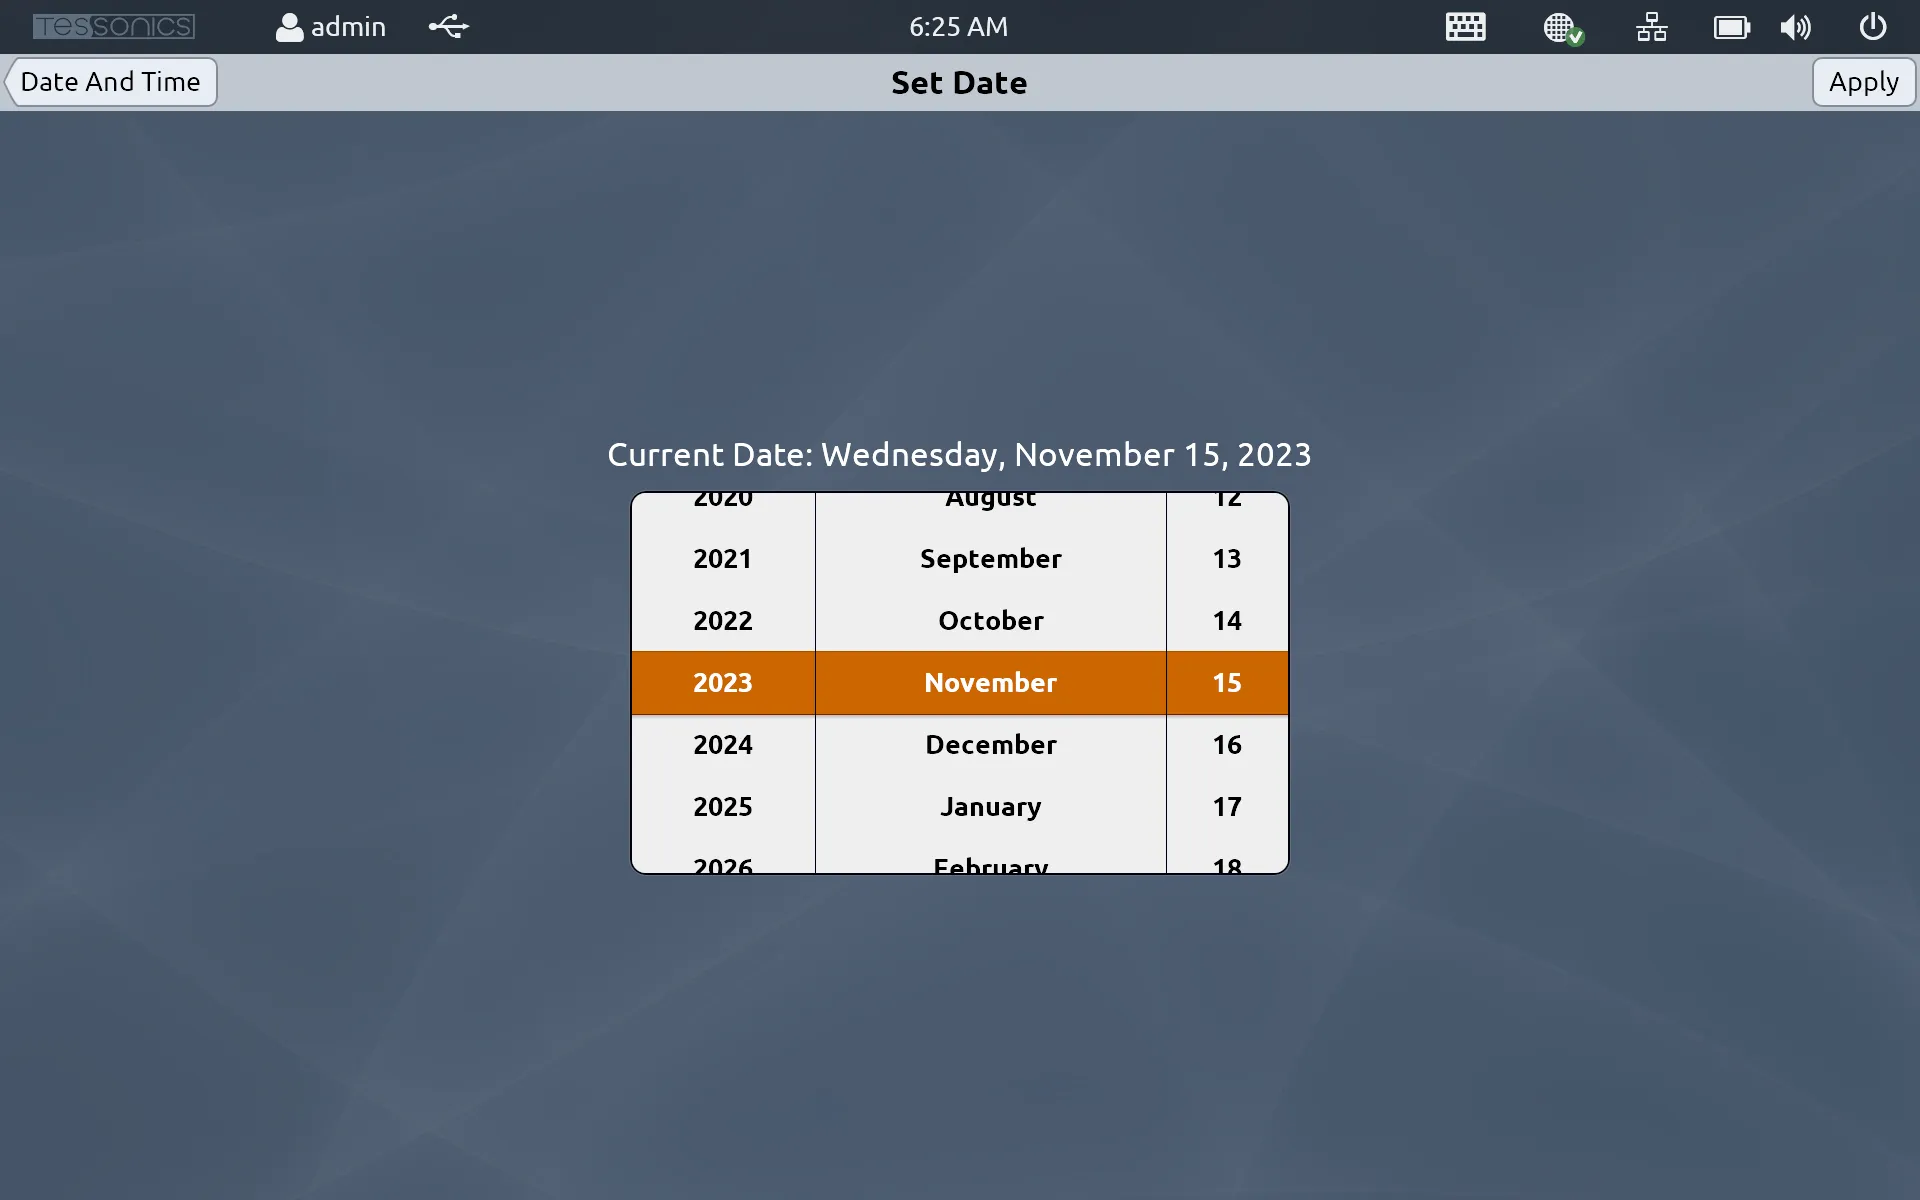
Set Date
- 4.6.0 and Newer
- 4.5.0 and Earlier
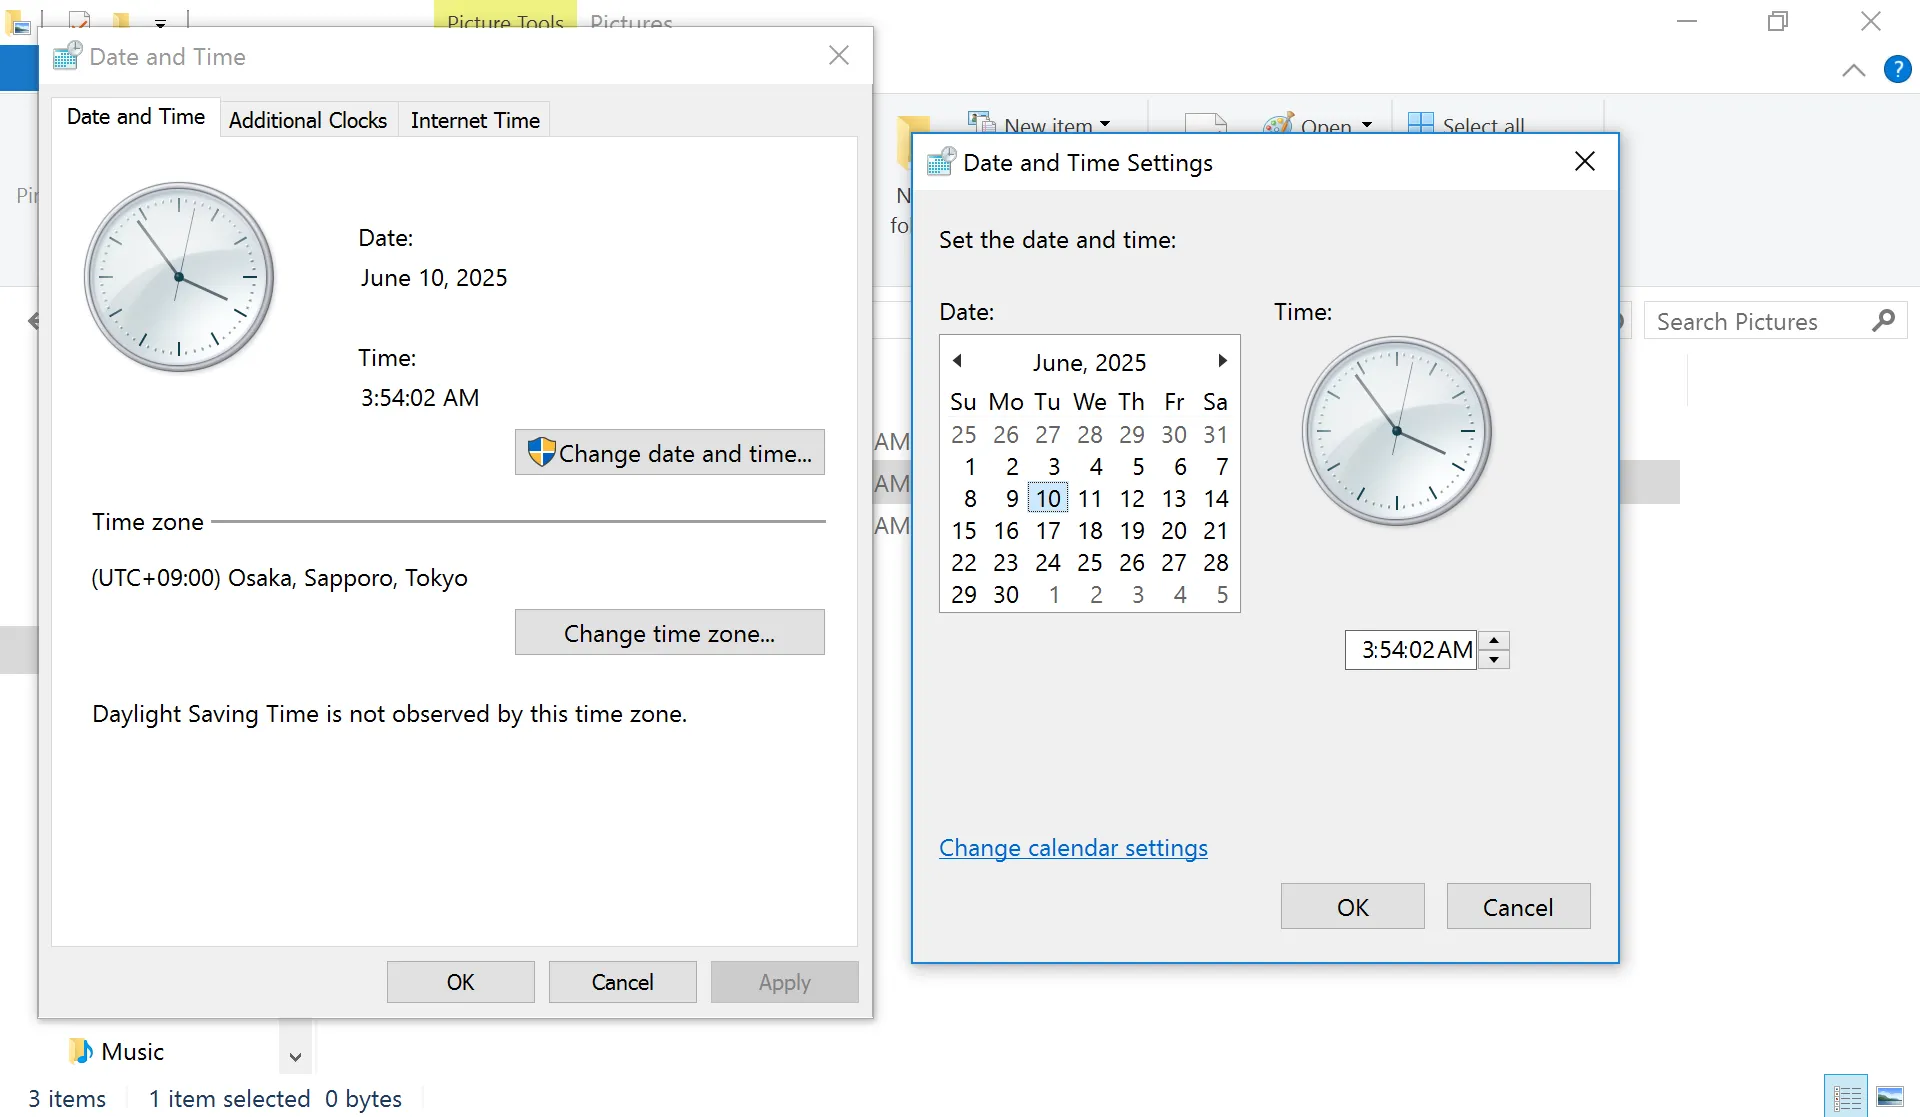
Modify the date by doing the following:
- Select Control Panel, then select Clock, Language and Region.
- Select Date and Time. A new window should pop up.
- Hit Change date and time.... A new window should appear, allowing you to change both the date and the time to your preferences.
- Hit Ok, then Apply and Ok on the second window.
The date and/or time should be changed.
Under the Set Date menu, you can scroll through available days of the week, month and year like a standard calendar. Click and drag with a mouse, or touch and drag with a stylus pen or your finger to scroll through the available options. When you're done, click Apply at the top right of the screen.
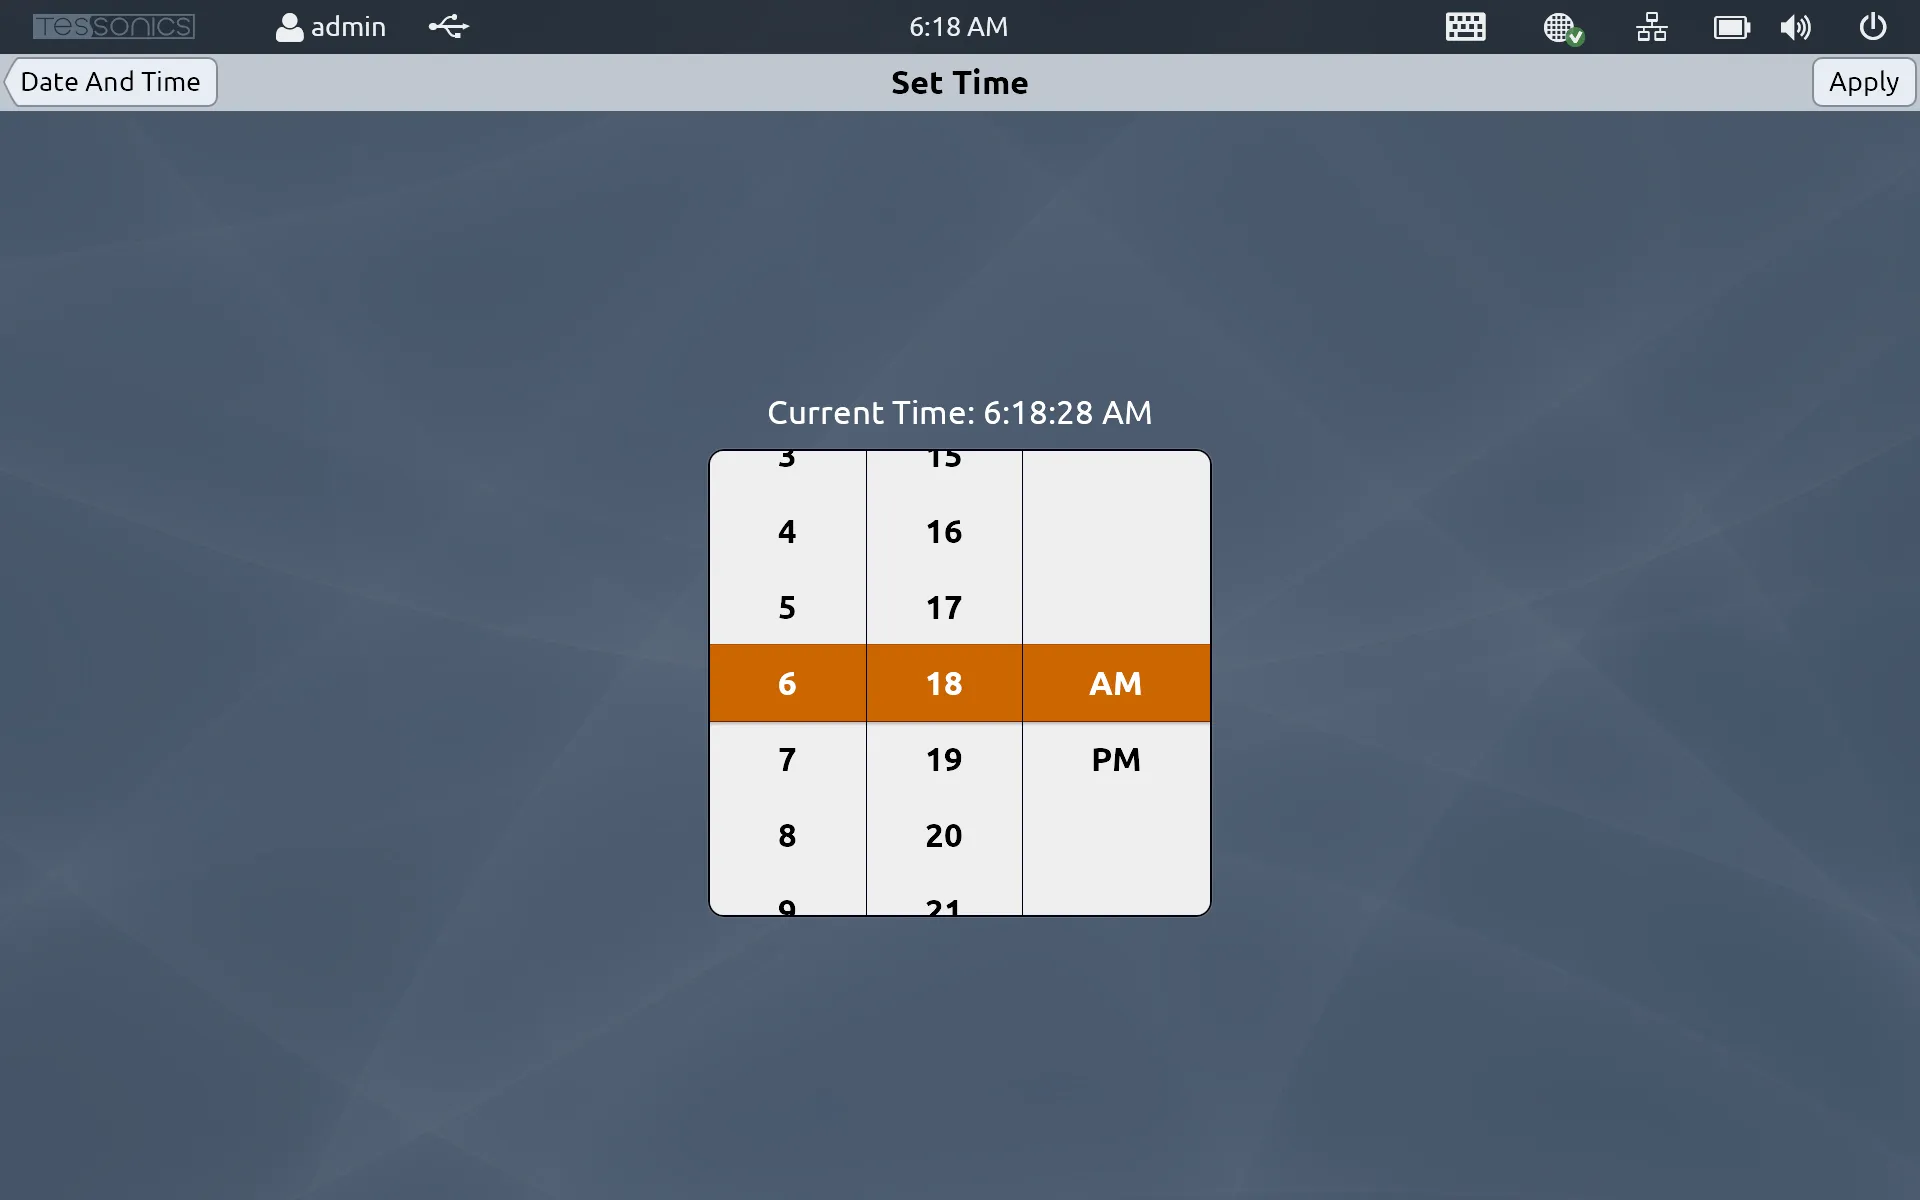
Set Time
- 4.6.0 and Newer
- 4.5.0 and Earlier
Follow the above steps to change the time.
Under the Set Time menu, you can go through a similar process as setting the date to set the exact time. You also have an option to change to a 24-hour system. Click Apply when done to save your changes.
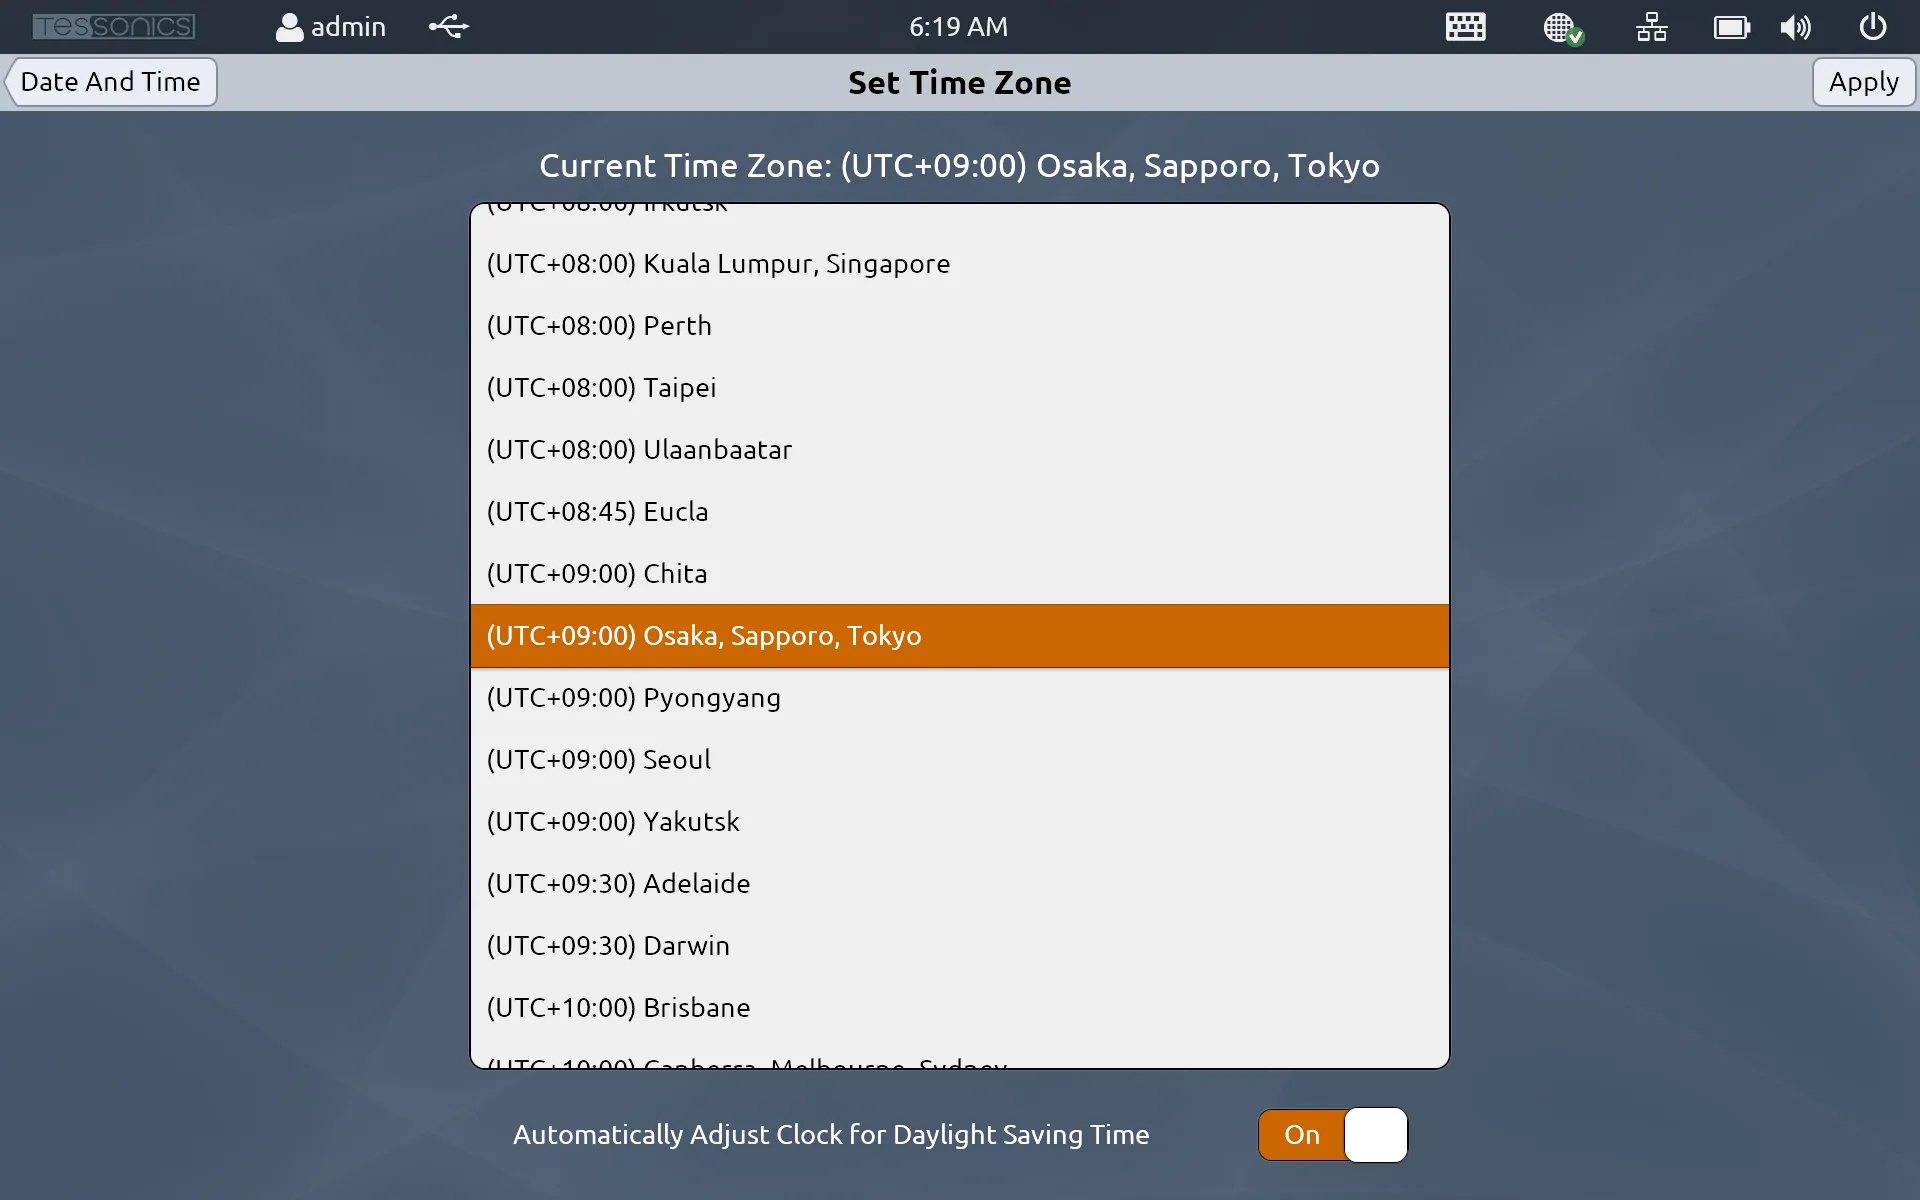
Set Timezone
- 4.6.0 and Newer
- 4.5.0 and Earlier
After following steps 1 and 2 from above, select Change time zone.... A window should appear, allowing you to select your desired timezone. Once completed, select Ok followed by Apply and Ok on the second window.
Under the Set Timezone menu, you can go through a similar process as setting the date and timezone. You also have an option to adjust to Daylight Saving Time or not. Click Apply when done to save your changes.